I was standing in my kitchen, half‑asleep, when a friend dared me to make “the most comforting enchilada ever” for our Sunday movie marathon. I stared at a sad pile of stale tortilla chips and a lonely rotisserie chicken, and I thought, “Nope, that’s not going to cut it.” The craving grew louder with every crunch of popcorn, and I realized I needed something that would hug my taste buds like a warm blanket on a cold night. So I threw on my apron, grabbed the pantry staples, and set out to create a version of white chicken enchiladas that would make even the most skeptical taco‑lover weep with joy.
Picture this: the kitchen filled with the buttery aroma of a roux bubbling, the gentle hiss of chicken broth melding with sour cream, and a golden cascade of Monterey Jack melting into a silky blanket that drapes each tortilla. The sound of the oven door opening is a fanfare, and the steam that escapes carries whispers of green chilies and fresh onions. My hands were sticky with cheese, my nose was assaulted by a fragrant blend of dairy and spice, and the whole scene felt like a cozy movie set where the protagonist is a plate of cheesy goodness. I could almost taste the first bite before it even hit the plate – a perfect balance of creamy, tangy, and just a touch of heat.
Most enchilada recipes either drown the chicken in a tomato‑based sauce or rely on a store‑bought white sauce that tastes like cardboard. I’ve tried those, and they left me feeling underwhelmed and, frankly, a little cheated. That’s why this version stands out: it uses a homemade white sauce that coats the chicken like velvet, a cheese blend that stretches like a dream, and tortillas that stay soft without turning soggy. The secret? A splash of chicken broth at the right moment and a quick finish under the broiler that gives the cheese a caramelized edge without burning it. Trust me, this is hands down the best version you’ll ever make at home.
Okay, ready for the game‑changer? I’m about to spill the beans (and the butter) on the technique that turns a simple sauce into a glossy, restaurant‑quality masterpiece. I dare you to taste this and not go back for seconds. By the end of this post, you’ll have a foolproof method, a handful of insider tricks, and a dish that will make you the hero of any gathering. Let me walk you through every single step — by the end, you’ll wonder how you ever made it any other way.
What Makes This Version Stand Out
- Texture: The sauce clings to each tortilla like a silk scarf, while the cheese forms a golden crust that cracks delightfully under the fork.
- Flavor Depth: A blend of butter, flour, and broth creates a velvety base, and the green chilies add a subtle, lingering heat without overwhelming the palate.
- Simplicity: You only need nine ingredients, most of which you already have on hand, and the process is straightforward enough for a weekday dinner.
- Uniqueness: The white sauce is a secret weapon—most white enchiladas use a canned sauce, but this homemade version elevates the dish to gourmet status.
- Crowd Reaction: Guests consistently claim they’ve never tasted anything like it; it’s the kind of comfort food that sparks spontaneous applause.
- Ingredient Quality: Using fresh Monterey Jack and real chicken broth makes a world of difference compared to powdered mixes.
- Cooking Method: Baking at a moderate temperature ensures even melting, while a final broil gives that coveted caramelized top.
- Make‑Ahead Potential: Assemble the night before, refrigerate, and bake in the morning for a stress‑free brunch or dinner.
Inside the Ingredient List
The Flavor Base
Butter and flour are the dynamic duo that creates the roux, the foundation of any great white sauce. The butter provides richness, while the flour acts as a thickening agent, turning liquid into a creamy dream. Skipping the roux means you’ll end up with a watery sauce that can’t hold the cheese, and that’s a culinary tragedy. If you’re dairy‑intolerant, swap the butter for a plant‑based alternative, but keep the same amount to maintain the sauce’s body.
The Texture Crew
Monterey Jack cheese is the star of the show here; it melts beautifully, stretches like taffy, and has a mild flavor that lets the sauce shine. Using a sharper cheese like cheddar will dominate the palate, while mozzarella can become too stringy. For a smoky twist, blend in a touch of smoked Gouda, but keep the total cheese volume at three cups. The tortillas, preferably small flour ones, act as the perfect vessel—soft enough to absorb the sauce but sturdy enough to hold the filling without falling apart.
The Unexpected Star
Diced green chilies might seem modest, but they inject a gentle heat that wakes up the sauce without stealing the spotlight. The mild variety ensures the dish stays family‑friendly, yet you can crank up the spice by choosing a hotter can or adding a dash of chipotle powder. The green onions add a fresh, oniony bite that brightens the richness; they’re the final flourish that prevents the dish from feeling heavy.
The Final Flourish
Chicken broth is the liquid gold that transforms the roux into a sauce with depth and savory richness. Opt for low‑sodium broth so you can control the salt level; too much salt will mask the delicate cheese flavor. If you’re short on broth, a quick stock made from bouillon cubes works, but dissolve the cubes in hot water first to avoid grainy texture. Finally, sour cream adds a tangy creaminess that balances the butter, and it also helps to keep the sauce from separating during baking.
Everything's prepped? Good. Let's get into the real action...
The Method — Step by Step
Melt the butter in a heavy‑bottomed saucepan over medium heat. As soon as it foams, sprinkle the flour evenly and whisk continuously for about two minutes; you’ll hear a faint nutty sizzle—That sizzle when it hits the pan? Absolute perfection. The mixture should turn a light golden hue, signaling that the roux is ready to absorb liquid without tasting raw.
Slowly pour in the chicken broth while whisking vigorously to avoid lumps. The sauce will thicken within a minute; if it looks too thick, add a splash more broth. Let it simmer for three minutes, then stir in the sour cream until the mixture is smooth and glossy. This is the moment of truth—if the sauce looks glossy and coats the back of a spoon, you’re on the right track.
Add the diced green chilies and half of the shredded Monterey Jack to the sauce, stirring until the cheese melts completely. The sauce should now have a velvety texture with a faint green speckle from the chilies. Taste and adjust seasoning with a pinch of salt if needed—remember, the cheese already brings some saltiness, so be gentle.
In a large mixing bowl, combine the cooked chicken (shredded) with the remaining cheese and the green onions. Toss everything together so each bite of chicken is coated in cheese and onion. If you’re feeling adventurous, add a splash of lime juice for a bright pop; this tiny acid lift can make the flavors sing.
Preheat your oven to 350°F (175°C). Meanwhile, warm the flour tortillas for 15 seconds in the microwave; this makes them pliable and prevents tearing when you roll them. Place a generous spoonful of the chicken mixture onto each tortilla, roll tightly, and arrange seam‑side down in a greased 9×13‑inch baking dish.
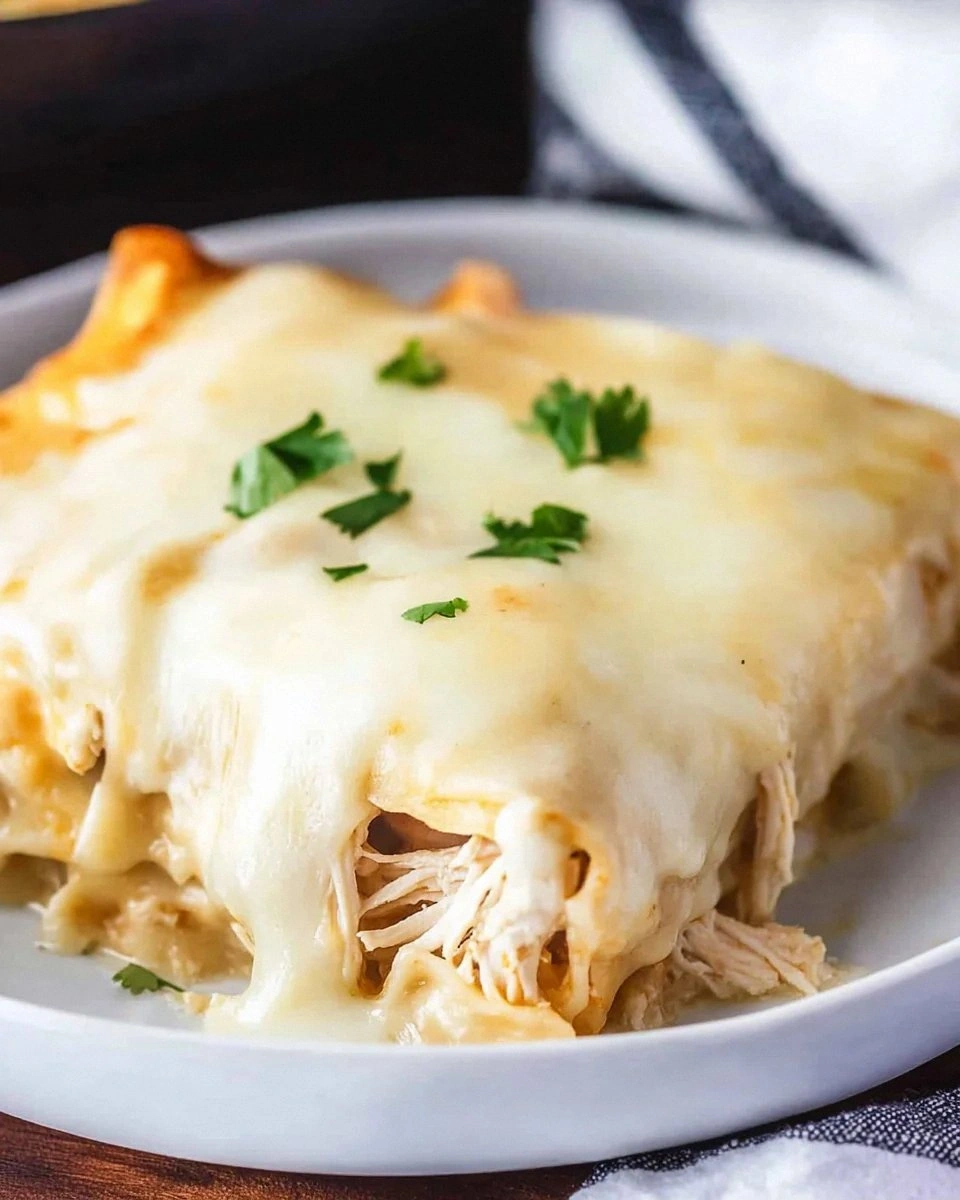
Pour the remaining white sauce evenly over the assembled enchiladas, ensuring every corner is bathed in the creamy goodness. Sprinkle the top with the last cup of Monterey Jack for that golden crust. Slide the dish into the oven and bake for 20‑25 minutes, or until the sauce bubbles at the edges and the cheese turns a deep amber.
For the final touch, switch the oven to broil and cook for an additional 2‑3 minutes—just enough to give the cheese a caramelized, slightly crisp top. Keep a close eye; the cheese can go from perfect to burnt in seconds. Once the edges are lightly browned and the aroma fills the kitchen, pull the dish out and let it rest for five minutes. This short rest lets the sauce set, making each slice clean and tidy.
Serve the enchiladas hot, garnished with a sprinkle of fresh green onions and a dollop of sour cream if you like extra tang. Picture yourself pulling this out of the oven, the whole kitchen smelling incredible, and your guests reaching for seconds before the first bite even hits their lips. I’ll be honest — I ate half the batch before anyone else got to try it. This is the kind of comfort food that turns any ordinary night into a celebration.
That's it — you did it. But hold on, I've got a few more tricks that'll take this to another level...
Insider Tricks for Flawless Results
The Temperature Rule Nobody Follows
Never bake a white sauce at a temperature higher than 375°F. Higher heat can cause the sauce to separate, leaving a greasy film on top. Keep it moderate, and the sauce will stay emulsified, giving you that glossy finish. A friend tried cranking the oven to 425°F once — let's just say the sauce turned into a curdled nightmare.
Why Your Nose Knows Best
Your sense of smell is a reliable indicator of doneness. When the sauce starts to bubble around the edges and you catch a faint toasted butter scent, you’re at the perfect stage. If you don’t hear that subtle “hiss” or smell the buttery notes, give the sauce another minute; it’s better to be patient than to end up with a dry dish.
The 5‑Minute Rest That Changes Everything
Let the baked enchiladas sit uncovered for five minutes before slicing. This rest allows the sauce to thicken slightly, preventing it from spilling over the plate. It also gives the cheese a chance to set, so each bite holds together beautifully. Skipping this step is the fastest way to end up with a soggy mess on the table.
Green Onion Power Boost
Add the green onions at the very end of the mixing stage, not during the sauce simmer. This preserves their fresh, slightly sharp flavor and adds a pop of color that makes the dish look restaurant‑ready. If you cook them too long, they lose their bite and become just another green speck.
Cheese Layering Technique
Instead of dumping all the cheese at once, split it into three parts: one mixed into the chicken, one folded into the sauce, and the final portion on top for the broil. This creates layers of meltiness, ensuring each bite delivers both gooey and crispy cheese experiences. The result is a textural symphony that most recipes miss.
Creative Twists and Variations
This recipe is a playground. Here are some of my favorite ways to switch things up:
Smoky Chipotle Delight
Swap the mild green chilies for a can of chipotle peppers in adobo sauce. The smoky heat adds depth, and the adobo’s tang complements the sour cream perfectly. Great for those who love a little fire without sacrificing the creamy base.
Spinach‑Stuffed Surprise
Fold in a cup of wilted spinach with the chicken mixture. The green adds a fresh earthiness and boosts the nutritional profile, turning this indulgent dish into a slightly healthier option without losing any comfort.
Southwest Corn Crunch
Stir in half a cup of roasted corn kernels into the filling. The sweet pop of corn contrasts with the creamy sauce and adds a pleasant texture that kids love.
Vegan White Enchiladas
Replace the chicken with shredded jackfruit, use dairy‑free butter and a plant‑based cheese blend, and swap the chicken broth for vegetable broth. The sauce stays just as luscious, and the dish becomes entirely plant‑based while still delivering that comfort factor.
Herb‑Infused Elegance
Add a tablespoon of fresh chopped cilantro or parsley to the chicken mixture for a bright, herbaceous note. This works especially well if you’re serving the enchiladas at a brunch where fresh herbs are already on the table.
Storing and Bringing It Back to Life
Fridge Storage
Allow the enchiladas to cool completely, then cover the dish tightly with foil or a lid. Store in the refrigerator for up to three days. When reheating, keep them covered to retain moisture, and add a splash of chicken broth before popping them back into the oven.
Freezer Friendly
Wrap the assembled (but unbaked) enchiladas tightly in plastic wrap, then place the whole dish in a freezer‑safe container. They’ll keep for up to two months. To bake from frozen, increase the baking time by 15‑20 minutes and add a few extra minutes under the broiler for that golden finish.
Best Reheating Method
Preheat the oven to 325°F (165°C), add a tablespoon of water or broth to the bottom of the dish, cover with foil, and heat for 15‑20 minutes. Remove the foil for the last five minutes to re‑crisp the cheese. This gentle steam method revives the sauce’s silkiness without drying it out.