Picture this: I’m in a cramped kitchen, the fridge is a black hole of leftover pizza, and a friend challenges me to whip up something that screams “campfire” without a single flame. I stared at the stack of graham crackers, a can of condensed milk, and a bag of marshmallows that had been sitting in the pantry for weeks. The idea of a no‑bake s’more bar seemed too easy, but I was determined to turn it into a showstopper that would have people begging for seconds. I dared myself to create a version that would make even the most skeptical taste buds dance.
The moment I cracked the first marshmallow, the sweet, gooey scent hit me like a warm hug. The sound of the chocolate chips clinking against the tin was oddly comforting, almost like a lullaby for the culinary soul. I could already taste the crunch of the graham crumbs mingling with the silky melted chocolate, each bite a perfect balance between sweet and salty. The texture, I imagined, would be a symphony: a crisp exterior, a molten center that oozes with every forkful. I could feel the anticipation building, like a kid waiting for the campfire to ignite.
What makes this recipe stand out? It’s not just the ingredients; it’s the method that turns a simple no‑bake bar into an edible masterpiece. I’ve fine‑tuned the ratio of marshmallows to chocolate to ensure that each bite is a melt‑in‑your‑mouth experience, not a sticky mess. The addition of whole wheat flour gives a subtle nuttiness that elevates the flavor profile, while the flaky sea salt provides a crisp contrast that lingers on the palate. Most recipes get this completely wrong, but here’s what actually works: a gentle heat that melts everything together without scorching. This version is hands down the best you’ll ever make at home, and I dare you to taste it and not go back for seconds.
Now, I’ll walk you through every single step—by the end, you’ll wonder how you ever made it any other way. Get ready to turn your kitchen into a campfire wonderland, no matches required. Let’s dive in.
What Makes This Version Stand Out
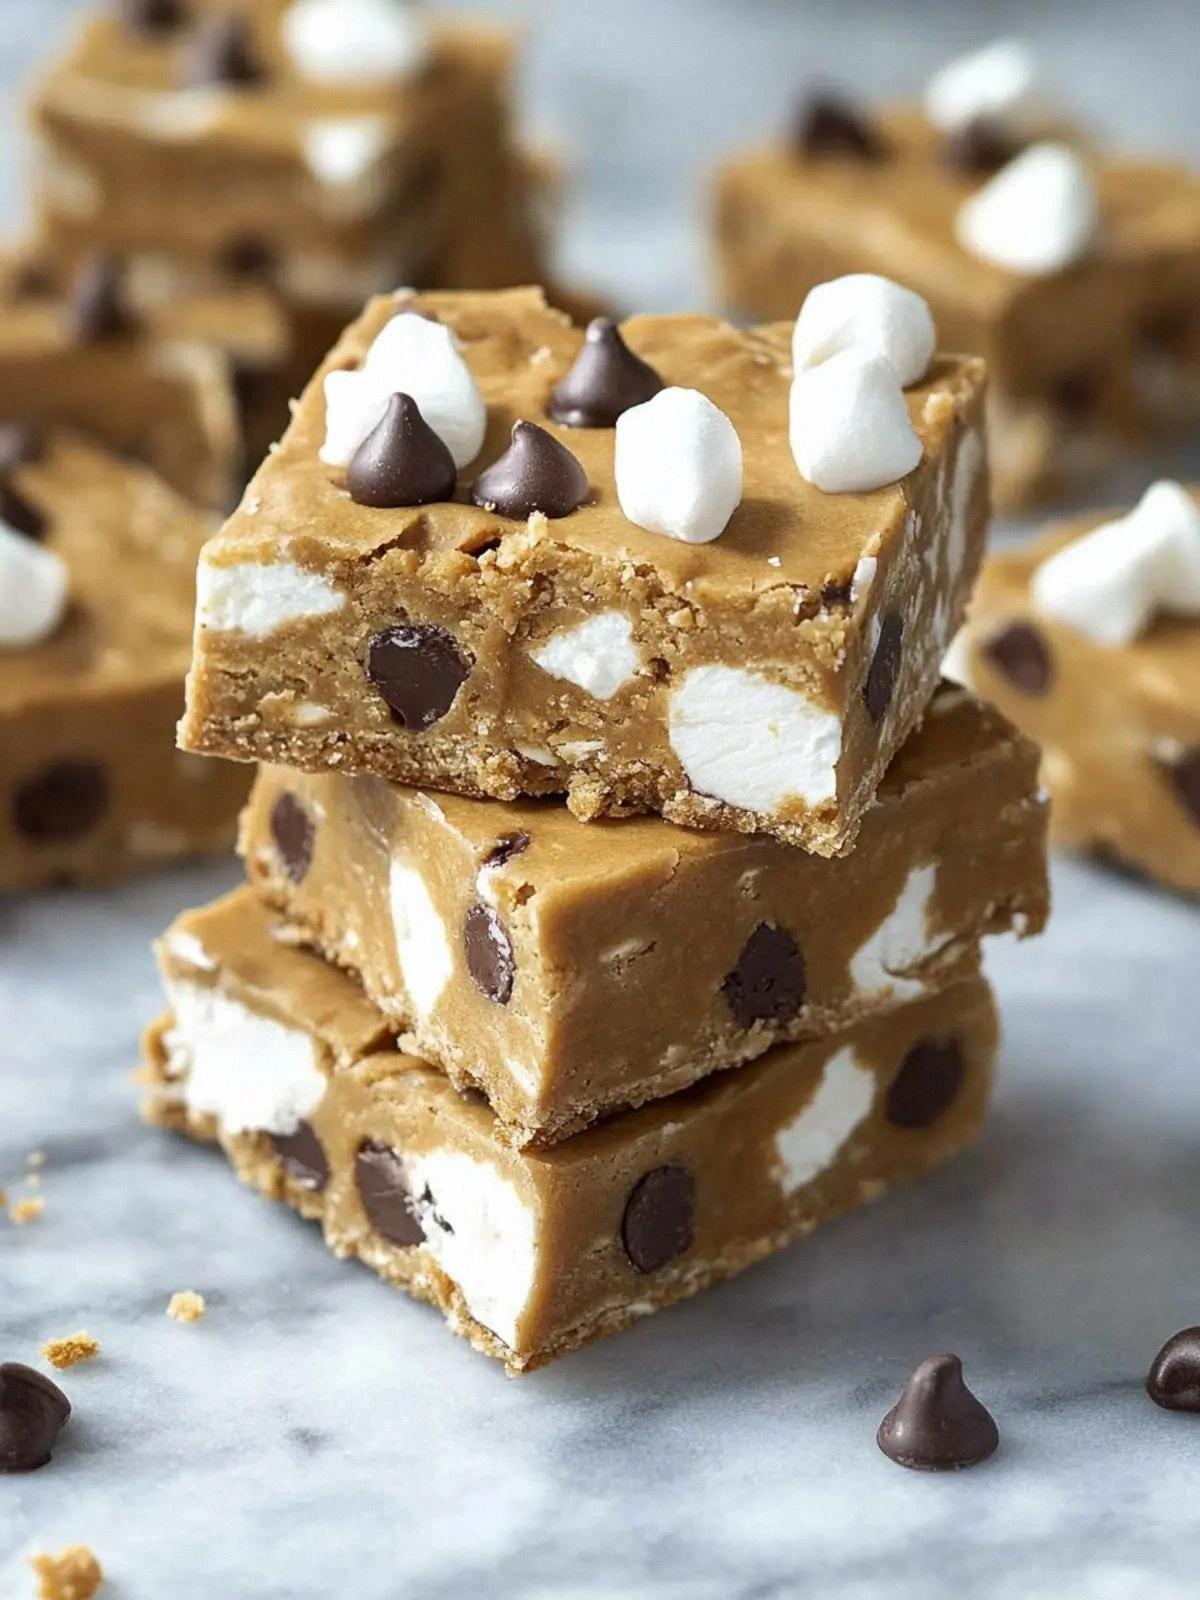
- Taste: The marriage of sweet marshmallows, rich chocolate, and a hint of sea salt creates a flavor profile that feels like a campfire in a bite. The salty undertone cuts through the sweetness, preventing the bars from feeling cloying.
- Texture: The crunch of graham cracker crumbs contrasts with the silky, molten center, giving each bite a satisfying bite‑and‑swoon moment. The bars hold their shape, so they’re easy to serve and share.
- Simplicity: No stove, no oven, just a handful of pantry staples and a heat‑proof bowl. This recipe is a lifesaver for those who want a dessert that feels indulgent but requires minimal effort.
- Uniqueness: The use of whole wheat flour adds a subtle earthy note, while the additional marshmallows create a gooey crown that’s impossible to resist. The result is a bar that looks and tastes like it was made over an open fire.
- Crowd Reaction: Friends and family have called it “the best version of a s’more I’ve ever had,” and it’s become a staple at parties. The bars are perfect for sharing, and the presentation alone is a conversation starter.
- Ingredient Quality: Each component is chosen for its flavor contribution: high‑quality chocolate chips for depth, fresh marshmallows for goo, and premium graham crumbs for crunch.
- Cooking Method: The gentle heat method keeps the marshmallows from burning while ensuring the chocolate melts evenly. The process is forgiving and works even if you’re a beginner.
- Make‑Ahead Potential: These bars set in the fridge for a few hours and can be stored for up to a week, making them the perfect make‑ahead dessert for gatherings.
Alright, let’s break down exactly what goes into this masterpiece…
Inside the Ingredient List
The Flavor Base
Graham Cracker Crumbs form the foundation of the bars, offering a buttery, slightly sweet base that balances the richness of the chocolate and marshmallows. They also provide structure, preventing the bars from becoming too soft or gummy. If you can’t find graham crackers, try crushed digestive biscuits for a slightly different flavor profile. When selecting graham crackers, look for ones that are lightly sweetened; a darker, more toasted flavor will deepen the overall taste.
The Texture Crew
Whole Wheat Flour adds a subtle nuttiness and helps bind the mixture together, giving the bars a firmer bite. It also absorbs some of the liquid from the condensed milk, preventing the bars from becoming overly sticky. For a gluten‑free version, swap in an equal amount of almond flour or oat flour, but keep in mind the texture will change slightly. The flour’s fine texture is key to achieving a smooth, cohesive crumb structure.
The Unexpected Star
Sweetened Condensed Milk is the secret weapon that brings everything together. Its thick, caramelized sweetness pairs perfectly with the marshmallows and chocolate, creating a velvety mouthfeel that’s hard to resist. If you’re watching calories, use a light version or a homemade alternative made from skim milk and a touch of honey. The condensed milk’s high sugar content also helps the bars set quickly when chilled.
The Final Flourish
The additional marshmallows create a gooey, crown‑like topping that adds an extra layer of indulgence. They melt into the chocolate, forming a glossy, caramelized glaze that’s irresistible to the touch. If you prefer a lighter version, reduce the amount of additional marshmallows by half; the bars will still hold together but with a slightly less gooey texture. For an extra twist, sprinkle a pinch of cocoa powder on top before chilling for a hint of bitterness.
Everything's prepped? Good. Let's get into the real action…
The Method — Step by Step
- Start by crushing the graham crackers in a food processor or by placing them in a zip‑lock bag and pounding them with a rolling pin until fine crumbs form. The goal is a texture that’s almost powdery but still slightly chunky for that satisfying bite. Keep a small portion aside for topping if you like a crunchy crown. This step sets the stage for the rest of the recipe and ensures the crumbs are evenly distributed.
- In a large mixing bowl, combine the graham cracker crumbs, whole wheat flour, and flaky sea salt. Stir until the ingredients are well blended, creating a uniform base that will hold the sweet mixture together. The salt will act as a flavor enhancer, cutting through the sweetness of the marshmallows and condensed milk.
- Gently heat the sweetened condensed milk in a saucepan over low heat, stirring constantly, until it reaches a smooth, syrupy consistency. This step is crucial; overheating can cause the milk to caramelize and impart a bitter note. The goal is a glossy, amber liquid that will bind the dry ingredients.
- Add the melted chocolate chips to the warm condensed milk, stirring until the mixture is glossy and the chocolate is fully incorporated. The chocolate will thicken slightly as it cools, so keep an eye on it to avoid over‑cooking. Once combined, the mixture should smell like a warm chocolate bar, indicating it’s ready for the next step.
- Fold in the gooey marshmallows, breaking them into smaller pieces with a spoon or spatula. The marshmallows will melt into the chocolate‑milk mixture, creating a luscious, gooey center. This is where the magic happens; the marshmallows should be fully integrated, not floating on top.
- Combine the wet mixture with the dry crumbs, stirring until the mixture resembles damp sand. The consistency should be thick enough to hold its shape when pressed but still pliable enough to spread. The mixture will be warm, so use a heat‑resistant glove or towel to handle it safely.
- Press the mixture firmly into a lined baking dish, smoothing the surface with a spatula or the back of a spoon. The goal is an even, compact slab that will set into bite‑size bars. Don’t rush; the mixture will set quickly, so work efficiently.
- Cover the dish with plastic wrap and refrigerate for at least 2 hours, or until the bars are firm. The chilling process allows the flavors to meld and the texture to set perfectly. Once chilled, cut into bars or squares, and serve immediately or store in an airtight container.
That’s it — you did it. But hold on, I've got a few more tricks that'll take this to another level…
Insider Tricks for Flawless Results
The Temperature Rule Nobody Follows
Keep the chocolate‑milk mixture at a gentle 110°F (43°C) before combining with the marshmallows. This temperature ensures the marshmallows melt without scorching, preserving the silky texture. A thermometer is handy; if you don’t have one, test a small drop on your wrist – it should feel warm, not hot.
Why Your Nose Knows Best
Smell the mixture as it cools; a faint caramel aroma indicates the condensed milk has reached the right consistency. If it smells too sweet or overly syrupy, give it a minute longer to thicken. Your nose will guide you to the perfect balance, ensuring the bars are neither too sticky nor too dry.
The 5‑Minute Rest That Changes Everything
After pressing the bars into the dish, let them rest at room temperature for 5 minutes before refrigerating. This short rest allows the mixture to set slightly, making it easier to cut cleanly once chilled. It also lets the flavors meld, giving the bars a richer taste profile.
The Secret of the Extra Marshmallow Layer
Top each bar with a thin layer of melted marshmallow before chilling. This creates a glossy, caramelized finish that’s visually stunning and adds a second layer of goo. The top layer will also prevent the bars from drying out in the fridge.
The Final Chill
Chill the bars for at least 3 hours, not just 2. The extra time ensures the chocolate fully sets and the bars hold their shape. If you’re short on time, a quick 30‑minute chill still works, but the texture will be slightly softer.
Creative Twists and Variations
This recipe is a playground. Here are some of my favorite ways to switch things up:
Nutty Crunch
Add chopped almonds or walnuts to the graham crumb mixture for a nutty crunch. The nuts add a delightful contrast and a dose of healthy fats, making the bars even more satisfying.
Citrus Zest
Incorporate a teaspoon of orange zest into the chocolate‑milk mixture for a bright, citrusy note that cuts through the sweetness. The zest adds a subtle aroma reminiscent of a summer campfire.
Spiced Delight
Sprinkle a pinch of ground cinnamon or nutmeg into the dry crumbs for a warm, comforting flavor. The spices bring depth and complexity, turning the bars into a cozy dessert.
Minty Fresh
Stir in a few drops of peppermint extract into the chocolate mixture. The minty freshness pairs beautifully with the chocolate and marshmallows, creating a mint chocolate s’more experience.
Berry Burst
Fold in dried cranberries or chopped dried apricots into the graham crumb mixture for a chewy, fruity burst. The dried fruit adds a chewy texture and a hint of tartness that balances the sweet.
Chocolate‑Covered Finish
Dip the cut bars in melted dark chocolate and let them set on parchment. The chocolate coating adds a glossy finish and intensifies the chocolate flavor, making the bars irresistible.
Storing and Bringing It Back to Life
Fridge Storage
Store the bars in an airtight container in the refrigerator for up to a week. The chilled environment keeps them firm and prevents the marshmallows from melting. For a crisp edge, keep the container sealed until you’re ready to serve.
Freezer Friendly
Freeze the bars in a single layer on a parchment‑lined tray before transferring to a freezer bag. They’ll keep for up to 3 months. Thaw at room temperature for 30 minutes before serving to restore the gooey center.
Best Reheating Method
To revive a chilled bar, place it in a microwave for 10‑15 seconds, or warm it in a low‑heat oven at 300°F (150°C) for 5 minutes. Add a tiny splash of water before reheating to create steam and bring back the soft, melted texture. The bars should feel warm and slightly gooey, just like fresh s’mores.
With these storage tips, you’ll always have a batch of decadent no‑bake s’mores ready to wow your guests or satisfy your midnight cravings. Remember, the secret to greatness lies in the balance of flavors, the careful handling of marshmallows, and a dash of love.