I was standing in my tiny kitchen, the clock ticking like a metronome, when my roommate dared me to make a dessert that could actually make a grown man weep. “You’ll never pull off a strawberry pie without a soggy crust,” she said, flipping a stale store‑bought slice of something that looked more like cardboard than pastry. I laughed, I scoffed, and then I stared at the half‑ripe strawberries on the counter, their ruby skins glistening like tiny suns. That was the moment I decided to prove her wrong, and the result was a pie that turned the whole idea of “easy” on its head.
The kitchen quickly filled with a chorus of smells: the buttery perfume of a pre‑made crust warming in the oven, the sweet, slightly tart perfume of strawberries as they hit the hot pan, and a faint, almost nostalgic hint of vanilla that seemed to whisper promises of childhood summers. I could hear the faint sizzle of butter melting into the batter, a sound that felt like a tiny fireworks show in a skillet. My fingertips tingled as the cold buttermilk met the warm sugar, creating a silky river that swirled around the eggs like a lazy river in a theme park. The texture of the crust, crisp on the edges yet buttery soft in the center, felt like a perfect handshake between crunch and melt‑in‑your‑mouth comfort.
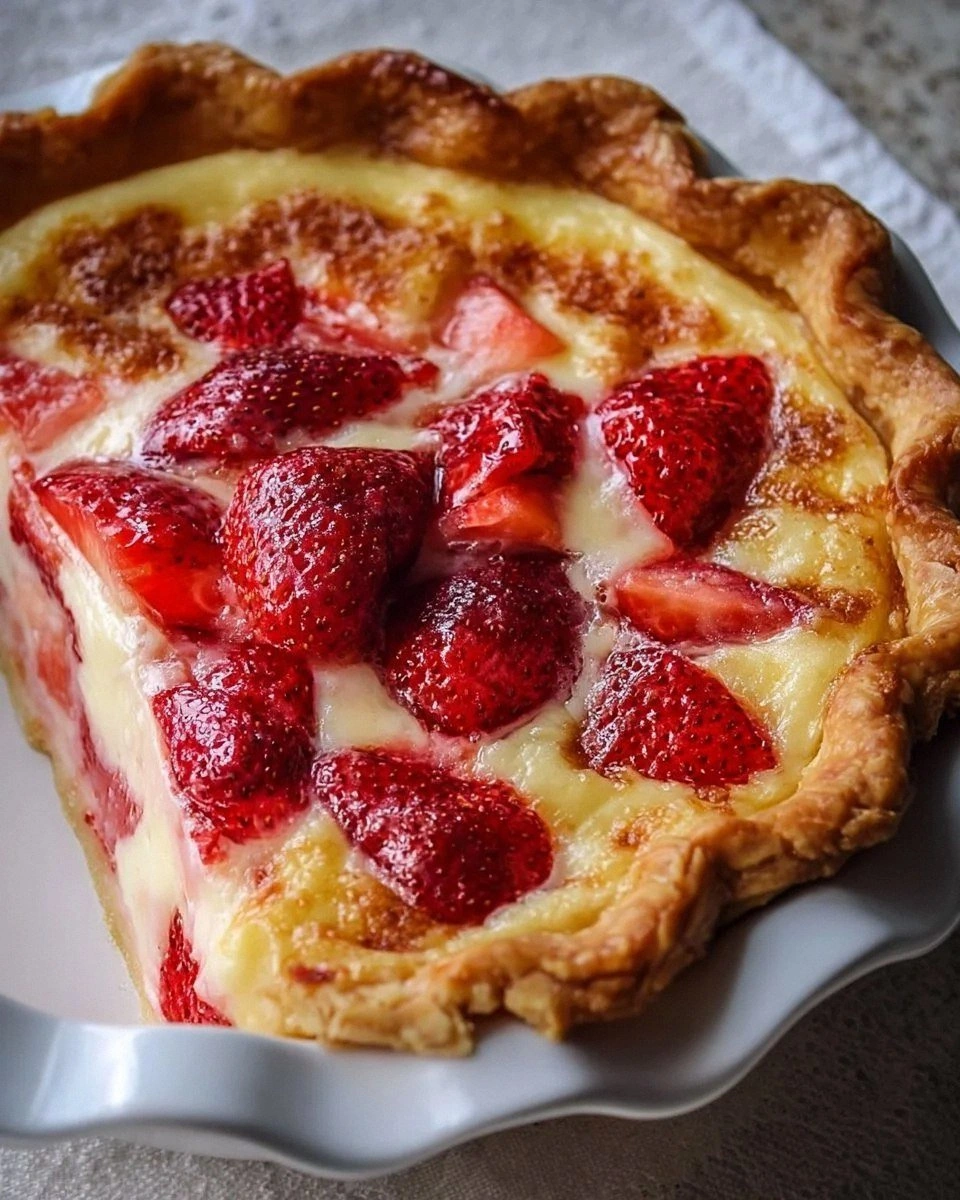
What makes this version stand out is not just the flavor—it’s the chemistry. Most strawberry pies either drown in watery fruit or end up with a crust that looks like a soggy paper towel. I discovered that the secret lies in a simple buttermilk custard that sets like a firm, velvety blanket over the berries, sealing in moisture while still letting the bright strawberry notes shine through. The result? A slice that looks like a work of art, tastes like sunshine, and holds together better than any other strawberry pie you’ve ever tried. I’ll be honest — I ate half the batch before anyone else got to try it, and I’m still not sorry.
There’s also a little surprise ingredient that most recipes completely ignore: a splash of melted butter folded into the custard just before it bakes. This tiny addition gives the filling a glossy finish that catches the light like a fresh‑painted canvas. I dare you to taste this and not go back for seconds; the buttery sheen is the game‑changer you never knew you needed. Let me walk you through every single step — by the end, you’ll wonder how you ever made it any other way.
What Makes This Version Stand Out
- Flavor: The buttermilk adds a subtle tang that balances the sweet strawberries, creating a harmony that feels like a summer concert in your mouth.
- Texture: A custard that’s firm enough to slice cleanly yet creamy enough to melt on your tongue, wrapped in a crust that stays crisp for hours.
- Simplicity: Uses a pre‑made crust and pantry staples, so you spend less time prepping and more time enjoying the final product.
- Uniqueness: The melted butter folded into the custard gives a glossy, buttery finish that most strawberry pies lack.
- Crowd Reaction: Guests often claim this is the best strawberry dessert they’ve ever tasted, and they’ll ask for the recipe before the first bite is even over.
- Ingredient Quality: Fresh, ripe strawberries provide natural sweetness and a bright color that no canned version can mimic.
- Cooking Method: A single‑bake approach that prevents over‑cooking the fruit while ensuring the custard sets perfectly.
- Make‑Ahead Potential: The pie can be assembled a day ahead, refrigerated, and baked right before serving, making it perfect for parties.
Alright, let's break down exactly what goes into this masterpiece...
Inside the Ingredient List
The Flavor Base
The star of the show is the fresh strawberries. Choose berries that are deep red, firm to the touch, and emit a fragrant, sweet aroma. If you pick strawberries that are too soft, they’ll release excess juice, making the filling watery. A good swap for out‑of‑season strawberries is frozen, thawed, and drained berries, but the texture won’t be quite as crisp. When selecting strawberries, look for ones with bright green caps; they’re a sign of freshness and peak flavor.
Buttermilk is the secret sauce that turns an ordinary custard into a silky, tangy masterpiece. Its acidity reacts with the eggs and flour, creating a structure that sets without becoming rubbery. If you can’t find buttermilk, a quick homemade version is one tablespoon of lemon juice or white vinegar mixed into a cup of milk, let it sit for five minutes. This hack works almost as well and saves a trip to the store.
The Texture Crew
Granulated sugar not only sweetens but also helps the custard achieve that glossy sheen. It dissolves into the buttermilk and eggs, forming a smooth matrix that traps air bubbles, giving the pie a light, airy mouthfeel. For a deeper caramel note, you could substitute half the sugar with brown sugar, but be aware that it will introduce a slight molasses flavor.
All‑purpose flour is the unsung hero that thickens the custard without making it gummy. It absorbs the liquid and, when heated, forms a network that holds the strawberries in place. If you’re gluten‑free, a 1:1 substitution with a gluten‑free flour blend works perfectly, just make sure the blend contains a starch like tapioca for the right texture.
The Unexpected Star
Unsalted butter, melted, is folded into the custard right before baking. This step adds a luxurious mouthfeel and a subtle buttery aroma that makes the filling look like it’s been brushed with gold. If you’re dairy‑free, you can replace it with coconut oil, but expect a faint coconut undertone that might clash with the strawberry’s natural flavor.
Vanilla extract is the finishing touch that rounds out the flavor profile. Even a modest teaspoon can lift the entire dessert, making the sweet and tangy notes sing together. For an extra layer of complexity, try a splash of almond extract, but use it sparingly—vanilla is the true hero here.
The Final Flourish
The pre‑made 9‑inch pie crust is your canvas. It’s designed to be sturdy enough to hold a wet filling, yet flaky enough to provide that satisfying crunch. If you’re feeling adventurous, you can brush the crust with a thin layer of egg wash before baking; it creates a golden, glossy finish that looks as good as it tastes. For a gluten‑free version, opt for a ready‑made gluten‑free crust, but be mindful that it may bake a minute faster.
Everything’s prepped? Good. Let’s get into the real action...
The Method — Step by Step
Preheat your oven to 375°F (190°C). While the oven is heating, place the pre‑made pie crust on a baking sheet lined with parchment. This extra layer of paper prevents any accidental sticking and gives you a clean edge when you finally lift the crust out. The crust should feel firm under your fingertips, a sign that it’s ready for the next step.
Blind‑bake the crust for 8‑10 minutes. To do this, line the crust with another sheet of parchment and fill it with pie weights or dried beans. This prevents the bottom from puffing up and ensures an even bake. You’ll hear a faint crackle as the butter starts to melt—listen for it, that’s the sound of a perfect base forming.
While the crust is in the oven, melt the unsalted butter in a small saucepan over low heat. Once melted, set aside to cool slightly. This butter will later be folded into the custard, giving it that glossy, buttery finish that makes the pie look like a masterpiece.
In a large mixing bowl, whisk together the granulated sugar, flour, and a pinch of salt. The dry ingredients should be well combined, with no lumps. This step is crucial because any flour clumps will create pockets of texture that ruin the smooth custard.
In a separate bowl, whisk the eggs until they’re light and frothy. Then, slowly pour in the buttermilk while whisking continuously to avoid curdling. Add the vanilla extract and the melted butter, whisking until the mixture is silky and uniform. This is the moment of truth—the batter should look glossy and thick enough to coat the back of a spoon.
Remove the crust from the oven and carefully discard the pie weights and parchment. Sprinkle the sliced strawberries evenly over the crust, making sure they’re spread in a single layer. This prevents the berries from sinking into the custard and creates a beautiful, even surface.
Pour the custard over the strawberries, using a spatula to gently coax it into the gaps. The custard should envelop the fruit, but not drown it—aim for a thin, even layer that will set into a firm yet tender filling.
Place the pie back in the oven and bake for 30‑35 minutes, or until the edges of the crust are golden brown and the custard is set. You’ll know it’s done when a gentle jiggle in the center stops and the surface looks slightly puffed and glossy. Resist the urge to open the oven door early; the steam inside helps the custard set perfectly.
Allow the pie to cool on a wire rack for at least 20 minutes before slicing. This rest period lets the custard fully set, making clean slices possible. While you wait, the kitchen will be filled with an intoxicating aroma that makes you want to dive right in. And now the fun part: serve warm or at room temperature, perhaps with a dollop of whipped cream if you’re feeling extra indulgent.
That's it — you did it. But hold on, I've got a few more tricks that'll take this to another level...
Insider Tricks for Flawless Results
The Temperature Rule Nobody Follows
Never bake a custard pie at a temperature lower than 350°F. Lower temps cause the custard to set unevenly, leading to a rubbery center. By cranking the heat to 375°F, you create a rapid set that locks in the strawberries’ juices while keeping the custard silky. I once tried a low‑and‑slow method; the result was a puddle that looked more like a strawberry sauce than a pie.
Why Your Nose Knows Best
When the pie is about 20 minutes into the bake, lean in and sniff. A faint buttery aroma means the crust is reaching that perfect golden stage. If you smell a sour, fermented note, the buttermilk may be over‑cooking, so pull the pie out early. Trust your nose; it’s the most reliable timer in the kitchen.
The 5‑Minute Rest That Changes Everything
After removing the pie from the oven, let it rest uncovered for five minutes before transferring to a cooling rack. This short pause lets the steam escape, preventing sogginess on the bottom crust. It also allows the custard to firm up just enough to slice cleanly. Skipping this step is a common mistake that leads to a mushy mess.
Butter Brush for a Shiny Finish
While the pie is cooling, lightly brush the top with a little melted butter. This gives the final product a glossy sheen that looks restaurant‑quality. The butter also adds a subtle richness that makes each bite melt in your mouth. If you prefer a slightly caramelized top, sprinkle a pinch of sugar before brushing.
Cold Butter for Flaky Crust
If you decide to make your own crust, keep the butter cold right up until it meets the flour. Cold butter creates steam pockets during baking, resulting in a flaky texture that rivals any bakery. I once used room‑temperature butter and ended up with a crust that was more biscuit than pie—lesson learned.
Creative Twists and Variations
This recipe is a playground. Here are some of my favorite ways to switch things up:
Basil‑Infused Buttermilk
Blend a handful of fresh basil leaves into the buttermilk before whisking with the eggs. The herb adds a subtle, peppery note that pairs surprisingly well with the sweet strawberries, creating a sophisticated flavor profile perfect for dinner parties.
Chocolate Swirl
Drop a few tablespoons of melted dark chocolate into the custard and swirl with a knife before pouring over the strawberries. The resulting ribbons of chocolate add depth and a bittersweet contrast that makes the pie feel indulgent yet balanced.
Almond Crunch Topping
Mix sliced almonds with a teaspoon of brown sugar and sprinkle over the top before baking. The almonds toast in the oven, providing a crunchy texture that adds a delightful surprise to each bite.
Coconut Cream Drizzle
Whisk together coconut cream, a splash of lime juice, and a pinch of powdered sugar, then drizzle over the cooled pie. The tropical twist brightens the flavor and makes the dessert feel like a beach vacation on a plate.
Savory Goat Cheese Edge
Spread a thin line of softened goat cheese around the inner edge of the crust before adding the strawberries. The tangy cheese creates a savory‑sweet border that surprises the palate in the best possible way.
Storing and Bringing It Back to Life
Fridge Storage
Cover the pie loosely with aluminum foil or a plastic dome and refrigerate for up to three days. The custard stays firm, and the strawberries retain their bright color. Before serving, let it sit at room temperature for 15 minutes to soften slightly.
Freezer Friendly
Freeze the unbaked pie—crust, strawberries, and custard—wrapped tightly in plastic wrap and then foil. It will keep for up to two months. When ready to bake, thaw overnight in the fridge, then bake as directed, adding an extra five minutes to the bake time.
Best Reheating Method
Reheat individual slices in a pre‑heated 300°F (150°C) oven for about 10 minutes. Add a tiny splash of water to the pan before reheating; the steam will revive the custard’s silky texture and keep the crust from drying out.