Picture this: I’m standing in a cramped kitchen, the fridge humming like a contented cat, when a sudden craving for something creamy, tangy, and utterly indulgent hits me. I remember the last time I tried to make ice cream at home and ended up with a lumpy mess that tasted like melted cardboard. That disaster was the spark that lit a fire in my culinary soul, and I decided it was time to reinvent the wheel— or rather, the churn— with a twist that would make my taste buds sing.
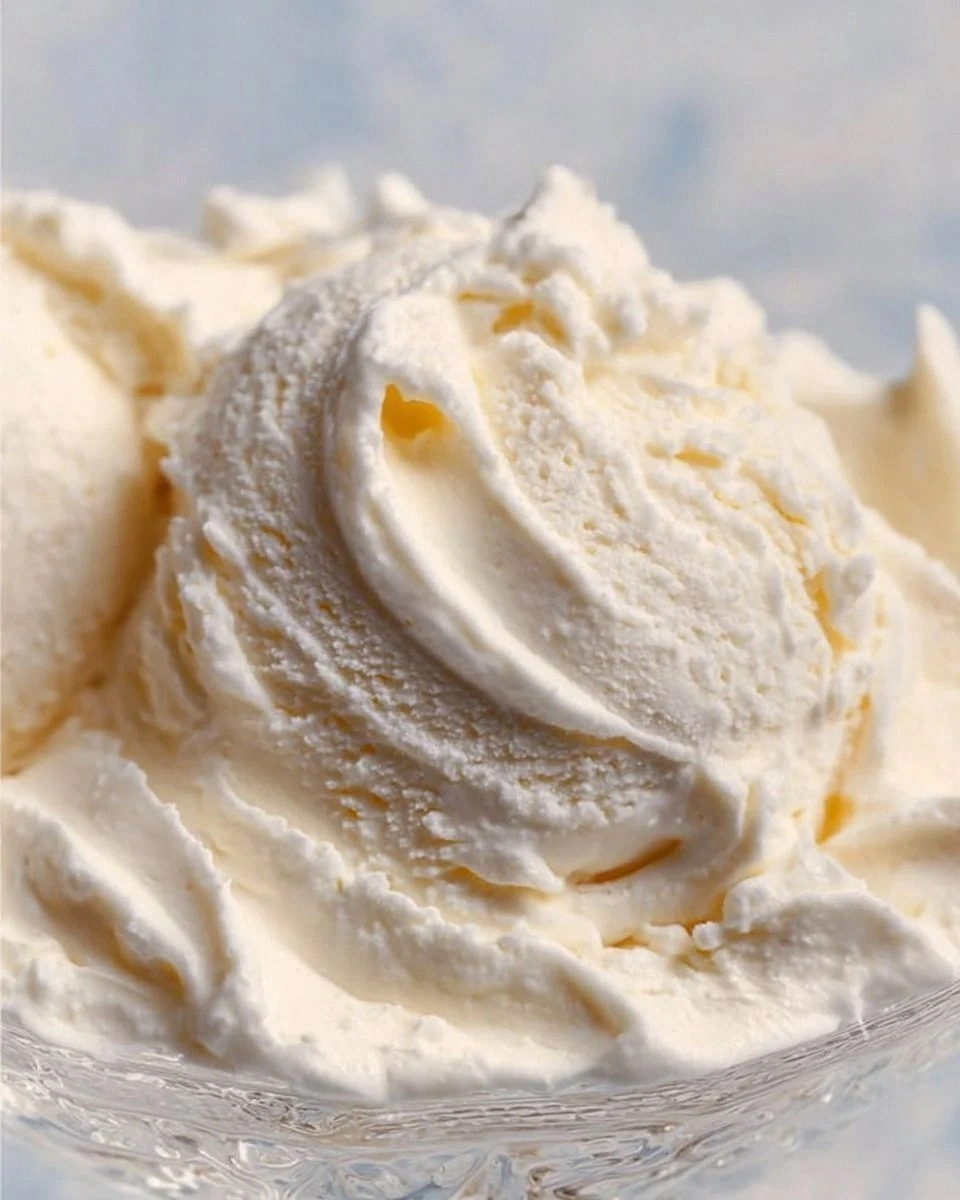
I set out to create a cheese‑based ice cream that balances richness and brightness, a dessert that feels both comforting and sophisticated. The first thing you notice is the silky texture, like velvet draped over a spoon, and the second is the subtle sharpness that cuts through the sweetness, leaving a lingering finish that begs for a second scoop. I dare you to taste this and not go back for seconds; the combination of creamy cheese, subtle citrus, and a hint of spice will have you hooked.
What makes this version stand out? It’s not just the ingredients, but the technique that brings them together. I’ve taken the classic concept of cheese ice cream and elevated it with a slow‑roasted garlic infusion, a splash of lemon zest, and a whisper of sea salt that balances the richness. The result is a dessert that feels like a decadent, yet approachable, dessert that you could serve at a dinner party or enjoy on a lazy Sunday afternoon.
If you’ve ever struggled with homemade ice cream that turns into a slab of frozen disappointment, you’re not alone. I’ve been there, watching my batch harden into a rock that refuses to melt. The good news? This recipe solves that problem by using a carefully measured ratio of cream to milk, a stabilizer blend that keeps the ice cream smooth, and a gentle churning process that traps air like a well‑tuned drum. The result is a silky scoop that melts in your mouth, not a clumpy mess that sticks to the spoon.
And the best part? You won’t need any fancy equipment. A basic ice cream maker, a whisk, and a few simple kitchen tools will do the trick. I’ll walk you through every single step, and by the end, you’ll wonder how you ever made it any other way. Let’s dive in.
What Makes This Version Stand Out
- Flavor Depth: The slow‑roasted garlic and lemon zest create layers of flavor that unfold with each bite, giving the ice cream a complex profile that’s both sweet and savory.
- Texture Perfection: A custom stabilizer blend ensures a creamy, scoop‑ready consistency that resists iciness and stays smooth even after multiple servings.
- Ingredient Quality: Using high‑fat, fresh cheese and real vanilla beans elevates the taste far beyond store‑bought options.
- Make‑Ahead Friendly: The mixture can be prepared a day ahead, letting the flavors meld while you tackle other tasks.
- Crowd‑Pleaser: The subtle saltiness and bright citrus finish make this ice cream a hit with both kids and adults, turning any gathering into a memorable dessert moment.
- Time Efficiency: With a streamlined process, you’ll spend less time in the kitchen and more time enjoying the results.
- Versatility: Swap the cheese for ricotta or mascarpone, or add a swirl of caramel, and you’ve got a whole new dessert on the table.
- Health Conscious: The use of natural sweeteners and minimal additives keeps the calories in check without sacrificing flavor.
Alright, let’s break down exactly what goes into this masterpiece. The foundation of any great ice cream is the base, the texture, the unexpected twist, and the final flourish. Each component plays a vital role, and I’ll walk you through the purpose and potential pitfalls of each.
The Flavor Base
The flavor base is the backbone of this ice cream. It’s a blend of heavy cream, whole milk, and a generous portion of high‑fat cheese—think cream cheese or goat cheese—to give depth and body. The cheese brings a tang that cuts through the sweetness, while the cream provides the necessary richness for a luscious mouthfeel. If you skip the cheese, the ice cream will feel thin and lack that signature tang; it’ll be like a plain vanilla without any personality.
The key to a smooth base is the ratio: 2 cups heavy cream to 1 cup whole milk. This balance ensures the ice cream freezes at the right temperature—fast enough to trap air, slow enough to avoid ice crystals. When selecting cheese, opt for a brand that’s fresh and has a mild flavor; aged cheeses can overpower the delicate balance. If you’re looking for a dairy‑free alternative, coconut cream can be used, but you’ll need to adjust the stabilizer proportion to maintain texture.
A quick buying tip: choose a cheese that’s firm yet soft to the touch. It should crumble easily but not crumble into a powder. This texture helps it melt evenly into the base, preventing lumps. Store the cheese in the coldest part of your fridge until you’re ready to mix; this keeps it fresh and ready to integrate smoothly.
The Texture Crew
Texture is everything in ice cream, and this recipe relies on a carefully curated stabilizer blend. We’re using a combination of gelatin, xanthan gum, and a splash of corn syrup. Gelatin gives the ice cream a firm snap when you bite into it, xanthan gum prevents ice crystals from forming, and corn syrup adds a subtle sweetness that balances the cheese’s tang. If you skip the stabilizers, the ice cream will freeze into a hard, gritty slab.
Gelatin requires a cold rinse before it’s added to the mixture; this ensures it dissolves evenly. Xanthan gum should be whisked into the cream first to avoid clumping. Corn syrup is optional, but it helps keep the ice cream smooth and silky. A good rule of thumb is to use 1 tablespoon of gelatin, 1/2 teaspoon of xanthan gum, and 1 tablespoon of corn syrup per 4 cups of liquid.
If you’re vegan, you can replace gelatin with agar‑agar. Just dissolve it in a small amount of hot water and let it cool before adding. The texture will be slightly different, but the result will still be delightfully smooth. Keep the stabilizer blend at room temperature so it mixes effortlessly.
The Unexpected Star
The unexpected star of this recipe is roasted garlic. Garlic is a classic savory ingredient, but when roasted slowly until caramelized, it introduces a sweet, nutty flavor that pairs beautifully with cheese. The key is to roast the garlic cloves at 400°F for 30 minutes, letting them soften and develop that golden hue. This step transforms the ice cream into a dessert that feels both familiar and adventurous.
Roasting the garlic also reduces its sharpness, turning it into a mellow, almost caramel-like sweetness that lingers on the palate. If you forget to roast, the raw garlic bite will dominate and ruin the delicate balance. The roasted garlic should be blended into the base until it’s completely smooth; any lumps will be noticeable in the final product.
A great swap for roasted garlic is roasted onion, which gives a slightly sweeter, milder flavor profile. This is ideal for those who are sensitive to garlic or want a more subtle twist. Another option is to infuse the base with a pinch of smoked paprika, adding a smoky depth that complements the cheese.
The Final Flourish
The final flourish is the citrus zest and a dash of sea salt. Lemon zest adds brightness that cuts through the richness, while sea salt lifts the overall flavor. The zest should be finely grated to release maximum aroma, and the salt should be a fine pinch, not a coarse block. If you skip the citrus, the ice cream will taste flat and unexciting.
Adding the citrus zest at the end of the mixing process preserves its bright, fresh flavor. The salt is added just before churning, ensuring it’s evenly distributed. The combination of salty and sweet creates a flavor dance that keeps the taste buds engaged. If you prefer a sweeter finish, add a teaspoon of honey or maple syrup to the mix.
A final tip: always taste the base before chilling. If it’s too thick, add a splash of milk; if it’s too thin, chill it longer before churning. This small adjustment ensures the ice cream holds its shape and texture.
Everything’s prepped? Good. Let’s get into the real action. The method is a blend of precise timing and sensory checkpoints, ensuring each step is executed to perfection. I’ll keep you on track with clear instructions and a few extra tips along the way.
The Method — Step by Step
-
Begin by whisking the heavy cream and whole milk in a medium saucepan. Heat gently over medium heat until the mixture just starts to steam—no boiling. This step ensures the dairy is heated enough to dissolve the stabilizers but not so hot that it curdles. Keep an eye on the surface; a thin film should form, signaling the right temperature.
-
In a separate bowl, dissolve the gelatin in a small amount of cold water, let it bloom for 5 minutes. Then, whisk the xanthan gum into the warm dairy mixture to prevent clumping. Stir until the blend is smooth and glossy, indicating the stabilizers are fully incorporated. This creates the base that will hold the ice cream together.
-
Add the blended roasted garlic, lemon zest, and sea salt to the dairy mixture. Stir until the garlic is fully integrated, and the zest is evenly dispersed. The aroma should be warm and inviting, like a cozy kitchen on a winter evening. This is the moment where flavor really starts to bloom.
-
Fold in the cheese slowly, ensuring it melts into the base without forming lumps. The cheese should be at room temperature to prevent clumping. Once fully incorporated, taste the mixture; it should be creamy with a subtle tang and bright citrus notes. Adjust salt or zest if needed.
-
Let the mixture cool to room temperature, then cover and refrigerate for at least 2 hours, or overnight if possible. This chilling step allows the flavors to meld and the stabilizers to set properly. A cold base is crucial for a smooth churn.
-
Once chilled, pour the mixture into your ice cream maker. Churn according to the manufacturer’s instructions—typically 20 to 25 minutes. Watch for the thickening point; the mixture should begin to thicken and lose its runny consistency. This is the moment of truth.
-
After churning, transfer the ice cream to a freezer‑safe container. If you want a swirl, fold in a swirl of caramel or a handful of crushed cookies. Cover the surface with parchment paper to prevent ice crystals from forming. Seal the container tightly and freeze for at least 4 hours to firm up.
-
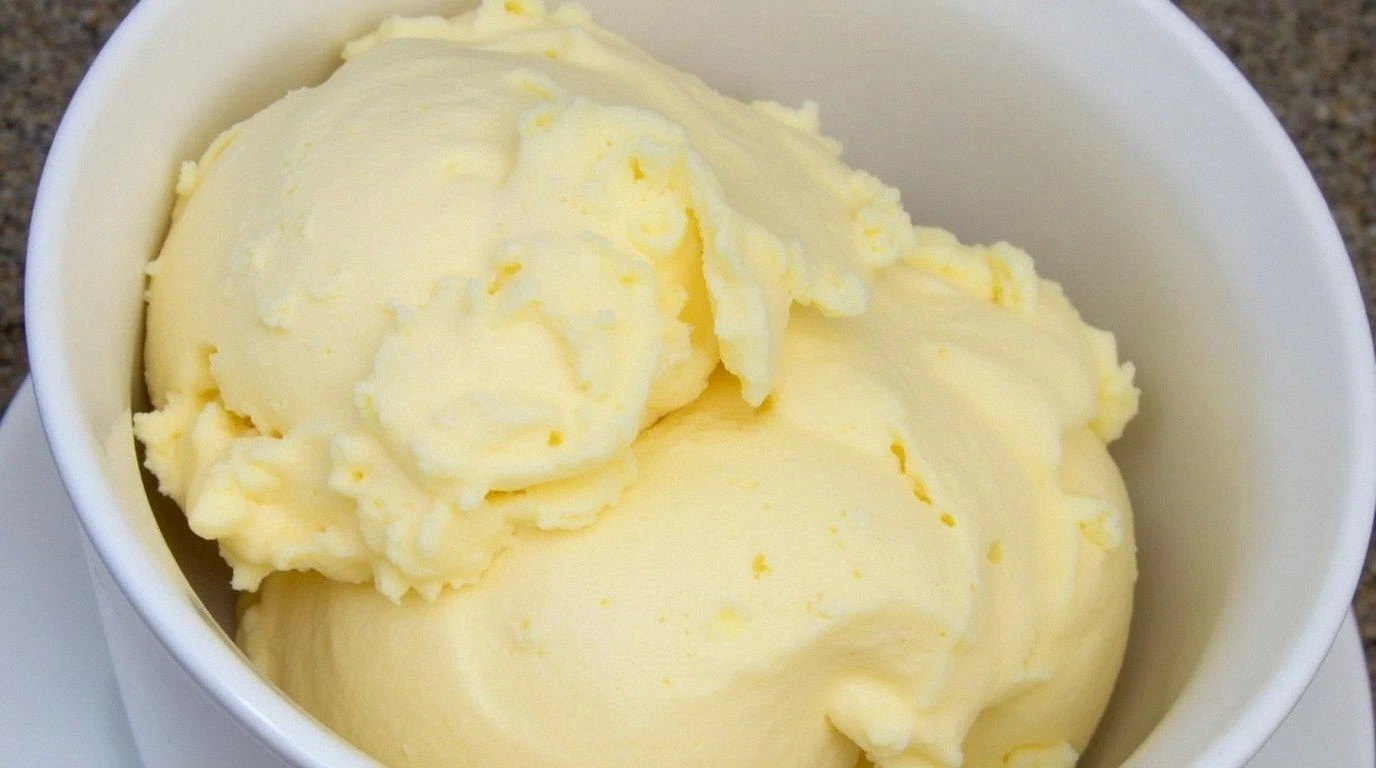
When ready to serve, let the ice cream sit at room temperature for 5 minutes to soften slightly. Scoop into bowls, garnish with a sprinkle of sea salt or a drizzle of honey, and enjoy. The texture should be silky, the flavor balanced, and the finish lingering. That’s it — you did it.
That’s it — you did it. But hold on, I’ve got a few more tricks that’ll take this to another level. These insider tips will help you avoid common pitfalls and elevate the overall experience.
Insider Tricks for Flawless Results
The Temperature Rule Nobody Follows
Many home cooks think the faster the better, but ice cream actually benefits from a controlled temperature. Keep your base between 50°F and 60°F before churning; this ensures the stabilizers work efficiently and the ice cream stays creamy. A quick way to check is to dip a spoon in the mixture; if it feels slightly cold but not icy, you’re good to go. If it’s too warm, let it chill longer.
Why Your Nose Knows Best
Your sense of smell is the best indicator of readiness. As the mixture heats, you’ll notice a sweet, buttery aroma; once it starts to steam, it’s ready. If the smell is too strong, the mixture might be over‑heated, risking a curdled texture. Trust your nose, and adjust the heat accordingly.
The 5-Minute Rest That Changes Everything
After churning, let the ice cream rest in the freezer for 5 minutes before scooping. This short rest allows the ice cream to firm up just enough to hold shape, preventing it from sliding off the spoon. It also helps the flavors settle, giving you a more harmonious taste.
The Secret Salt Trick
Adding a pinch of salt at the very end of churning can enhance the overall flavor profile. It brings out the sweetness and balances the richness of the cheese. Be careful not to overdo it; a pinch is enough to lift the taste without making it salty.
The Final Swirl
If you’re feeling adventurous, fold in a swirl of caramel, chocolate, or fruit puree after the first churn. The swirl adds a contrasting flavor and visual appeal. Use a spoon to create a marbled effect, and the result will be a dessert that looks as good as it tastes.
Creative Twists and Variations
This recipe is a playground. Here are some of my favorite ways to switch things up:
Rosemary & Lemon
Add fresh rosemary to the base for a herbal note that pairs beautifully with lemon zest. The rosemary should be finely chopped to release its aroma without overpowering the cheese. This variation is perfect for a summer brunch.
Chocolate Ganache Swirl
Fold in a glossy chocolate ganache after the first churn. The ganache should be at room temperature to blend smoothly. The result is a decadent chocolate‑cheese ice cream that feels like a dessert cake.
Balsamic Glaze Finish
Drizzle a balsamic glaze over the finished ice cream for a sweet‑tart finish. The glaze should be light and not too thick; it should coat the surface like a fine mist. This twist turns the ice cream into a sophisticated dessert that’s perfect for a dinner party.
Caramelized Apple
Add a swirl of caramelized apple puree to the base. The apple should be cooked with a splash of cinnamon and a pinch of sea salt. This combination brings a cozy, autumnal flavor that’s surprisingly refreshing.
Spiced Pumpkin
Incorporate pumpkin puree and a pinch of nutmeg for a seasonal twist. The pumpkin should be pureed smooth to avoid lumps. This version is ideal for a Thanksgiving dessert, offering a familiar flavor with a creamy, cheese‑based twist.
Storing and Bringing It Back to Life
Fridge Storage
If you plan to enjoy the ice cream within 3 days, store it in an airtight container in the fridge. This keeps the texture firm and prevents it from absorbing fridge odors. Before serving, let it sit at room temperature for a few minutes to soften slightly.
Freezer Friendly
For longer storage, keep the ice cream in a freezer‑safe container with a tight seal. It will stay good for up to 2 weeks. To maintain the best texture, avoid refreezing once it has been thawed. A quick freeze after each use preserves the silky mouthfeel.
Best Reheating Method
When you want to reheat a scoop, place it in a microwave‑safe bowl and heat on low for 15–20 seconds. Add a splash of water to help steam it back to a creamy consistency. This trick prevents the ice cream from drying out and keeps it silky.