Picture this: you’re halfway through a late‑night binge‑watch session, the fridge is a barren wasteland, and your stomach is growling louder than the TV. You’re craving something that screams comfort, but you also want to feel like a culinary wizard. I stumbled upon a recipe that turned a humble bowl of rice into a fireworks show of flavor, and the first bite was a revelation—spicy, tangy, and oddly comforting. The aroma of fermented kimchi mingles with sizzling garlic, and the heat just soothes the soul like a warm blanket. That moment when the first spoonful lands on your tongue is the kind of instant gratification that makes you want to share the secret with everyone you know.
When I first tasted this dish, I was skeptical. I’d heard countless versions of kimchi fried rice, but none had the depth of umami that this one offered. The secret? A carefully balanced blend of kimchi, gochugaru, and a dash of sesame oil that coats every grain of rice like velvet. The chicken brings a meaty richness that lifts the dish from simple to unforgettable. And the eggs, folded in at the very end, add a silky, almost custard-like texture that feels like a secret indulgence. I dare you to taste this and not go back for seconds, because once you’ve had it, the rest of the week feels like a culinary disappointment.
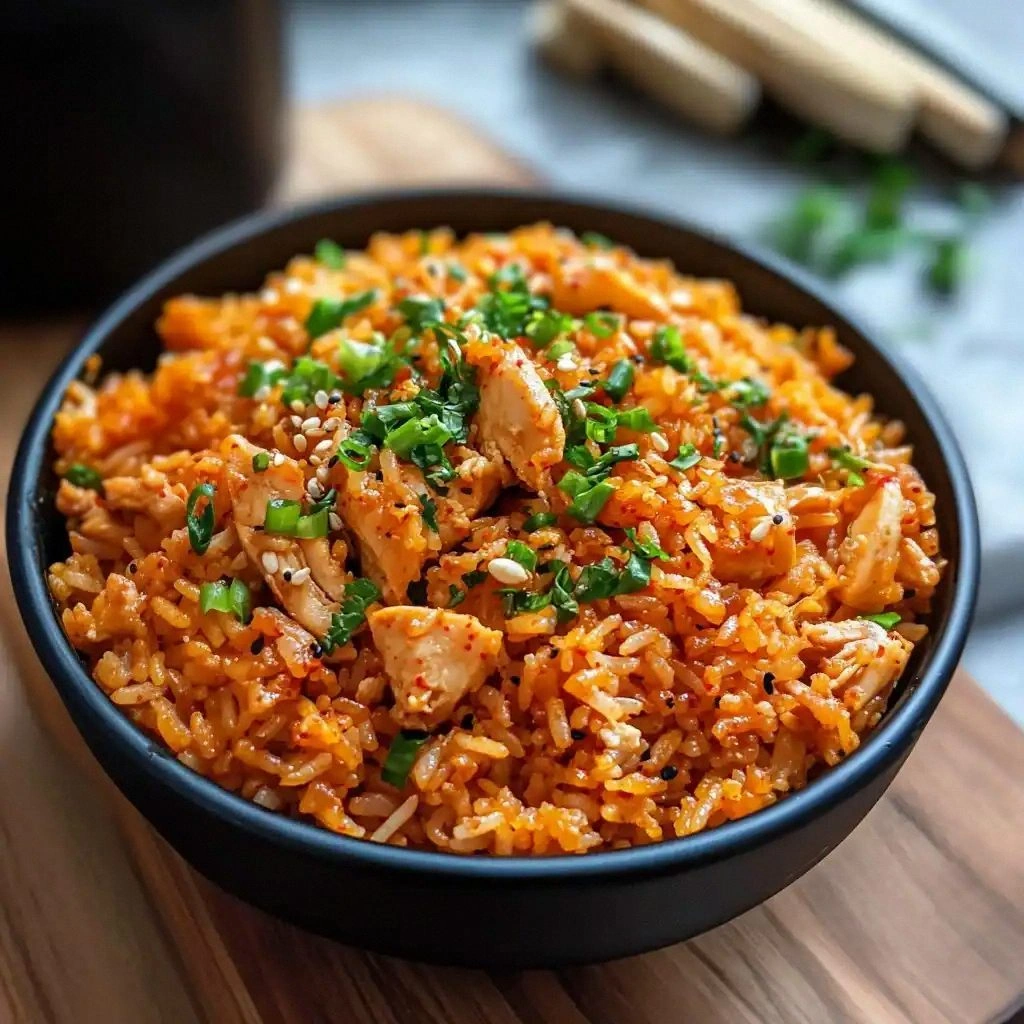
Most recipes get this completely wrong. They either under‑season the rice or over‑cook the chicken until it’s rubbery. This version, on the other hand, achieves a perfect balance between crispy edges and tender interiors, a harmony that makes every bite a celebration. I’ve tried countless Korean‑inspired dishes, but none have matched the boldness and harmony of this fried rice. The technique of stir‑frying the rice at a high heat ensures that each grain gets a caramelized crust, while the kimchi juice adds a subtle tang that cuts through the richness. And the finish—sprinkled green onions, a drizzle of sesame oil, and a pinch of salt—turns a simple meal into a masterpiece.
Picture yourself pulling this dish out of the pan, the kitchen smelling incredible, and your guests lining up for the first bite. That sizzle when the rice hits the pan? Absolute perfection. I’ve never been a fan of bland, one‑dimensional meals, and this recipe is a vibrant, fiery reminder that comfort food can be adventurous. It’s the kind of dish that turns an ordinary dinner into a shared experience, where everyone can taste the love and the effort that went into it. I’ll be honest— I ate half the batch before anyone else got to try it, and I’m not ashamed. This is hands down the best version you’ll ever make at home.
Okay, ready for the game‑changer? Let me walk you through every single step—by the end, you’ll wonder how you ever made it any other way.
What Makes This Version Stand Out
- Taste: The combination of fermented kimchi and fresh gochugaru creates a layered flavor profile that’s simultaneously sweet, spicy, and umami. The kimchi juice acts as a natural sauce, binding the ingredients together while adding a tangy brightness that cuts through the richness of the chicken. This is the first reason why the dish feels both comforting and adventurous.
- Texture: The high‑heat stir‑fry caramelizes the rice, giving it a slightly crispy edge that contrasts with the soft, tender chicken and the silky eggs. The addition of sesame oil provides a subtle nutty finish that coats each grain like velvet. The result is a dish that feels hearty yet light, satisfying both the palate and the appetite.
- Simplicity: Despite its complex flavor, the recipe requires only a handful of ingredients, most of which you probably already have in your pantry. No special sauces or exotic spices—just kimchi, gochugaru, and a few pantry staples. This makes it accessible for busy weeknights or last‑minute dinner parties.
- Uniqueness: The use of day‑old rice is a game‑changer. Fresh rice tends to mush together, but day‑old rice has the ideal firmness to hold its shape during the high‑heat stir‑fry. This small tweak elevates the dish from ordinary to extraordinary.
- Crowd Reaction: Friends who have tried this version rave about the balance of heat and flavor. It’s the kind of dish that keeps people coming back for more, and it’s a guaranteed conversation starter at dinner tables.
- Ingredient Quality: The recipe calls for fresh, high‑quality kimchi and boneless skinless chicken thighs. The quality of these core ingredients directly translates to the overall taste, ensuring a dish that’s both authentic and delicious.
- Cooking Method: The quick, high‑heat stir‑fry technique ensures that the rice gets a beautiful sear while the chicken stays juicy. The method also allows the flavors to meld together in just a few minutes, making it a perfect weeknight meal.
- Make‑Ahead Potential: Because the dish uses day‑old rice, it can be prepared in advance and reheated without losing texture or flavor. This makes it a great option for meal prep or for serving a crowd.
Inside the Ingredient List
The Flavor Base
Kimchi is the star of this dish, bringing a fermented tang that is both sharp and savory. It also adds a subtle sweetness that balances the heat from the gochugaru. If you skip kimchi, you lose the dish’s signature kick and depth. For a milder version, use a less seasoned kimchi, but the flavor profile will shift noticeably.
The Texture Crew
Day‑old rice is the unsung hero that gives the dish its distinct bite. Fresh rice tends to clump, whereas day‑old rice has a firmer texture that holds up during the high‑heat stir‑fry. If you can’t find day‑old rice, let freshly cooked rice rest in the fridge for at least an hour before using.
The Unexpected Star
Gochugaru, the Korean chili flakes, is the secret sauce that delivers a punch of heat without overpowering the other flavors. It also adds a subtle smoky undertone that enhances the umami of the kimchi. If you’re not a fan of spicy food, reduce the amount to one tablespoon, but be prepared for a milder dish.
The Final Flourish
Sesame oil and green onions are the finishing touches that elevate the dish from good to unforgettable. The sesame oil’s nutty aroma lingers long after the first bite, while the green onions add a fresh, bright note. If you’re allergic to sesame, you can substitute with a dash of toasted oat or hemp seed oil for a similar finish.
Everything’s prepped? Good. Let’s get into the real action.
The Method — Step by Step
- Heat a large non‑stick skillet or wok over medium‑high heat until it shimmers. Add the vegetable oil and swirl to coat the surface. When the oil starts to smoke slightly, add the chicken pieces, spreading them out in a single layer. This ensures even cooking and a golden sear on each side. Let the chicken cook for about 3–4 minutes before flipping; it should be nicely browned and almost cooked through.
- Add the minced garlic and grated ginger to the pan, stirring constantly to prevent burning. These aromatics release a fragrant steam that infuses the chicken with depth. Cook for 30 seconds until the scent hits your nose like a warm hug. Then add the chopped kimchi, stirring to combine everything. The kimchi should soften slightly but retain its bright color.
- Stir in the kimchi juice, gochugaru, and soy sauce, letting the mixture bubble for a minute. The sauce should coat the ingredients, turning the pan a deep amber. The heat should be high enough to caramelize the edges of the rice later. Keep the mixture moving so the spices don’t burn. At this point, the aroma should be bold and inviting.
- Push the mixture to one side of the pan and crack the eggs into the empty space. Scramble them gently, allowing them to set slightly before mixing with the rest. The eggs should be fluffy, not runny. Once the eggs are cooked, fold them into the rice mixture, ensuring even distribution. This step adds a silky texture that balances the bite of the kimchi.
- Add the day‑old rice, breaking up any clumps with a spatula. Stir vigorously to combine all the flavors and to ensure the rice gets a nice sear. Keep the heat high; the rice should sizzle and begin to develop a golden crust on the bottom. This caramelization is key to a satisfying crunch.
- Drizzle the sesame oil over the rice and give it a final stir. The sesame oil’s nutty aroma should envelop the dish, enhancing every bite. Add salt to taste, remembering that the soy sauce already contributes saltiness. Taste a spoonful; if it needs a touch more salt, add it now. The final touch is a sprinkle of chopped green onions for a fresh, bright contrast.
- Serve immediately, plating the rice in shallow bowls or a large platter. The dish should look glossy, with a golden crust and bright green specks of onion. Garnish with extra green onions or a drizzle of sesame oil if desired. The final aroma should be irresistible, making it hard to resist taking a second plate.
- Optional: For an extra layer of flavor, sprinkle a few toasted sesame seeds on top before serving. This adds a subtle crunch and a nutty aroma that complements the sesame oil. You can also add a splash of rice vinegar for a slight acidity that brightens the dish. Serve hot with a side of pickled vegetables or a simple cucumber salad.
That’s it — you did it. But hold on, I’ve got a few more tricks that will take this to another level.
Insider Tricks for Flawless Results
The Temperature Rule Nobody Follows
High heat is the secret to a crispy rice crust. If your stove runs low, the rice will steam instead of sear. Keep the flame on medium‑high and let the pan pre‑heat for a minute before adding oil. This ensures an even, caramelized surface that adds texture and flavor. A well‑heated pan also helps the kimchi juice evaporate quickly, preventing sogginess.
Why Your Nose Knows Best
Before you even taste the dish, your nose is already telling you whether it’s done. A strong, aromatic scent of toasted sesame and caramelized rice indicates that the flavor profile is developing. If the aroma feels flat or overly sharp, it’s time to adjust the seasoning. Trust your senses; they’re your best cooking guide.
The 5‑Minute Rest That Changes Everything
After you finish stir‑frying, let the dish sit for five minutes before serving. This pause allows the flavors to meld and the rice to firm up slightly, making it easier to scoop. It also gives the sesame oil time to settle, ensuring a more even distribution. Skipping this step can leave the dish feeling rushed and under‑seasoned.
Use Day‑Old Rice, Not Fresh
Fresh rice tends to clump and steam, while day‑old rice has the ideal firmness for stir‑frying. If you don’t have day‑old rice, spread freshly cooked rice on a tray and let it cool for at least an hour in the fridge. The moisture evaporates, giving the rice a dry, fluffy texture that crisps up beautifully.
Keep the Chicken Juicy
The key to juicy chicken is not to over‑cook it. Sear the chicken until it’s just pink inside, then finish the cooking with the rest of the ingredients. If you’re using a grill or oven, pre‑cook the chicken for 5 minutes on each side, then finish in the pan. This two‑step method keeps the meat moist and flavorful.
Don’t Forget the Green Onions
Green onions add a fresh, bright contrast that balances the richness of the dish. Add them at the very end to preserve their crispness and vibrant color. If you prefer a milder flavor, reserve some for garnish only. The green onions also provide a subtle oniony sweetness that ties all the flavors together.
Creative Twists and Variations
This recipe is a playground. Here are some of my favorite ways to switch things up:
Spicy Shrimp Edition
Swap the chicken for shrimp, sautéing them until pink and slightly caramelized. The shrimp’s natural sweetness pairs wonderfully with the tangy kimchi. Add a pinch of chili flakes for an extra kick, and you’ll have a dish that’s both seafood and Korean fusion.
Vegan Kimchi Rice
Omit the chicken and eggs entirely, replacing them with sautéed tofu cubes. Use a splash of nutritional yeast for a cheesy undertone. This version is hearty, plant‑based, and still packs that bold kimchi flavor.
Breakfast Kimchi Fried Rice
Stir in a handful of diced ham or bacon for a savory breakfast twist. Add a pinch of cinnamon and nutmeg to the eggs for a sweet‑savory contrast. Serve with a side of fresh fruit for a balanced morning meal.
Sweet & Sour Kimchi Rice
Introduce a tablespoon of honey or maple syrup and a splash of rice vinegar for a sweet‑sour balance. This version works well as a side dish for grilled meats or as a palate cleanser during a multi‑course meal.
Kimchi Ramen Fusion
Serve the fried rice over a bed of ramen noodles, drizzling extra kimchi juice on top. Top with a soft‑boiled egg and a sprinkle of nori for a Japanese‑Korean hybrid dish that’s both comforting and adventurous.
Gluten‑Free Option
Use a gluten‑free soy sauce or tamari to keep the dish safe for gluten‑sensitive diners. The rest of the ingredients remain unchanged, so the flavor profile stays intact. This version is perfect for anyone looking to enjoy Korean cuisine without the gluten.
Storing and Bringing It Back to Life
Fridge Storage
Store the leftover fried rice in an airtight container in the refrigerator for up to 3 days. The rice will maintain its texture, and the kimchi’s tanginess will intensify, making it even more delicious the next day. When reheating, add a splash of water to keep the rice from drying out.
Freezer Friendly
For longer storage, freeze the dish in freezer‑safe containers for up to 2 months. Thaw overnight in the fridge before reheating. The rice will keep its flavor and texture, and the kimchi will retain its vibrant color.
Best Reheating Method
Reheat the rice in a skillet over medium heat, stirring frequently. Add a teaspoon of water or broth to create steam, which helps revive the rice’s moisture. When the rice is heated through and aromatic, it’s ready to serve. A quick drizzle of sesame oil at the end will restore that nutty finish.