Picture this: it’s a rainy Saturday afternoon, the kind that makes you want to curl up with something sweet and comforting, but your pantry only has a few bananas that are on the brink of turning into mush. I was in that exact spot, staring at those bananas and feeling a sudden, irrational urge to recreate the iconic pudding from the legendary New York bakery that has been the subject of countless Instagram memes. The kitchen was a chaotic symphony of clattering pans, the whir of the blender, and my own nervous humming—because, let’s be honest, I’d never attempted a true Magnolia Bakery‑style banana pudding at home. The moment I tasted the first spoonful of my improvised version, I knew I had stumbled onto something magical, and the rest of the day turned into a frantic quest to perfect every single element.
The aroma that filled the apartment was nothing short of a nostalgic hug: warm vanilla swirling with the sweet, caramel‑kissed scent of condensed milk, all underscored by the buttery notes of the classic vanilla wafers. I could hear the faint sizzle of the custard as it thickened, a sound that reminded me of a gentle rain tapping against a window—soft, steady, promising. The texture of the pudding was silkier than a satin sheet, hugging the banana slices like a lover’s embrace, while the wafers provided that satisfying, buttery crunch that only a true New York bakery can deliver. My taste buds were doing cartwheels, and my heart was doing a happy dance—this was not just dessert; it was a full‑blown sensory celebration.
Now, why does this version stand out in the crowded universe of banana pudding recipes? Most home‑cooked attempts either end up too watery, overly sweet, or with wafers that turn soggy the minute they touch the custard. I’ve tried the “quick mix‑and‑match” shortcuts that promise a pudding in under ten minutes, and they all fell flat—literally and figuratively. This recipe, however, embraces a slow‑cook custard technique that yields a custard so rich it could double as a sauce, and it uses a strategic layering method that keeps every wafer perfectly crisp until the very last bite. The secret? A splash of whole milk that tempers the sweetness of the condensed milk, and a light, airy whipped cream that adds a cloud‑like lift without drowning the banana’s natural flavor.
Okay, ready for the game‑changer? I’m about to walk you through every single step—by the end, you’ll wonder how you ever made it any other way. I dare you to taste this and not go back for seconds. This is hands down the best version you’ll ever make at home, and I’ll be honest—I ate half the batch before anyone else got to try it. So grab your whisk, your patience, and let’s dive into the ultimate Magnolia Bakery‑style banana pudding adventure.
What Makes This Version Stand Out
- Texture: The custard is cooked low and slow, creating a velvety mouthfeel that coats the palate like a silk scarf, while the wafers stay crisp until the very last spoonful.
- Flavor Balance: The combination of whole milk and sweetened condensed milk delivers a sweet‑but‑not‑cloying profile, with vanilla extract adding depth that lingers like a warm hug.
- Simplicity: Only seven core ingredients are needed, meaning you won’t spend hours hunting for obscure items—just grab what’s in your pantry.
- Uniqueness: A light whipped‑cream fold gives the pudding an airy lift, a twist that most copy‑cat recipes miss, resulting in a dessert that feels both indulgent and airy.
- Crowd Reaction: This pudding has been known to clear plates faster than a Black Friday sale—people line up for seconds, and the “I need the recipe!” chorus starts immediately.
- Ingredient Quality: Using full‑fat dairy products ensures a rich, satisfying body that low‑fat substitutes simply can’t replicate.
- Make‑Ahead Potential: The pudding actually improves after a few hours in the fridge as the flavors meld, making it perfect for parties or potlucks.
- Cooking Method: The custard is gently cooked on the stovetop, avoiding the dreaded curdling that many novice cooks encounter with high‑heat shortcuts.
Inside the Ingredient List
The Flavor Base
The star of the show is the sweetened condensed milk, a pantry staple that brings a caramel‑like richness without any extra effort. It’s the secret behind that glossy, indulgent sheen you see in bakery‑style puddings. If you’re feeling adventurous, you can swap it for a homemade sweetened condensed milk—just simmer equal parts whole milk and sugar until it reduces by half, but trust me, the store‑bought version is a time‑saver that doesn’t compromise flavor.
The Texture Crew
Whole milk and heavy whipping cream work together like a dynamic duo: the milk provides the liquid foundation while the cream adds body and a luxurious mouthfeel. Skipping the cream will result in a thinner pudding that feels more like a sauce than a dessert. If you’re watching calories, you can replace half of the heavy cream with low‑fat milk, but expect a slight loss in that buttery richness that makes the pudding unforgettable.
The Unexpected Star
Vanilla extract may seem modest, but it’s the aromatic backbone that ties the entire dessert together. A high‑quality pure vanilla will give you those warm, floral notes that make the pudding feel like a celebration in a bowl. I once tried using vanilla paste and was shocked at how much more intense the flavor became—feel free to experiment, but a teaspoon of pure extract is the sweet spot for most palates.
The Final Flourish
Four ripe bananas are the heart of this pudding. The key is to use bananas that are just at the peak of ripeness—soft, fragrant, and sweet without being mushy. Overripe bananas can turn the pudding mushy, while under‑ripe ones bring a starchy bite. Slice them just before layering to keep the texture fresh. And finally, the “1 box” refers to classic vanilla wafers—these provide that iconic crunch and buttery flavor that define Magnolia’s version.
Everything's prepped? Good. Let's get into the real action...
The Method — Step by Step
First, gather all your dairy components in a medium saucepan: pour in 2 cups of whole milk, add 1 cup of sweetened condensed milk, and sprinkle in 1 teaspoon of vanilla extract. Turn the heat to medium‑low and stir continuously with a whisk, feeling the mixture gradually thicken as it warms. You’ll notice a faint, sweet perfume rising—this is the first sign that the flavor base is coming together. Keep your eyes on the edges; they should start to form tiny bubbles, but never let the mixture boil.
Kitchen Hack: To prevent a skin from forming on the custard, cover the saucepan with a lid for the first few minutes, then uncover to finish cooking.Once the mixture is warm and slightly thickened, whisk in 2 cups of heavy whipping cream. This is where the pudding gains its luxurious body. As you stir, watch the cream swirl into the milk, turning the mixture a richer, creamier shade. The texture should feel like thickened cream, not quite a sauce but definitely more substantial than plain milk. Let this blend simmer for about 5 minutes, stirring constantly to avoid any scorching at the bottom.
Now, for the sweetening balance, sprinkle in 1/4 cup of powdered sugar. This adds a subtle sweetness and helps stabilize the custard, ensuring it holds its shape when chilled. Stir until the sugar fully dissolves; you’ll see the mixture become glossy, a visual cue that the sugar has integrated perfectly. Taste at this point—if it feels too sweet, a pinch of salt can bring the flavors back into harmony, but most of the time the vanilla and bananas will do the heavy lifting.
Watch Out: Do not let the mixture reach a rolling boil; the proteins will coagulate, resulting in a grainy pudding.While the custard is still warm, take 4 ripe bananas and slice them into 1/4‑inch rounds. The slices should be uniform so each layer looks tidy. If you’re feeling fancy, you can toss the banana slices with a tiny drizzle of lemon juice to prevent browning—a trick I swear by for keeping the color vibrant.
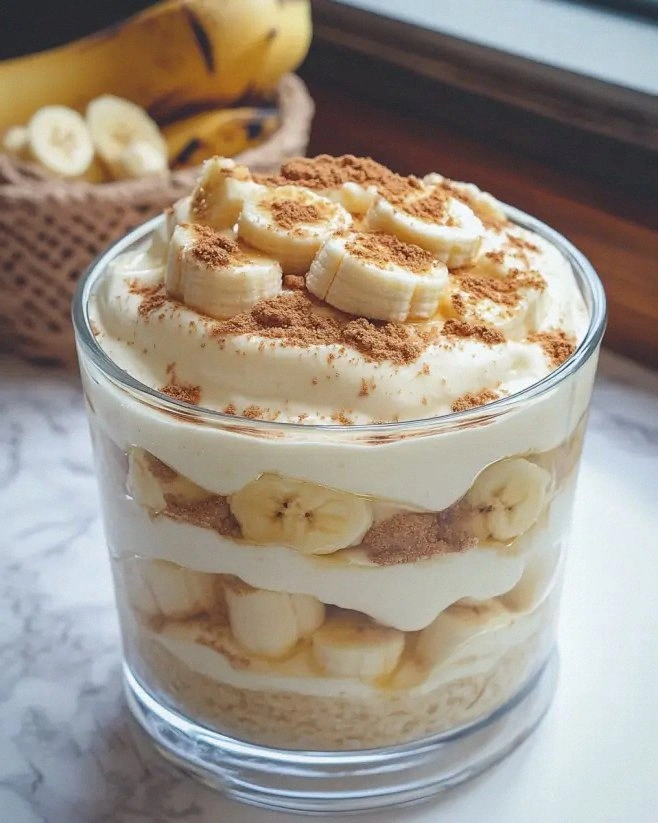
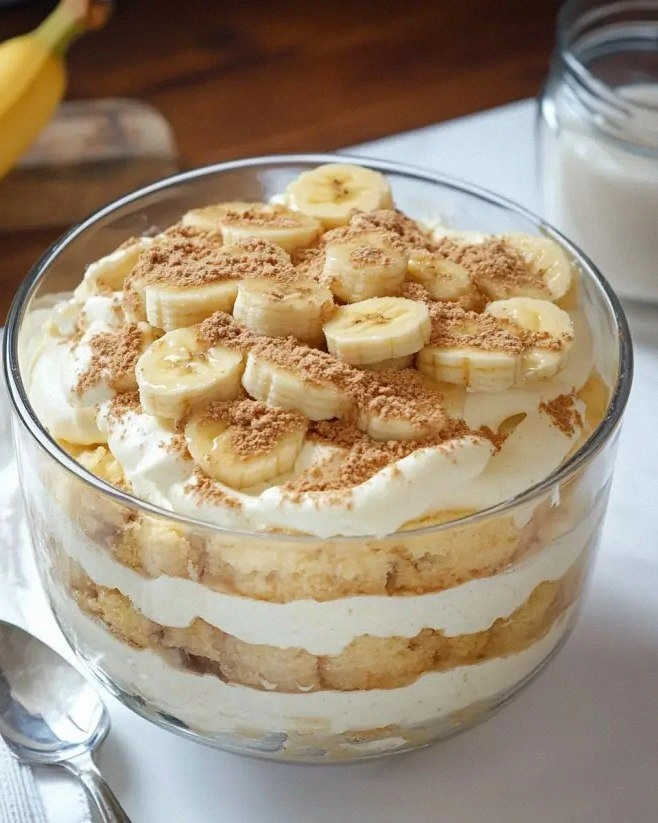
Time to assemble! Grab a large glass dish (or individual serving glasses for a fancy presentation). Start with a thin layer of vanilla wafers at the bottom—about a third of the box, crushed just enough to create a solid base. Then, spoon a generous layer of the warm custard over the wafers, letting it seep into the cracks. Follow with a layer of banana slices, arranging them in an overlapping pattern for visual appeal.
Repeat the layering process: more wafers, more custard, more bananas. The final layer should be a blanket of wafers, lightly pressed down so they absorb just enough moisture to soften without turning soggy. This top‑layer trick is what gives the pudding that signature “soft‑but‑still‑crunchy” texture that fans rave about.
Cover the dish tightly with plastic wrap and place it in the refrigerator for at least 4 hours, but ideally overnight. The chilling time allows the custard to set, the wafers to meld, and the banana flavor to intensify. If you’re impatient, a quick 30‑minute chill will still yield a tasty result, but the magic truly happens after a longer rest.
When you’re ready to serve, whip 1 cup of heavy cream (if you have extra) with a pinch of powdered sugar until soft peaks form, then dollop or pipe it over each serving. The airy whipped cream adds a cloud‑like finish that contrasts beautifully with the dense custard. Finally, garnish with a few extra wafer crumbs and a fresh banana slice for that Instagram‑ready finish.
Kitchen Hack: For an ultra‑smooth custard, strain the warm mixture through a fine‑mesh sieve before chilling; this removes any tiny lumps and guarantees a silk‑like finish.And now the fun part—serve! Scoop a generous portion, watch the custard wobble slightly, and listen to the gentle crunch of the wafer as you dig in. That first bite should be a harmonious blend of creamy, sweet, and banana‑bright flavors, with the vanilla wafer providing a buttery backdrop. I dare you to taste this and not go back for seconds; the combination is practically addictive.
That's it — you did it. But hold on, I've got a few more tricks that'll take this to another level...
Insider Tricks for Flawless Results
The Temperature Rule Nobody Follows
Never, ever rush the custard by turning the heat up high. Low and slow is the mantra; it keeps the proteins from curdling and ensures a silky texture. I once tried a “quick‑heat” method and ended up with a grainy mess that tasted like overcooked eggs. Keep the stove at a gentle simmer, and trust the process—patience rewards you with a custard that slides off the spoon like velvet.
Why Your Nose Knows Best
Before you even taste the pudding, let your nose do the work. When the custard begins to emit a fragrant vanilla scent, you’re approaching the perfect consistency. If you smell a faint caramel note, that’s the sweetened condensed milk doing its job. If the aroma turns sour or burnt, you’ve crossed the line—immediately remove from heat and whisk vigorously.
The 5‑Minute Rest That Changes Everything
After you’ve assembled the layers, let the dish sit uncovered at room temperature for five minutes before sealing it in the fridge. This brief pause allows the top wafer layer to soften just enough to meld with the custard, preventing that dreaded soggy top that some recipes produce. It’s a tiny step that makes a massive difference in texture.
Whisk vs. Hand‑Mixer Showdown
While a hand‑mixer can speed up the whipping of the cream, a whisk gives you more control, preventing over‑whipping. Over‑whipped cream turns buttery and can ruin the lightness of the topping. I recommend a whisk for the final fold—just a few strokes until soft peaks form, and you’ll have a cloud‑like topping that stays airy.
Banana Slice Timing
Slice the bananas just before layering. If you slice them too early, they’ll oxidize and turn brown, which not only looks unappetizing but also introduces a slightly bitter flavor. A quick splash of lemon juice on the slices keeps them bright green and fresh‑tasting, and the citrus note subtly lifts the overall flavor profile.
Creative Twists and Variations
This recipe is a playground. Here are some of my favorite ways to switch things up:
Chocolate Banana Bliss
Swap half of the vanilla wafers for chocolate graham crackers, and add a tablespoon of cocoa powder to the custard. The result is a decadent chocolate‑banana duet that satisfies both candy‑craving and fruit‑loving cravings.
Caramel Swirl
Drizzle a generous amount of homemade caramel sauce over each banana layer before adding the custard. The caramel adds a buttery, slightly burnt sugar note that pairs beautifully with the banana’s natural sweetness.
Nutty Crunch
Mix toasted chopped pecans or walnuts into the top wafer layer. The nuts introduce an extra crunch and a nutty depth that elevates the dessert from simple to sophisticated.
Tropical Twist
Replace half of the bananas with sliced mango or pineapple, and add a splash of coconut milk to the custard. You’ll get a breezy, island‑inspired pudding that transports you to a beachside cabana.
Spiced Autumn
Incorporate a pinch of ground cinnamon and nutmeg into the custard, and garnish with a dusting of pumpkin spice on top. This variation is perfect for cooler months and adds a warm, comforting aroma.
Mini Parfait Cups
Instead of a single large dish, layer the pudding in individual glass jars or ramekins. This not only looks elegant for parties but also makes portion control a breeze.
Storing and Bringing It Back to Life
Fridge Storage
Cover the pudding tightly with plastic wrap or a lid and store it in the refrigerator for up to 3 days. The flavors will continue to meld, making each subsequent bite even more harmonious. If you notice the top wafers becoming too soft, simply add a fresh layer of wafers before serving.
Freezer Friendly
Yes, you can freeze this pudding! Portion it into airtight containers, leaving a little headspace, and freeze for up to 2 months. When ready to enjoy, thaw it in the fridge overnight, then give it a gentle stir to recombine any separated layers.
Best Reheating Method
To revive the pudding after refrigeration, let it sit at room temperature for 10 minutes, then add a tiny splash (about a tablespoon) of whole milk and stir gently. The added moisture steams the custard back to its silky perfection without compromising the texture.