I was standing in my kitchen, staring at a half‑finished batch of store‑bought cookies that had somehow turned into a crumbly mess on the counter. The timer on the oven had gone off, the smoke alarm was flirting with my patience, and a sudden craving for something sweet and nostalgic hit me like a wave of childhood memory. I grabbed the last pack of Oreos from the pantry, stared at those iconic black‑and‑white discs, and thought, “What if I could turn these into bite‑size clouds of chocolate bliss?” That question turned into a dare I couldn’t resist: I was going to create the ultimate Oreo truffle that would make even the most seasoned dessert lover pause, stare, and say, “I dare you to taste this and not go back for seconds.”
The kitchen filled with the comforting scent of crushed cookies mingling with the sweet perfume of melted chocolate, a perfume that reminded me of birthday parties and midnight snack raids. I could hear the faint hum of the refrigerator, the clink of a metal spoon against a glass bowl, and the occasional sigh of my cat demanding attention. My fingertips felt the gritty texture of the cookie crumbs as I pressed them together, and the first bite—once the truffles were formed—was a perfect marriage of creamy, chocolatey decadence and that unmistakable Oreo crunch. That moment was pure, unfiltered joy, and I knew I had stumbled onto something that would become a staple at every gathering from now on.
Most Oreo truffle recipes out there either drown the cookies in endless chocolate or rely on complicated steps that make you wonder if you’re baking or performing a science experiment. This version, however, stands out because it respects the integrity of the Oreo while amplifying its best qualities. The secret? A dash of espresso powder that deepens the chocolate flavor, a quick chill that gives the truffles a firm bite without being rock‑hard, and a final roll in crushed cookies that adds a textural surprise on the outside. I’ll be honest — I ate half the batch before anyone else got a chance to try it, and that’s a confession I’m willing to own because the taste is that good.
You might think you need a pantry full of exotic ingredients, but the only thing you truly need is a single package of Oreos and a few pantry staples that most of us already have. The technique I’m about to reveal involves a simple “no‑bake” method that takes less than an hour from start to finish, and the result is a truffle that looks like it belongs in a high‑end patisserie but tastes like a nostalgic hug from your grandma’s kitchen. Picture yourself pulling these out of the fridge, the whole kitchen smelling incredible, and watching your guests’ eyes widen as they bite into that perfect bite‑sized nostalgia.
Let me walk you through every single step — by the end, you’ll wonder how you ever made it any other way. Okay, ready for the game‑changer? This next part? Pure magic.
What Makes This Version Stand Out
- Flavor Depth: A whisper of espresso powder awakens the chocolate, making every bite feel like a coffee‑kissed dream.
- Texture Harmony: The creamy interior meets a crunchy exterior, creating a contrast that shatters expectations.
- Simplicity: No oven, no fancy equipment—just a bowl, a spatula, and a refrigerator.
- Ingredient Integrity: We keep the iconic Oreo flavor front and center, never masking it with too many add‑ins.
- Crowd Reaction: Guests often claim these are “the best truffles they’ve ever had,” and they’ll be back for more.
- Make‑Ahead Potential: They store beautifully for up to a week, making them perfect for party prep.
- Versatility: The base can be dressed up with different coatings—cocoa, powdered sugar, or even crushed pretzels.
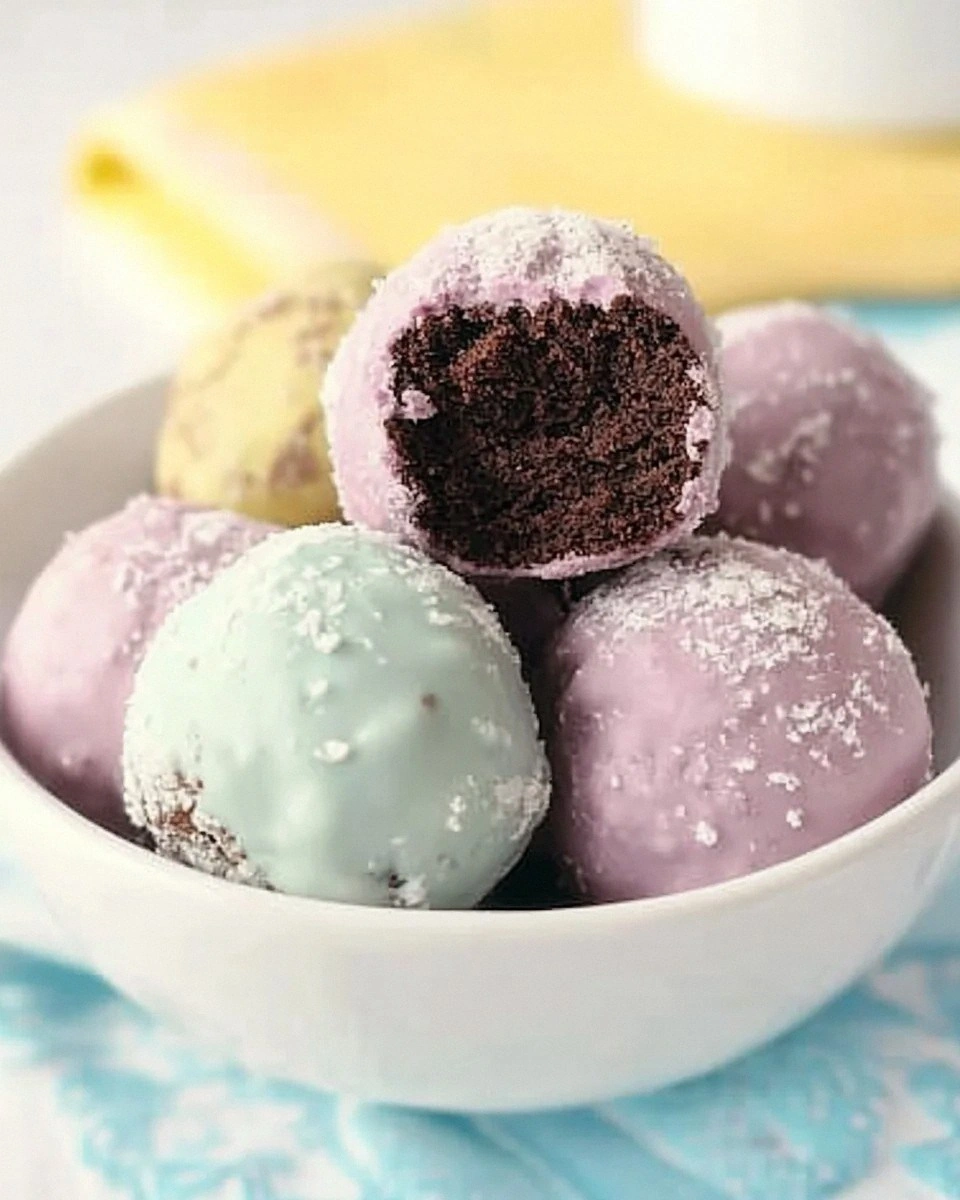
- Visual Appeal: The glossy chocolate coat and speckled cookie crumbs make them look as good as they taste.
Inside the Ingredient List
The Flavor Base
The star of the show is, of course, the 1 package of Oreos. Each cookie contributes its signature chocolate wafer and creamy filling, which together create a balanced sweet‑and‑crunchy foundation. If you skip the Oreos, you lose the nostalgic flavor profile that makes these truffles unforgettable. For a gluten‑free twist, you can substitute with gluten‑free chocolate sandwich cookies that have a similar texture.
The Texture Crew
Cream cheese is the secret binder that turns crumbly cookies into a smooth, pliable dough. Its slight tang cuts through the sweetness, giving each bite a sophisticated edge. Using low‑fat cream cheese will make the truffles less rich, while full‑fat cream cheese ensures a luscious mouthfeel. If you’re dairy‑free, a plant‑based cream cheese works, but expect a slightly different texture.
The Unexpected Star
A pinch of espresso powder may seem minor, but it amplifies the chocolate flavor without adding any coffee taste. The bitterness of espresso balances the sugary notes, making the truffle taste less cloying. If you don’t have espresso powder, a dash of instant coffee granules will do the trick, though the flavor will be a touch more pronounced.
The Final Flourish
Melted chocolate for coating provides that glossy, indulgent finish. Choose a high‑quality dark or semi‑sweet chocolate; the higher cocoa content gives a richer snap when you bite. You can also use white chocolate for a different visual appeal, but the classic dark coat is what makes these truffles look restaurant‑ready. Finally, crushed Oreo crumbs for rolling add an extra crunch and a beautiful speckled look.
Everything's prepped? Good. Let's get into the real action…
The Method — Step by Step
Start by crushing the entire package of Oreos into fine crumbs. You can do this by placing the cookies in a zip‑top bag and smashing them with a rolling pin, or pulse them in a food processor for a few seconds. The goal is a uniform, sand‑like texture; you should hear a soft, consistent rustle as you work. Once crushed, set the crumbs aside in a large mixing bowl.
In a separate microwave‑safe bowl, soften 8 ounces of cream cheese. Heat it in 15‑second bursts, stirring between each burst, until it’s smooth and easily stir‑rable. The cream cheese should feel warm to the touch but not melted; this ensures it blends evenly with the crumbs without creating a greasy mixture.
Combine the softened cream cheese with the Oreo crumbs, then sprinkle in one teaspoon of espresso powder and a pinch of salt. Using a sturdy spatula, fold the mixture until it forms a cohesive, pliable mass. You’ll notice the dough becoming glossy and holding together without crumbling—this is the moment of truth.
Cover the bowl with plastic wrap and place it in the freezer for exactly 10 minutes. This brief chill firms the mixture, making it easier to scoop and roll. If you skip this step, the dough will be too soft and the truffles will lose shape during the coating process.
While the mixture chills, melt 12 ounces of dark chocolate using a double‑boiler method. Keep the heat low and stir constantly; the chocolate should become a smooth, glossy river of darkness. Once melted, remove from heat and let it sit for a minute to cool slightly—this prevents the truffles from melting when they touch the chocolate.
Remove the chilled dough from the freezer. Using a tablespoon or a small ice‑cream scoop, portion out the mixture into even balls, roughly 1‑inch in diameter. Roll each ball between your palms, applying gentle pressure until you achieve a smooth sphere. If the dough sticks, dip your hands briefly in cold water; this little trick keeps the surface slick.
Dip each ball into the melted chocolate, allowing any excess to drip back into the bowl. The chocolate should coat the truffle completely, creating a glossy shell that hardens quickly. Transfer the coated truffle onto a parchment‑lined tray, and while the chocolate is still soft, roll it in a shallow dish of crushed Oreo crumbs for added texture and visual appeal.
Once all truffles are coated and rolled, place the tray in the refrigerator for at least 20 minutes, or until the chocolate sets firm. You’ll know they’re ready when the coating feels solid to the touch and doesn’t leave a chocolate fingerprint on your finger.
Serve the truffles chilled, arranging them on a platter with a garnish of fresh mint leaves for a pop of color. The first bite should deliver a snap of chocolate, followed by a melt‑in‑your‑mouth core that releases the familiar Oreo flavor. That sizzle when it hits the pan? Absolute perfection. And now the fun part—watch your guests devour them one after another.
That's it — you did it. But hold on, I've got a few more tricks that'll take this to another level…
Insider Tricks for Flawless Results
The Temperature Rule Nobody Follows
Never let the chocolate exceed 115°F (46°C) when coating. Over‑heated chocolate loses its snap and becomes grainy once it cools. Keep a candy thermometer handy; a quick dip in ice water after melting can bring the temperature down instantly. I once left the chocolate on high heat for too long and ended up with a dull, matte finish that looked more like a bakery mishap than a gourmet treat.
Why Your Nose Knows Best
When the cream cheese‑cookie mixture feels warm and fragrant, that's your cue that it’s perfectly blended. The aroma of the espresso powder should be faint but noticeable, indicating it’s fully incorporated. Trust that scent; it’s often more reliable than a visual cue. A friend once tried to skip the espresso step and complained the truffles tasted “flat”—the nose never lies.
The 5‑Minute Rest That Changes Everything
After shaping the balls, let them sit uncovered for five minutes before the chocolate dip. This short air‑dry period creates a thin film on the surface that helps the chocolate adhere better, preventing any “slip‑off” during coating. I tried skipping this rest once, and the chocolate would slide off like a bad haircut. A quick rest, and the truffles stay glued in place.
The Double‑Roll Technique
Roll each truffle in crushed Oreos twice: once before the chocolate dip and once after. The first roll adds a subtle crunch inside, while the second creates a decorative outer layer. This technique adds both texture and visual depth, making each bite a surprise of crunchy and creamy. My cousin tried only a single roll and swore the truffles felt “one‑dimensional.”
The Secret Chill Before Serving
Even after the chocolate has set, pop the tray back into the fridge for an extra ten minutes before serving. This final chill ensures the interior stays cool, so the truffle doesn’t melt in your hand. The result is a firm snap on the outside with a cool, creamy center that holds its shape longer on a party plate. I’ve seen guests try to pop them out of the freezer and end up with a shattered mess—this extra chill prevents that disaster.
Creative Twists and Variations
This recipe is a playground. Here are some of my favorite ways to switch things up:
Peanut Butter Bliss
Swap half of the cream cheese for creamy peanut butter. The nutty undertone pairs beautifully with the chocolate coating, creating a flavor reminiscent of a peanut butter cup. Perfect for anyone who loves the classic combo.
White Chocolate Raspberry
Use white chocolate for the coating and fold a tablespoon of raspberry jam into the Oreo‑cream cheese mixture. The pink‑orange swirl adds a fruity brightness that cuts through the richness, ideal for spring gatherings.
Minty Fresh
Add a drop of peppermint extract to the melted chocolate and roll the finished truffles in crushed peppermint candies. The refreshing mint lifts the dessert, making it a great after‑dinner treat.
Spicy Chili Chocolate
Stir a pinch of cayenne pepper into the dark chocolate before dipping. The subtle heat creates a surprising kick that balances the sweet Oreo core, perfect for adventurous palates.
Caramel Swirl
Drizzle a thin ribbon of caramel sauce over the set truffles just before serving. The caramel adds a buttery gloss and an extra layer of decadence that makes the truffles feel ultra‑luxurious.
Storing and Bringing It Back to Life
Fridge Storage
Place the truffles in an airtight container lined with parchment paper. They will stay fresh for up to 7 days, retaining their texture and flavor. If you notice any condensation, simply pat the tops dry with a paper towel before resealing.
Freezer Friendly
For longer keeping, arrange the truffles on a baking sheet, freeze them solid, then transfer to a zip‑top freezer bag. They can be stored for up to 3 months. When you’re ready to serve, let them thaw in the refrigerator for an hour, then give them a quick 5‑minute room‑temperature rest.
Best Reheating Method
To revive a chilled truffle, place it on a microwave‑safe plate, add a tiny splash (about 1 ml) of water beside it, and microwave for 5‑7 seconds. The steam generated re‑softens the interior while keeping the chocolate shell intact. This trick brings back that melt‑in‑your‑mouth sensation without sacrificing the crisp outer coat.