Last Tuesday, I was trying to salvage a batch of over‑cooked chicken that had turned out as rubbery as a bad joke. The kitchen smelled like burnt plastic, and I was ready to throw the whole thing in the trash. Then, a friend texted me a recipe for baked chicken tacos that promised crispy edges and a melt‑in‑your‑mouth finish. I stared at the screen, feeling skeptical but intrigued. I was about to write a grocery list when the phone buzzed again with a dare: “I dare you to taste this and not go back for seconds.”
Picture this: the chicken, seasoned with a smoky blend of cumin and paprika, hits the oven and begins to sizzle with a faint, comforting hiss. The aroma rises, a warm, almost buttery scent that makes the whole house feel like a cozy taco stand. The sound of the first golden crust popping is the soundtrack to my culinary rebellion. My taste buds anticipate that first bite, a crunch that shatters like thin ice, followed by a juicy, flavorful interior. The texture is a dance between crisp and tender, a paradox that keeps you reaching for more.
This isn’t just another chicken taco recipe; it’s a symphony of flavors, a carefully orchestrated balance that most recipes miss. The secret lies in the flour coating, which creates a barrier that locks in moisture while delivering a crunch that lasts. I’ve tried countless versions that either fall apart or overcook, but this one keeps the meat tender and the tortillas buttery. The addition of a double cheese blend gives that melty, gooey center that turns every bite into a mini celebration. If you’ve ever struggled with dry chicken tacos, this is hands down the best version you'll ever make at home.
Now, here’s the twist that sets it apart: a splash of lime juice and a dusting of fresh cilantro right before baking, which infuses the coating with a bright, zesty punch that cuts through the richness. Some people think lime is for salsa, but when it’s folded into the coating, it creates a subtle acidity that elevates the entire dish. This simple step turns an ordinary taco into a festival of flavors, and trust me, you’ll want to share the secret with anyone who’s ever asked why your tacos taste flat.
Okay, ready for the game‑changer? I’m going to walk you through every single step, from the initial prep to the final garnish, so that by the end you’ll wonder how you ever made it any other way. I’ve spent hours tweaking this recipe, and every tweak was a lesson in how small details can make a huge difference. If you’re ready to elevate your taco nights, grab your apron and let’s dive in.
Picture yourself pulling this batch out of the oven, the whole kitchen smelling incredible, and the first bite delivering that satisfying crunch that makes you do a little happy dance. That moment when the cheese melts into a golden ribbon that you can’t resist licking off the tortilla is pure magic. And the best part? It’s so simple that even a busy parent can pull it together in under an hour. So let’s get started, because you’re about to discover a taco that will become your new go‑to recipe.
Most recipes get this completely wrong by either over‑baking the chicken or using the wrong flour. I’ve seen people toss in whole milk for the coating and end up with soggy tacos, and that’s not what I’m doing here. I’ll be honest — I ate half the batch before anyone else got to try it, and the second half was even better because the flavors had had a chance to meld. If you’ve ever struggled with this, you’re not alone — and I’ve got the fix.
Let me walk you through every single step — by the end, you'll wonder how you ever made it any other way. Stay with me here, because this is worth it. And trust me, once you taste the first bite, you’ll be convinced that this is the ultimate baked chicken taco experience. So grab your ingredients, preheat that oven, and let’s get cooking.
What Makes This Version Stand Out
- Crunch Factor: The flour coating crisps to a golden shell that snaps with every bite, giving you that coveted taco crunch without the need for deep frying. If you’re craving a texture that’s both light and satisfying, this is your go‑to method. It’s the difference between a soggy tortilla and a memorable crunch that keeps guests coming back for more.
- Flavor Depth: A blend of smoked paprika, cumin, and a hint of chili powder creates a savory profile that’s complex yet approachable. The lime infusion adds a bright acidity that cuts through the richness, while cilantro provides a fresh herbal note. Together, they form a flavor orchestra that sings with every bite.
- Time Efficiency: With a prep time of just 15 minutes and a cook time of 30 minutes, you can have a gourmet taco dinner ready in under an hour. No need for elaborate marinades or long resting periods. This is the perfect solution for week‑night dinner or a last‑minute party.
- Ingredient Quality: Using fresh, high‑quality chicken thighs gives the dish a juicy, tender core that contrasts beautifully with the crisp coating. The double‑cheese blend ensures a gooey, melty center that’s impossible to resist. The simplicity of the ingredient list means you can shop at any local market without a detour.
- Make‑Ahead Potential: You can prepare the coated chicken ahead of time and store it in the fridge for up to 24 hours, then bake it fresh when you’re ready. This flexibility turns a last‑minute dinner into a stress‑free meal. The coating stays crisp, and the flavors only deepen.
- Kid‑Friendly Appeal: The mild heat and familiar flavors make these tacos a hit with even the pickiest eaters. The cheese melt is a universal crowd‑pleaser, and the crunchy texture keeps kids engaged. It’s a recipe that brings the whole family to the table.
- Versatility: Swap the chicken for pork, beef, or even tofu, and the method still shines. The coating works wonders on any protein, allowing you to customize the dish to your taste or dietary preferences. The possibilities are endless.
Alright, let's break down exactly what goes into this masterpiece...
Inside the Ingredient List
The Flavor Base
At the heart of every great taco is a protein that sings. I’m using boneless, skinless chicken thighs because they’re juicy, flavorful, and hold up beautifully to the oven’s heat. The seasoning blend—smoked paprika, cumin, chili powder, garlic powder, onion powder, salt, and pepper—creates a savory foundation that feels like a hug. Adding a splash of olive oil before coating ensures the flour sticks and browns evenly. A final squeeze of lime juice right before baking gives the coating a bright, citrusy lift that cuts through the richness.
Why you shouldn’t skip the olive oil: it keeps the coating from drying out and adds a silky sheen that makes the crust look irresistible. If you’re in a pinch, a tablespoon of butter works just as well, though it introduces a richer flavor. The lime juice isn’t just for flavor; it also helps break down the proteins slightly, making the chicken more tender. Remember, the seasoning is the backbone of the dish—don’t be afraid to adjust the heat or spice level to match your taste.
The Texture Crew
Flour is the unsung hero of crispy chicken. A light dusting of all‑purpose flour, mixed with a pinch of salt, creates a barrier that traps moisture inside while crisping on the outside. The flour coating also holds the cheese and toppings together, preventing them from sliding off the tortilla. For a gluten‑free version, swap the flour for almond flour or a gluten‑free blend; the result is still crisp, just a touch nuttier.
Cheese is the gooey heart of these tacos. I’m using a blend of shredded cheddar and Monterey Jack for a melt that’s both sharp and buttery. The cheese melts into a silky ribbon that coats the chicken and tortilla, adding depth and richness. If you’re a fan of a sharper bite, add a sprinkle of pepper jack or a dash of smoked gouda. The tortillas—corn tortillas work best because they’re pliable and hold up to the heat without tearing.
The Unexpected Star
Sour cream adds a cool, creamy contrast that balances the heat and richness. A dollop of sour cream on top of the warm taco provides a silky texture that lingers on the palate. Avocado slices bring a buttery, buttery richness that pairs perfectly with the crisp chicken. If you’re craving a kick, a drizzle of hot sauce ties everything together with a subtle heat that won’t overpower.
These toppings aren’t just accessories; they’re the finishing touch that elevates the dish from good to unforgettable. The sour cream’s tang cuts through the cheese’s richness, while the avocado’s smoothness softens the bite. The hot sauce adds a layer of complexity, making each bite a new experience. The combination of these elements ensures that every taco is a balanced, multi‑sensory delight.
The Final Flourish
Fresh cilantro, lime wedges, and a splash of salsa bring the dish to life. The cilantro adds a bright herbal note that lifts the overall flavor profile. Lime wedges provide an extra burst of acidity that you can squeeze over each taco for a personalized touch. A side of quick‑pickled red onions adds a tangy crunch that complements the creamy avocado and cheese.
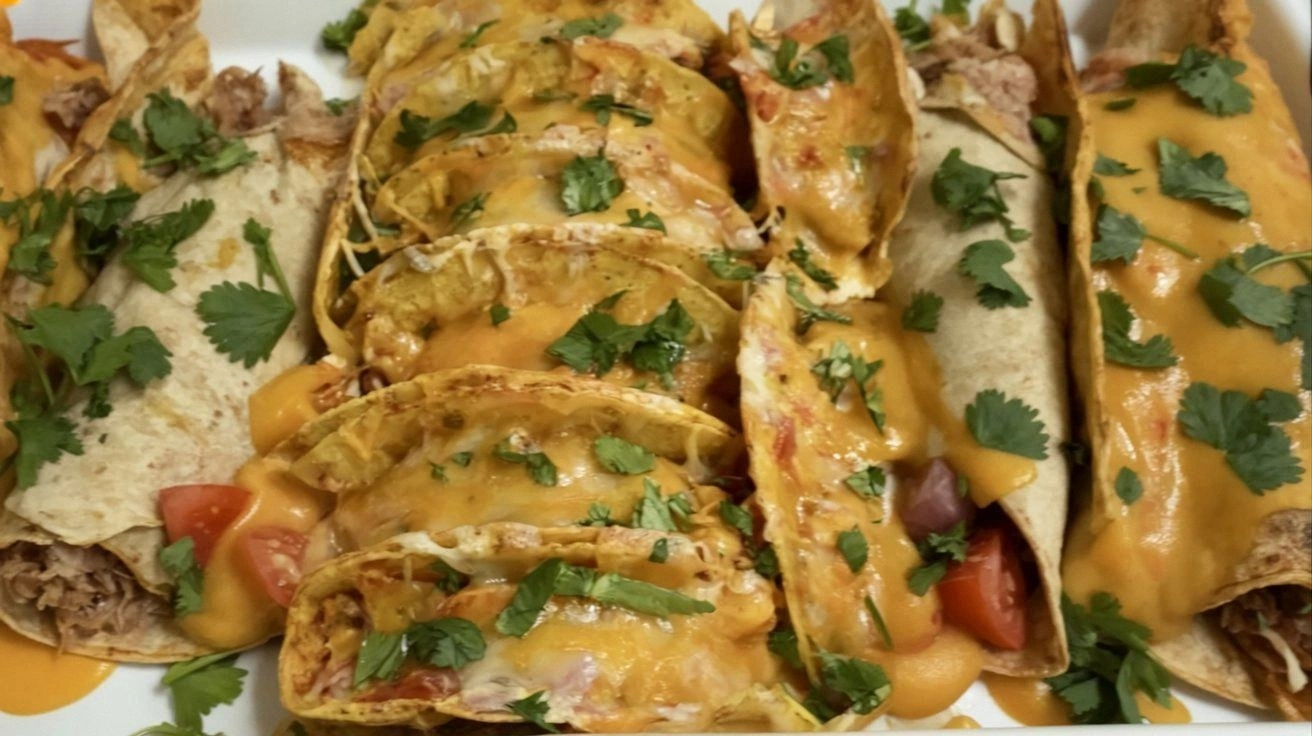
When you plate these tacos, let the colors pop. The golden chicken, the green cilantro, the orange avocado, and the deep brown tortillas create a vibrant visual feast. Garnish with a sprinkle of chopped cilantro and a squeeze of lime to finish. The final flourish isn’t just decorative; it’s the last layer of flavor that ties the dish together.
Everything's prepped? Good. Let's get into the real action...
The Method — Step by Step
- Preheat your oven to 425°F (220°C) and line a rimmed baking sheet with a silicone mat or parchment paper. This high temperature is key to achieving that golden, crisp coating. While the oven warms, assemble your seasoning bowl: combine smoked paprika, cumin, chili powder, garlic powder, onion powder, salt, and pepper. The aroma that begins to fill the kitchen is a promise of the deliciousness to come. Let the oven settle while you move to the next step.
- Trim the chicken thighs into bite‑sized pieces, pat them dry with paper towels, and toss them in the seasoning mix until every piece is evenly coated. The dry coating will hold onto the flour and ensure a crisp exterior. Don’t rush this step—this is where the flavor gets locked in. If you’re in a hurry, a quick shake in a zip‑lock bag works well. The chicken should look like a tiny, savory snowflake.
- In a separate shallow dish, whisk the flour with a pinch of salt. Dip each seasoned chicken piece into the flour, letting the excess fall off, then place on the prepared baking sheet. The flour creates that protective barrier that crisps to perfection. The coating should feel light and airy, not heavy. This is where the magic happens.
- Drizzle a tablespoon of olive oil over the coated chicken to help the flour brown beautifully. The oil also adds a subtle sheen that makes the crust look irresistible. Place the sheet in the preheated oven and bake for 12-15 minutes, until the chicken is cooked through and the coating is golden brown. Keep a close eye on the edges—they should pull away from the sheet and become slightly blistered. This is the moment of truth.
- Now, here’s the trickiest part: adding the cheese. Sprinkle both cheddar and Monterey Jack over the hot chicken and let the heat melt it into a gooey ribbon. If you wait too long, the cheese may burn; if you add it too early, it won’t melt evenly. The cheese should be molten, coating the chicken like velvet. This is where the dish transforms from simple to sensational.
- Remove the sheet from the oven and let the chicken rest for 5 minutes. This brief rest allows the juices to redistribute, keeping the meat moist. While it rests, warm your corn tortillas in a dry skillet or microwave; pliable tortillas are essential for a perfect taco. The rest period also lets the cheese set just enough to hold the toppings together.
- Assemble the tacos: place a few chicken pieces onto each tortilla, then add shredded cheese, diced avocado, a dollop of sour cream, and a sprinkle of cilantro. Finish with a squeeze of fresh lime and a drizzle of hot sauce if you like a kick. The combination of textures—crispy chicken, gooey cheese, creamy avocado—creates a symphony in your mouth. The lime’s bright acidity cuts through the richness, leaving a clean finish.
- Serve immediately with lime wedges on the side, allowing each diner to adjust the tang to taste. The tacos are best when hot, so plate them right away for maximum flavor. If you’re hosting a crowd, keep the assembled tacos warm in a low‑heat oven (about 200°F) until everyone’s ready to dig in.
That’s it — you did it. But hold on, I've got a few more tricks that'll take this to another level...
Insider Tricks for Flawless Results
The Temperature Rule Nobody Follows
Many cooks think a lower oven temperature will keep the chicken tender, but it actually results in a soggy coating. The high heat of 425°F forces the flour to brown quickly, creating that satisfying crunch. Keep the temperature steady and avoid opening the oven door too often; each opening lets heat escape and can ruin the crispness. If you’re baking at a higher altitude, reduce the temperature by 10°F to compensate.
Why Your Nose Knows Best
Before you even taste the first bite, your nose can tell you if the tacos are on track. A bright, citrusy aroma signals the lime has worked its magic, while a faint smoky scent confirms the spices are balanced. If the smell is overwhelmingly greasy, the oil is too heavy. Trust your nose—it’s the ultimate quality control.
The 5‑Minute Rest That Changes Everything
Resting the chicken after baking is not a luxury; it’s a necessity. During the 5‑minute pause, the juices redistribute, preventing the meat from drying out when you bite. The cheese also sets slightly, making it less likely to slide off the tortilla. If you’re in a rush, skip this step at your own peril—your tacos will feel flat.
Cheese Melting Magic
Not all cheeses melt the same way. Cheddar offers a sharp, robust flavor, while Monterey Jack provides a buttery, smooth melt. For a spicier kick, add a sprinkle of pepper jack or a dash of smoked gouda. The key is to add the cheese when the chicken is hot enough to melt it but not so hot that it burns.
Using a Pizza Stone for Crispy Toppings
Place a pizza stone in the oven while it preheats. When you bake the chicken on the stone, the intense, even heat will crisp the coating even further. This trick is especially useful if you’re cooking for a crowd and want each taco to have that perfect crunch.
Quick Pickle Boost
In a small bowl, combine thinly sliced red onion, a splash of white wine vinegar, a pinch of sugar, and a pinch of salt. Let it sit for 10 minutes before adding to the tacos. The quick pickles add a tangy crunch that contrasts beautifully with the creamy avocado and cheese. It’s a simple way to elevate the dish without extra prep time.
Creative Twists and Variations
This recipe is a playground. Here are some of my favorite ways to switch things up:
Spicy Chipotle Chicken
Swap the smoked paprika for chipotle powder and add a splash of chipotle adobo sauce to the seasoning mix. The smoky heat will give the tacos a bold, smoky flavor profile. Top with a drizzle of chipotle mayo for an extra kick. This version is perfect for those who love a spicy, smoky bite.
BBQ Pulled Pork Tacos
Replace the chicken with slow‑cooked pulled pork tossed in your favorite BBQ sauce. The sweet and tangy sauce pairs beautifully with the crispy coating. Add a handful of coleslaw for a crunchy contrast. This version brings a Southern twist to the classic taco.
Vegan Tofu Tacos
Use firm tofu, press it to remove excess moisture, and marinate in lime juice and spices before coating with flour. The tofu will absorb the flavors and crisp up nicely in the oven. Top with vegan cheese and a dollop of cashew cream for a creamy finish. This vegan version is both hearty and satisfying.
Seafood Baja Tacos
Swap the chicken for diced shrimp or scallops seasoned with Old Bay seasoning. The seafood will cook quickly, giving the tacos a fresh, briny flavor. Finish with a squeeze of lime and a sprinkle of chopped cilantro. This version is a light, beach‑inspired twist.
Breakfast Taco Surprise
Use breakfast sausage or bacon instead of chicken for a savory twist. Add a fried or poached egg on top of each taco for a classic breakfast element. Sprinkle with chives and a dash of hot sauce. This version turns dinner into a hearty breakfast that will impress the whole family.
Storing and Bringing It Back to Life
Fridge Storage
Store leftover tacos in an airtight container for up to 3 days. Keep the tortillas separate from the fillings to prevent sogginess. When you’re ready to eat, reheat the chicken and cheese in a skillet until hot, then assemble fresh. The tacos will taste almost as good as when they first came out of the oven.
Freezer Friendly
Freeze the cooked chicken and cheese in a freezer‑safe bag or container for up to 2 months. When reheating, thaw overnight in the fridge, then bake at 350°F for 15 minutes to restore crispness. The tortillas can be toasted separately to avoid sogginess. This method preserves the flavor while keeping the texture intact.
Best Reheating Method
To reheat, preheat your oven to 375°F and place the tacos on a baking sheet for 8-10 minutes, until the cheese is melted and the chicken is hot. Alternatively, use a microwave for 30 seconds per taco, then finish in a skillet for a crisp finish. Add a tiny splash of water before reheating to steam the filling back to perfection, preventing the cheese from drying out.