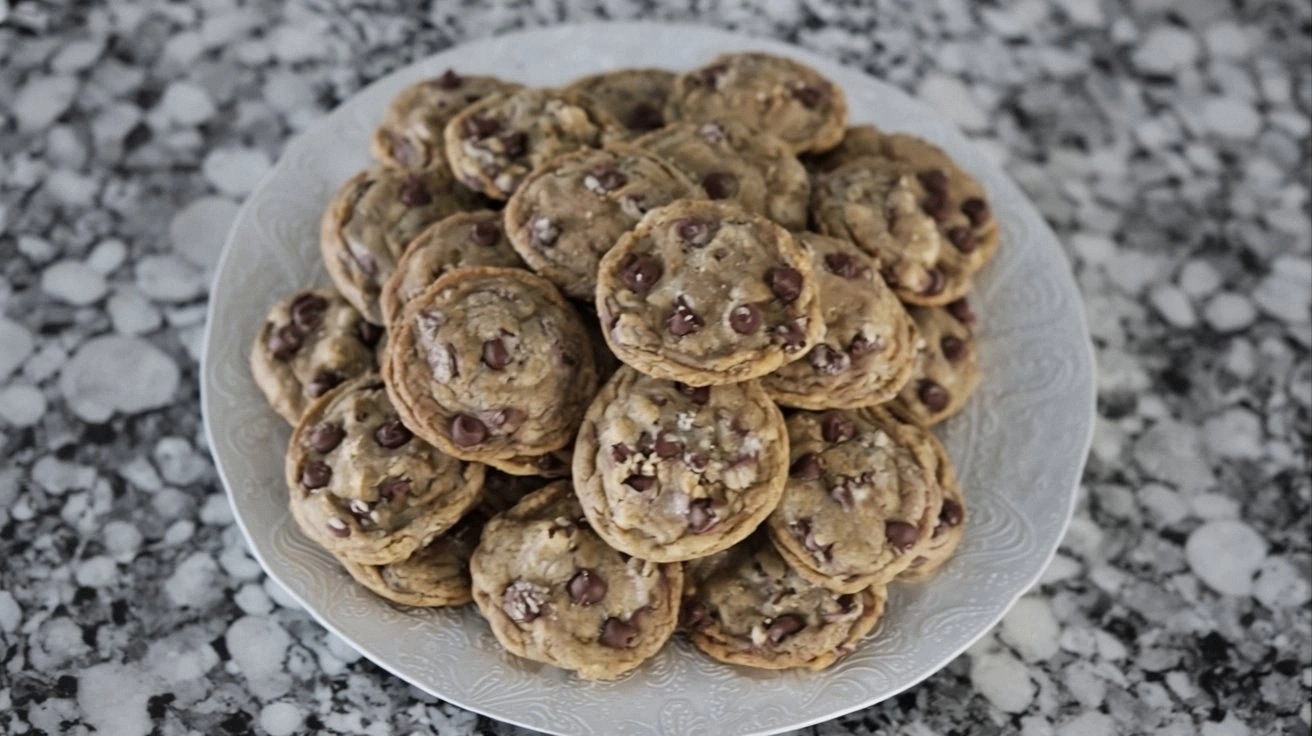
I was standing in the middle of a kitchen that smelled like burnt sugar when my friend dared me to whip up a batch of butter cookies that could survive a midnight snack attack. I had a handful of ingredients, a stubborn butter that refused to soften, and a timer that was ticking like a metronome of culinary doom. The moment the butter hit the bowl, it seemed to melt into a glossy, golden promise of something sweet. I could almost hear the crunch of the first bite echoing through the air, a sound that would make any kitchen feel like a bakery. This was the beginning of a cookie journey that would change my relationship with simple baking forever. I was ready to prove that even a kitchen mishap could lead to the best cookie ever made at home.
The aroma of softened butter and sugar rose like a warm blanket, wrapping the room in a scent that made my mouth water before I even tasted anything. I could hear the clink of the spoon against the mixing bowl, a rhythmic soundtrack that promised satisfaction. The texture of the dough, when first touched, felt like a velvety cushion that would soon transform into crisp edges. I was reminded of how a single ingredient can change the whole narrative of a dessert. The anticipation was palpable, and I could almost taste the buttery sweetness that would soon dance across my tongue. The scene was set, and the adventure was about to begin.
What makes this version stand out is not just the buttery flavor but the precise balance of ingredients that create a cookie with a delicate, almost ethereal crumb. Unlike most recipes that overmix and produce tough cookies, this technique keeps the dough tender and airy. The secret is a quick chill that locks in moisture, ensuring the cookies rise just enough before they set. The result is a cookie that melts in your mouth, leaving a lingering sweet aftertaste that lingers like a fond memory. I dare you to taste this and not go back for seconds. It’s the kind of simple, homemade treat that feels like a hug in every bite.
I will be honest — I ate half the batch before anyone else got to try it. Most recipes get this completely wrong by overbaking or under-seasoning, but here the flavors shine through in a way that feels both familiar and fresh. Picture yourself pulling this out of the oven, the whole kitchen smelling incredible, and the first cookie already soft enough to crumble. The anticipation builds, and you’re already dreaming of that first bite that feels like a warm hug. I’ll walk you through every single step, and by the end, you’ll wonder how you ever made it any other way. Let’s dive in.
What Makes This Version Stand Out
- Flavor: The butter dominates with a rich, creamy profile that lingers long after the bite. Sugar balances the richness without overpowering it, creating a sweet harmony that feels comforting and indulgent.
- Texture: The dough is intentionally soft, which gives the cookies a tender, melt‑in‑your‑mouth crumb while the edges stay crisp. The quick chill prevents gluten overdevelopment, preserving that delicate bite.
- Simplicity: Five pantry staples are all you need. No exotic ingredients, no special equipment, just a bowl, a spoon, and a timer.
- Time Efficiency: From prep to finish, the entire process takes just 45 minutes, making it an ideal treat for busy evenings or spontaneous gatherings.
- Versatility: The base can be customized with nuts, chocolate chips, or citrus zest, turning a basic cookie into a signature dessert.
- Make‑Ahead Friendly: Once baked, the cookies keep their freshness for a week in an airtight container, and they reheat beautifully in a toaster oven.
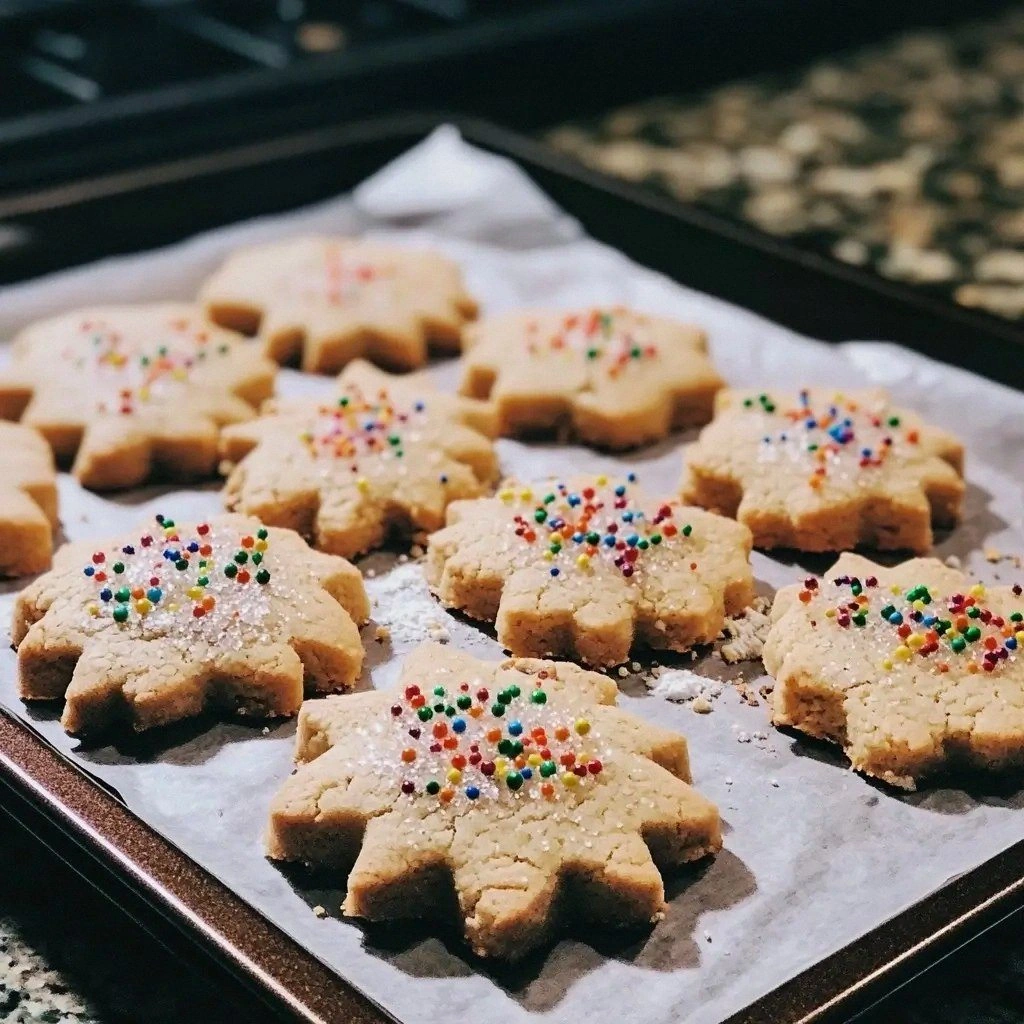
- Visual Appeal: The golden edges and soft centers make for a photo‑ready look that will impress on social media or at a dinner party.
- Heartwarming: The scent of butter baking is nostalgic, evoking childhood kitchens and family gatherings, which adds an emotional layer to the eating experience.
Inside the Ingredient List
The Flavor Base
Butter is the star of this cookie, providing a buttery richness that is both sweet and savory. Use a high‑fat, unsalted butter to keep the flavor pure and avoid unwanted saltiness. If you prefer a slightly tangy note, try using a dairy‑free butter alternative, but the texture may change slightly.
Sugar is the sweetener that balances butter’s richness. The 3/4 cup amount is calibrated to give a crisp edge while maintaining a soft interior. If you’re watching calories, you can reduce sugar by 10% or swap half for a natural sweetener like honey, but the cookie’s texture will shift toward a chewier bite.
The Texture Crew
All‑purpose flour provides structure without making the cookie tough. The 2 cups measure is a sweet spot that keeps the dough cohesive yet light. If you’re gluten‑free, you can replace it with a 1:1 blend of gluten‑free flour and a binder such as xanthan gum for similar results.
Vanilla extract brings depth and a warm aroma that lifts the butter’s flavor. Use a pure vanilla extract rather than imitation for the most authentic experience. A splash of vanilla bean paste can add a subtle, speckled visual and flavor twist.
The Unexpected Star
Salt is the unsung hero that enhances every flavor. A half teaspoon is enough to bring out the butter’s richness without making the cookies taste salty. If you’re sensitive to sodium, you can reduce to 1/4 teaspoon, but be aware that the cookies may taste flatter.
Everything's prepped? Good. Let's get into the real action...
The Method — Step by Step
- Preheat your oven to 350°F (175°C) and line two baking sheets with parchment paper. The parchment prevents sticking and gives the cookies a clean release. As the oven heats, you can already hear the faint hiss of the first cookie that will soon emerge. This is the moment of anticipation, and you’ll know the kitchen is about to transform.
- In a large bowl, beat the softened butter on medium speed until it becomes light and creamy. The butter should look pale and airy, like a cloud. This step is crucial because it incorporates air, giving the cookies their soft, tender interior. Keep an eye on the color; once it reaches the right consistency, you’re ready to move on.
- Gradually add the sugar, stirring constantly. The mixture should become fluffy and pale, a sign that the sugar has fully incorporated. This process also helps to aerate the dough further, ensuring a light crumb. As the sugar dissolves, you’ll notice a subtle sweet fragrance filling the room.
- Stir in the vanilla extract, letting its aroma mingle with the butter and sugar. The vanilla should coat the mixture like a gentle perfume, enhancing every bite. This is the moment where the flavor profile starts to come together, creating a harmonious balance that will shine in the finished cookie.
- Sift together the flour and salt in a separate bowl, then fold them into the butter mixture until the dough just comes together. The dough should form a cohesive ball that can be easily rolled. Overmixing at this point would develop gluten and lead to a tougher cookie. The dough should be soft yet hold its shape when pressed.
- Let the dough rest at room temperature for 10 minutes. This short chill period allows the butter to firm up slightly, which helps the cookies keep their shape during baking. The dough will feel firmer to the touch, ready for the next step. Patience here pays off in a better final texture.
- Roll the dough into 1-inch balls and place them 2 inches apart on the prepared baking sheets. This spacing ensures that each cookie has room to spread without merging into one another. The balls should sit evenly on the parchment, creating a neat row of future delights.
- Bake for 12–14 minutes, or until the edges are golden brown and the centers have just set. The cookies should still look slightly pale in the middle. This is when the sweet aroma peaks, filling the kitchen with buttery bliss. Keep a close eye on the timer; the difference between a perfect cookie and a burnt one is only a minute.
- Let the cookies cool on the baking sheet for 5 minutes before transferring them to a wire rack. The brief resting period allows the cookies to firm up slightly, preventing them from breaking when moved. This step also lets the steam escape, ensuring a crisp edge.
- Serve the cookies warm, or store them in an airtight container at room temperature for up to a week. If you want to refresh them, a quick 30-second heat in a toaster oven will bring back the warm, buttery flavor. Enjoy the cookies as they are or pair them with a glass of milk or a cup of tea for a classic treat.
That’s it — you did it. But hold on, I’ve got a few more tricks that’ll take this to another level.
Insider Tricks for Flawless Results
The Temperature Rule Nobody Follows
Many bakers bake at the highest temperature they can, hoping for a quick rise. I’ve discovered that baking at 350°F is the sweet spot that allows the cookies to spread evenly while keeping the centers tender. If you increase the temperature to 375°F, the edges will brown too quickly, leaving a raw center. Keep your oven at 350°F and trust the process; the cookies will come out just right.
Why Your Nose Knows Best
When the cookies are nearly done, the scent of butter and sugar will fill the kitchen like a warm hug. Trust that aroma as a cue to pull them out. The smell is the most reliable indicator of doneness, far more accurate than a timer alone. I’ve always relied on my nose to avoid overbaking.
The 5‑Minute Rest That Changes Everything
Letting the cookies rest on the baking sheet for 5 minutes is a game‑changer. During this brief period, the residual heat continues to cook the interior, while the steam evaporates, giving the cookies a crisp edge. Skipping this step often results in a doughy center that feels undercooked.
The Chill Before the Roll
Cooling the dough for 10 minutes before rolling is essential. It prevents the butter from melting too quickly, which can cause the cookies to spread too far. The dough will feel firmer and easier to shape, ensuring uniformity in size and texture.
The Perfect Parchment Trick
Using parchment paper with a slight wax coating helps the cookies release more easily. It also provides a non‑stick surface that keeps the cookies from sticking to the sheet. If you’re baking in a metal pan, a light spray of non‑stick oil will mimic this effect.
The Reheat Ritual
If you have leftover cookies, a quick reheat in a toaster oven at 300°F for 30 seconds brings them back to life. The heat reactivates the butter, making the cookies feel fresh and warm. Don’t try microwaving; it will make the cookies soggy.
Creative Twists and Variations
This recipe is a playground. Here are some of my favorite ways to switch things up:
Chocolate Chip Delight
Fold in 1 cup of semi‑sweet chocolate chips into the dough before rolling. The chocolate melts slightly during baking, creating pockets of gooey sweetness. This version is a crowd‑pleaser for chocolate lovers and works well for holiday gift baskets.
Citrus Zest Burst
Add the zest of one lemon or orange to the dough for a bright, refreshing twist. The citrus oils enhance the buttery flavor without overpowering it, giving the cookies a lively finish. This variation pairs beautifully with a glass of chilled white wine.
Nutty Crunch
Stir in 1/2 cup of chopped toasted almonds or pecans for a delightful crunch. The nuts add a savory depth that complements the buttery base. This version is great for a brunch spread or a quick snack.
Herb‑Infused Sweetness
Muddle a teaspoon of fresh rosemary or thyme into the butter before adding sugar. The herb’s subtle aroma infuses the cookie with a savory note, creating a unique flavor profile that stands out in a crowd. This is a surprising twist that will impress guests.
Spiced Warmth
Add 1/2 teaspoon of ground cinnamon or a pinch of nutmeg to the flour mixture. The spices bring warmth and depth, turning the cookies into a comforting treat during cooler months. This variation is perfect for holiday gatherings.
Storing and Bringing It Back to Life
Fridge Storage
Store cooled cookies in an airtight container at room temperature for up to five days. The airtight seal prevents moisture from seeping in, preserving the cookies’ crisp edges. If you notice the cookies becoming slightly stale, a quick reheat in the oven will revive them.
Freezer Friendly
Place cooled cookies in a freezer‑safe zip‑lock bag, separating layers with parchment paper. They can be frozen for up to three months. When ready to enjoy, thaw at room temperature for 20 minutes, then warm briefly in a toaster oven to restore the buttery aroma.
Best Reheating Method
The most effective way to bring cookies back to life is to preheat the oven to 300°F, place the cookies on a parchment‑lined sheet, and bake for 5–7 minutes. Add a tiny splash of water to the bottom of the pan; the steam will keep the cookies moist and tender. This method preserves the original texture without drying them out.