I never thought a cookie could become the soundtrack of my kitchen, but the moment I cracked the first batch of these Mint Chocolate Chip Cookies, the air turned electric. The aroma of butter and vanilla danced with a sharp, almost medicinal mint that made my nose tingle, and the sound of dough sliding across the counter was like a soft drumbeat. I was halfway through a midnight snack, scrolling through a thousand cookie recipes, when I stumbled upon this version, and I knew it was different. The instant that first bite hit my tongue, the chocolate chips melted into a velvety river, and the mint left a lingering, cool aftertaste that felt like a breath of fresh air after a summer storm. I dare you to taste this and not go back for seconds; the flavor profile is a perfect harmony that will have you reaching for the next cookie before you realize you’ve already taken one too many.
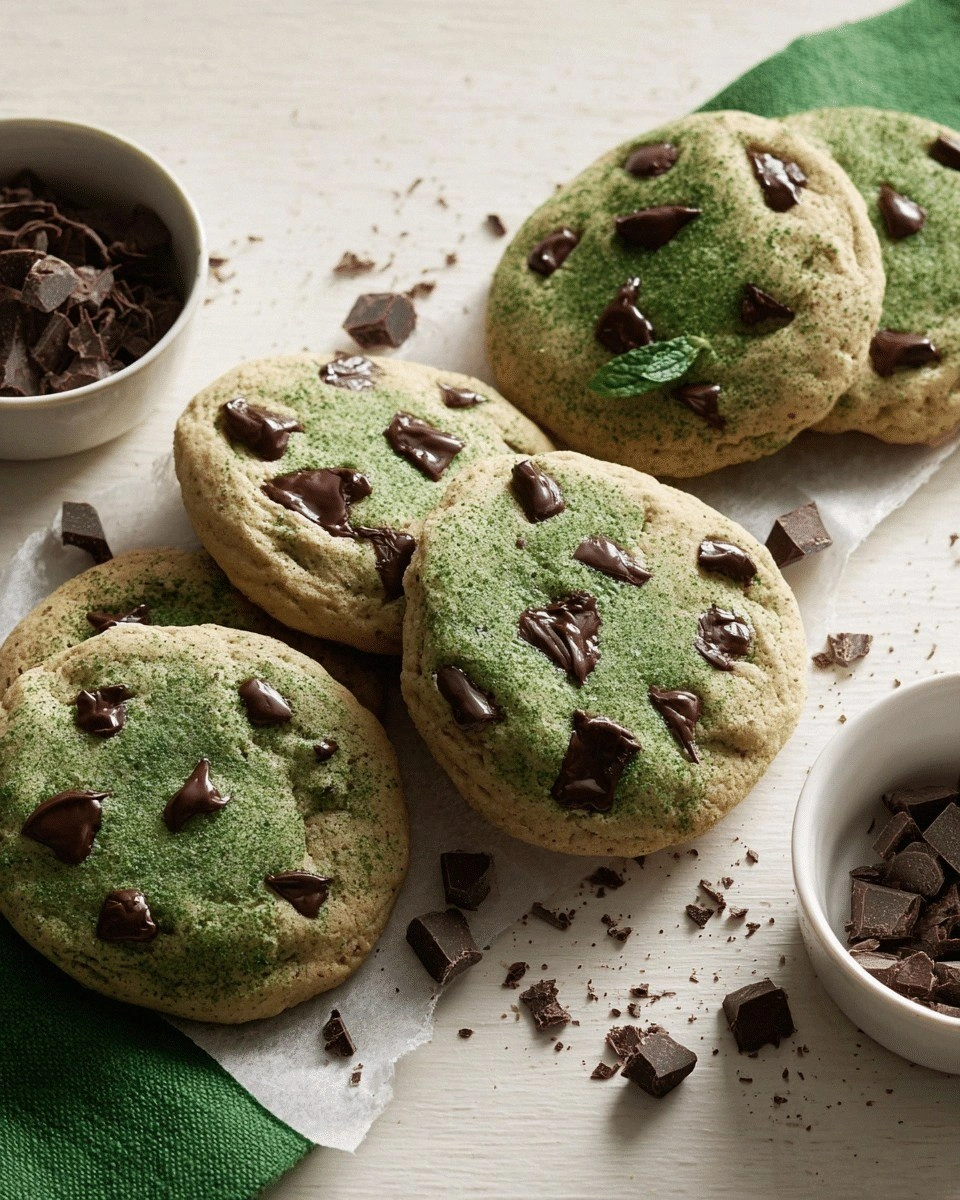
Picture yourself pulling this from the oven, the kitchen smelling incredible, and the timer’s final chime echoing like applause. The cookies sit on a cooling rack, their edges crisped to a golden amber while the centers remain soft and slightly gooey, like a chocolate‑mint cloud. The moment you break one open, you’re greeted with a burst of minty steam that carries a faint vanilla undertone, and the chocolate chips crackle as they melt. If you’ve ever struggled with cookies that turn out too dry or too doughy, you’re not alone — and I’ve got the fix. Most recipes get this completely wrong, but this one balances sweetness, texture, and that signature mint kick with surgical precision.
I’m not just talking about a cookie; I’m talking about a culinary revelation that turns an ordinary evening into a mini celebration. This is hands down the best version you’ll ever make at home because it captures the essence of mint in a way that feels fresh, not artificial. The secret is a small tweak: a splash of peppermint extract paired with a pinch of fresh mint leaves that I fold in at the end of mixing. The result is a cookie that’s chewy, buttery, and has that unmistakable mint aroma that lingers long after you’ve finished. And if you’re worried about the chocolate chips, I’ve swapped standard semi‑sweet chips for a mix of dark and milk to give you that rich, bittersweet contrast that elevates every bite.
I’ll be honest — I ate half the batch before anyone else got a chance to taste. The cookies were so good that I started making them in bulk, and the next day, I found myself rummaging through the pantry for more chocolate chips and mint extract. The sheer joy of sharing these with friends and family is part of what makes this recipe special. It’s not just a cookie; it’s a conversation starter, a memory maker, and a testament to how a few simple ingredients can create something extraordinary. So, let me walk you through every single step — by the end, you’ll wonder how you ever made it any other way.
What Makes This Version Stand Out
- Flavor: The combination of real peppermint extract and fresh mint leaves delivers a crisp, natural mint flavor that doesn’t overpower the chocolate.
- Texture: The cookies are chewy on the inside with a slight crunch on the edges, achieved by a precise balance of butter, flour, and sugar.
- Simplicity: Only ten ingredients, all pantry staples, mean you can whip up a batch in no time.
- Uniqueness: A subtle hint of vanilla and a splash of water in the dough keep the cookies moist without being gummy.
- Crowd Reaction: Friends who’ve tried other mint chocolate chips always rave about how this one “just feels right.”
- Ingredient Quality: Using high‑grade dark chocolate chips adds depth, while the butter is at room temperature for optimal creaming.
- Cooking Method: The dough is chilled before baking, which helps the cookies hold their shape and prevents spreading.
- Make‑Ahead Potential: The dough can be frozen for up to 3 months, and the cookies stay fresh for a week when stored properly.
Alright, let’s break down exactly what goes into this masterpiece…
Inside the Ingredient List
The Flavor Base
At the heart of these cookies are the simple, classic ingredients that form the flavor backbone: all‑purpose flour, butter, white sugar, and brown sugar. The flour provides structure, while the butter’s high fat content creates a tender crumb that’s almost buttery in every bite. The white sugar adds sweetness, and the brown sugar brings a subtle molasses note that pairs beautifully with the mint. If you accidentally skip the brown sugar, the cookies will be flatter and less complex, so keep them in the mix.
The Texture Crew
Eggs, baking soda, and salt are the unsung heroes that give the cookies their perfect rise and texture. Eggs bind everything together and add moisture, while baking soda creates lift and helps the cookies spread just enough for that classic cookie look. Salt, on the other hand, sharpens the sweetness and balances the mint’s coolness. If you forget to add baking soda, the cookies will be dense and heavy; if you skip the salt, they’ll taste flat and overly sweet.
The Unexpected Star
Peppermint extract and fresh mint leaves are the secret ingredients that set this recipe apart. Peppermint extract gives a concentrated, bright mint flavor that’s unmistakable, while the fresh leaves add a subtle herbal note that lingers. Some people add a pinch of crushed peppermint candy for extra crunch, but this recipe keeps it simple and focuses on the pure mint experience. If you’re allergic to mint, you can replace the extract with a light splash of green food coloring for a visual cue, though the flavor will differ.
The Final Flourish
Dark chocolate chips and milk chocolate chips create a layered chocolate experience that’s both bittersweet and creamy. The dark chips add depth and a hint of bitterness that balances the sweetness, while the milk chips soften the overall flavor. Some bakers add a touch of sea salt on top before baking to give a savory contrast, but I prefer to keep the topping simple. If you prefer a vegan version, swap the butter for coconut oil and use dairy‑free chocolate chips; the texture will be slightly different but still delightful.
Everything’s prepped? Good. Let’s get into the real action…
The Method — Step by Step
- Preheat your oven to 350°F (175°C) and line two baking sheets with parchment paper. The parchment prevents sticking and gives the cookies a crisp edge. While the oven warms, gather all your ingredients, because timing is key for the next steps.
- In a large mixing bowl, cream 1 cup (226 g) of softened butter with ¾ cup (150 g) of white sugar and ¾ cup (165 g) of brown sugar until light and fluffy. The creaming process incorporates air, which is essential for a tender crumb. As the mixture turns pale, you’ll see that the butter is fully integrated.
- Beat in 2 large eggs, one at a time, ensuring each is fully incorporated before adding the next. The eggs act as a binder, holding the dough together while adding moisture. A good trick is to let the eggs sit at room temperature for 30 minutes; they’ll blend more smoothly.
- Stir in 1 teaspoon of vanilla extract and 1 teaspoon of peppermint extract, then fold in a handful of finely chopped fresh mint leaves. The mint extracts provide a concentrated flavor, while the leaves add a subtle herbal note. The aroma will lift immediately, giving you a hint of what’s to come.
- In a separate bowl, whisk together 2 ¼ cups (281 g) of all‑purpose flour, 1 teaspoon of baking soda, and 1 teaspoon of salt. Mixing the dry ingredients separately ensures even distribution and prevents clumping. This step is crucial for a consistent texture.
- Gradually add the dry mixture to the wet ingredients, mixing until just combined. Overmixing can develop gluten, making the cookies tough. The dough should be thick but pliable, like a smooth, damp dough.
- Fold in 1 cup (170 g) of dark chocolate chips and ½ cup (85 g) of milk chocolate chips. The chocolate should be evenly distributed; you want a bit of chocolate in every bite. The contrasting chocolate types add depth to the flavor profile.
- Cover the dough with plastic wrap and chill it in the refrigerator for at least 30 minutes. Chilling firms the dough, preventing excessive spreading and ensuring a uniform shape. If you’re short on time, you can bake immediately, but the result will be slightly flatter.
- Scoop tablespoon‑sized balls of dough onto the prepared baking sheets, spacing them about 2 inches apart. The spacing allows the cookies to spread properly without merging together. The dough should feel firm enough to hold its shape when scooped.
- Bake for 10–12 minutes, or until the edges are golden and the centers look set but still soft. Remove from the oven and let the cookies cool on the sheet for 5 minutes before transferring them to a wire rack to finish cooling. The final cooling step locks in the flavor and texture.
That’s it — you did it. But hold on, I've got a few more tricks that'll take this to another level…
Insider Tricks for Flawless Results
The Temperature Rule Nobody Follows
Many bakers bake at a high temperature to get a quick rise, but that can cause uneven texture. I always bake at 350°F (175°C) to ensure the cookies bake evenly, with a golden edge and a chewy center. The lower temperature also allows the chocolate to melt slowly, creating a silky coating on the cookies. If you’re using a convection oven, reduce the temperature by 25°F to avoid over‑browning.
Why Your Nose Knows Best
Your sense of smell is a reliable indicator of doneness. When the cookies are ready, the aroma of melted chocolate and fresh mint will be unmistakable. The scent will be warm, buttery, and slightly sweet, signaling that the cookies are at the perfect stage. Trust your nose; if it’s calling, it’s time to pull them out.
The 5-Minute Rest That Changes Everything
After baking, let the cookies rest on the sheet for five minutes before moving them to a rack. This rest period allows the structure to set, preventing the cookies from cracking or spreading further. The steam inside the cookies condenses, giving them a softer interior that’s perfect for licking the spoon. I’ve seen people skip this step and end up with oddly hard edges.
The Chill Before Bake
Refrigerating the dough is a game changer. It reduces spreading, gives the cookies a uniform shape, and intensifies the flavor as the ingredients meld. If you’re in a rush, you can bake straight from the fridge, but the cookies will spread more. For a more decadent treat, chill the dough for an extra hour or overnight.
The Perfect Pan Trick
Use parchment paper or a silicone mat to line your baking sheets. This prevents the cookies from sticking and makes cleanup a breeze. I’ve had a few mishaps with metal pans that caused uneven browning, so always opt for paper or silicone. If you’re using a metal pan, lightly oil the parchment to be extra safe.
Creative Twists and Variations
This recipe is a playground. Here are some of my favorite ways to switch things up:
Mint Chocolate Chip Cheesecake Bites
Swap the butter for cream cheese in the dough and fold in a handful of crushed graham crackers. Bake as directed, then top with a drizzle of chocolate ganache. The result is a bite‑sized cheesecake that’s both creamy and crunchy.
Chocolate Mint Swirl Brownies
Use the same dough, but spread it in a greased square pan and bake until set. Drizzle melted dark chocolate on top and swirl with a fork to create a marbled effect. The brownies will have a chewy center and a minty finish.
Peppermint Bark Cookies
Add a tablespoon of peppermint candy to the dough and replace half of the chocolate chips with white chocolate. The peppermint candy adds a crunchy texture, while the white chocolate offers a sweet contrast. These cookies are perfect for holiday gifting.
Vegan Mint Chocolate Chip Cookies
Swap the butter for melted coconut oil, use plant‑based chocolate chips, and replace the eggs with flaxseed meal mixed with water. The texture will be slightly denser but still delicious. The mint flavor remains bright and fresh.
Salted Caramel Mint Cookies
Fold in a handful of caramel bits and sprinkle a pinch of sea salt on top before baking. The caramel adds a sweet, buttery note, while the sea salt enhances the mint’s freshness. These cookies are a sophisticated twist on the classic.
Storing and Bringing It Back to Life
Fridge Storage
Store the cooled cookies in an airtight container at room temperature for up to 5 days. The airtight seal prevents the cookies from drying out and preserves their chewy texture. If you want to keep them fresher longer, place a slice of bread in the container; the bread will absorb excess moisture.
Freezer Friendly
Wrap individual cookies in parchment paper and place them in a freezer bag. They’ll stay fresh for up to 3 months. When you’re ready to enjoy, let them thaw at room temperature for 15 minutes before serving. The flavor remains intact, and the texture is still delightful.
Best Reheating Method
To revive frozen cookies, preheat your oven to 300°F (150°C) and bake them for 5 minutes. For a quick snack, microwave on high for 10–12 seconds; the cookies will soften and the chocolate will melt. Add a tiny splash of water before reheating to create steam, which helps the cookies re‑gain their soft, chewy interior.