Ever had that moment when you open the pantry, stare at a jar of bland, store‑bought pepperoncini, and think, “There’s got to be something better”? I’ve been there, standing over a lonely sandwich, feeling the sting of disappointment like a bad joke that never lands. The kitchen was a battlefield that day—my oven was smoking from a burnt garlic bread experiment, the timer had betrayed me, and the only thing left standing was a stubborn craving for something bright, tangy, and just a little naughty. I grabbed the nearest jar of Mezzetta Golden Greek Peperoncini, a handful of jalapeños, and a couple of bell peppers, and set out on a mission that would change my condiment game forever.
The air in my tiny apartment kitchen turned into a symphony of sizzling onions, the sharp snap of garlic hitting the hot pan, and the subtle hiss of olive oil as it warmed. The colors exploded—golden peppers, fiery jalapeños, ruby‑red and sunshine‑yellow bell peppers—all dancing together like a carnival parade. I could already taste the sweet‑heat mingling with the bright acidity of lemon, the briny depth of the peperoncini juice, and a whisper of parsley that would add a fresh green finish. My senses were on high alert, and I could feel the anticipation building like a drumroll before the big reveal.
Most pepperoncini relishes I’ve tried either drown in vinegar or end up as a limp, soggy mess that clings to your fork like a bad habit. This version, however, is a game‑changer: it’s crisp, it’s vibrant, and it packs a punch that makes even the most stoic palate sit up and take notice. The secret? A quick flash‑cook that preserves the crunch, a balanced blend of sweet and spicy, and a dash of parsley that adds a garden‑fresh pop. I’m about to hand you the exact formula that turns a handful of pantry staples into a condiment that can elevate a sandwich, a grilled steak, or even a humble bowl of pasta.
And yes, there’s a tiny twist that most recipes overlook—a splash of the very pepperoncini brine that brings a depth of flavor you’ll swear you’ve never experienced before. I dare you to taste this and not go back for seconds. Let me walk you through every single step — by the end, you’ll wonder how you ever made it any other way.
What Makes This Version Stand Out
- Flavor Explosion: The combination of sweet bell peppers, tangy lemon, and the briny kick of peperoncini juice creates a layered taste that evolves with each bite, making it unforgettable.
- Crunch Factor: A quick sauté of the onions and garlic preserves the crispness of the peppers, so you get that satisfying snap that most relishes lack.
- Simplicity: All you need is a cutting board, a skillet, and ten minutes—no fancy equipment, no complicated steps, just pure, honest flavor.
- Unique Ingredient: The inclusion of Mezzetta’s Golden Greek Peperoncini adds a subtle sweetness that balances the heat from jalapeños, something most generic recipes miss.
- Crowd Reaction: Serve it at a gathering and watch people line up for seconds; it’s the kind of side that sparks conversation and compliments.
- Ingredient Quality: Using high‑quality, jarred peppers means you get consistent texture and flavor, eliminating the guesswork of fresh versus pickled.
- Make‑Ahead Potential: This relish actually improves after a few hours in the fridge as the flavors meld, so you can prep it ahead of time and still wow.
- Versatility: It’s not just a topping; think marinades, sandwich spreads, taco boosts, or a bright salad enhancer—endless possibilities.
Inside the Ingredient List
The Flavor Base
1 cup Mezzetta Golden Greek Peperoncini – These little golden gems bring a subtle sweetness and a mellow heat that forms the backbone of the relish. Skipping them would leave the mix flat, like a song missing its bass line. If you can’t find the golden variety, regular green pepperoncini will work, but expect a slightly sharper profile.
1 cup Mezzetta Sliced Tamed Jalapeno Peppers – The jalapeños add that essential kick that wakes up the palate without overwhelming it. They’re “tamed” for a reason: they’re milder than wild jalapeños, making the relish approachable for most guests. Want more heat? Add a pinch of extra red pepper flakes or a dash of hot sauce.
The Texture Crew
1 cup Red Bell Pepper – Provides a sweet crunch and a vivid splash of color that makes the relish look as good as it tastes. Removing it would diminish both texture and visual appeal. If you’re out of red, a roasted red pepper can be a smoky alternative.
1 cup Yellow Bell Pepper – Balances the red with a sunny, slightly milder sweetness, creating a harmonious color palette. Swapping it for orange bell pepper works, but the visual contrast won’t be as striking.
1 large White Onion – The onion adds depth and a gentle sharpness that rounds out the flavor. A red onion would give a sharper bite; a shallot would be subtler but might not hold up to the heat.
The Aromatic Boost
2 cloves Garlic – Garlic’s aromatic oils are released quickly in hot oil, infusing the entire mixture with a warm, earthy backdrop. Skip it and you’ll miss that comforting undertone that makes the relish feel homey.
1/2 cup Peperoncini Juice – This briny liquid is the secret sauce; it ties all the flavors together and adds a pleasant tang. If you’re watching sodium, you can reduce the amount, but the relish will lose some of its bright zing.
The Final Flourish
2 tablespoons Fresh Lemon Juice – The lemon cuts through the richness, brightening the palate and balancing the heat. A splash of lime works too, giving a slightly different citrus character.
1/2 teaspoon Red Pepper Flakes – Adds a lingering heat that lingers after the first bite. Adjust to taste; more for heat lovers, less for the faint‑hearted.
1/4 cup Freshly Chopped Parsley – This herb adds a fresh, herbaceous finish that lifts the entire dish. If parsley isn’t your thing, cilantro can be a bold substitute, especially for Mexican‑style twists.
2 tablespoons Olive Oil – The oil carries the flavors, gives a silky mouthfeel, and helps the vegetables sauté without sticking. Use extra‑virgin for the best flavor; avoid cheap oils that can taste metallic.
1 teaspoon Salt – Enhances all the flavors, ensuring nothing feels muted. Taste and adjust; the brine already contributes salt, so you might need less.
1/2 teaspoon Black Pepper – A classic seasoning that adds a subtle warmth and depth. Freshly cracked pepper works best.
Everything's prepped? Good. Let's get into the real action...
The Method — Step by Step
First, gather all your ingredients and have them within arm's reach. I like to line them up on the counter like a mini‑assembly line; it makes the process feel like a well‑orchestrated performance. Grab a sharp chef’s knife, a cutting board, and a medium‑sized skillet. The moment you start chopping, you’ll notice the sweet scent of bell peppers filling the kitchen—a promise of what’s to come.
Dice the white onion into fine, uniform pieces. The goal is a size that will soften quickly without turning mushy. As you slice, the onion releases a sharp, almost pungent aroma that signals the start of flavor building. Watch Out: If you over‑chop, the onion may become too fine and dissolve into the oil, losing its textural contribution.
Thinly slice the garlic cloves; a quick mince works, but I prefer a light crush with the side of my knife to keep some larger bits for texture. This ensures you get both the aromatic oils and a pleasant bite of garlic in the final relish. Toss the garlic into a bowl with the chopped onion and set aside.
Heat the skillet over medium‑high heat and add the 2 tablespoons of olive oil. When the oil shimmers—think of a calm lake catching the sunrise—you know it’s ready. Drop the onion and garlic mixture into the pan, stirring constantly. You’ll hear a gentle sizzle that’s music to any home chef’s ears; this is the moment where flavor starts to develop.
After about a minute, when the onions become translucent but still retain a slight crunch, add the diced red and yellow bell peppers along with the sliced jalapeños and golden pepperoncini. Stir everything together, letting the vegetables get a quick sear.
Kitchen Hack: If you want extra crunch, blanch the bell peppers for 30 seconds in boiling water, then shock them in ice water before adding to the skillet.Season the mix with 1 teaspoon of salt, ½ teaspoon of black pepper, and the red pepper flakes. The salt will draw out moisture from the peppers, intensifying their natural sweetness. Keep stirring; you’ll notice the colors deepening and the aroma becoming more complex, a sign that the flavors are marrying nicely.
Now, pour in the ½ cup of peperoncini juice and the 2 tablespoons of fresh lemon juice. The liquid should hiss gently as it meets the hot pan, releasing a fragrant steam that smells like a Mediterranean garden after rain. Let the mixture simmer for just 2‑3 minutes—no more—so the peppers stay crisp while the flavors meld. Watch Out: Over‑cooking will turn the peppers soggy and dilute the bright acidity.
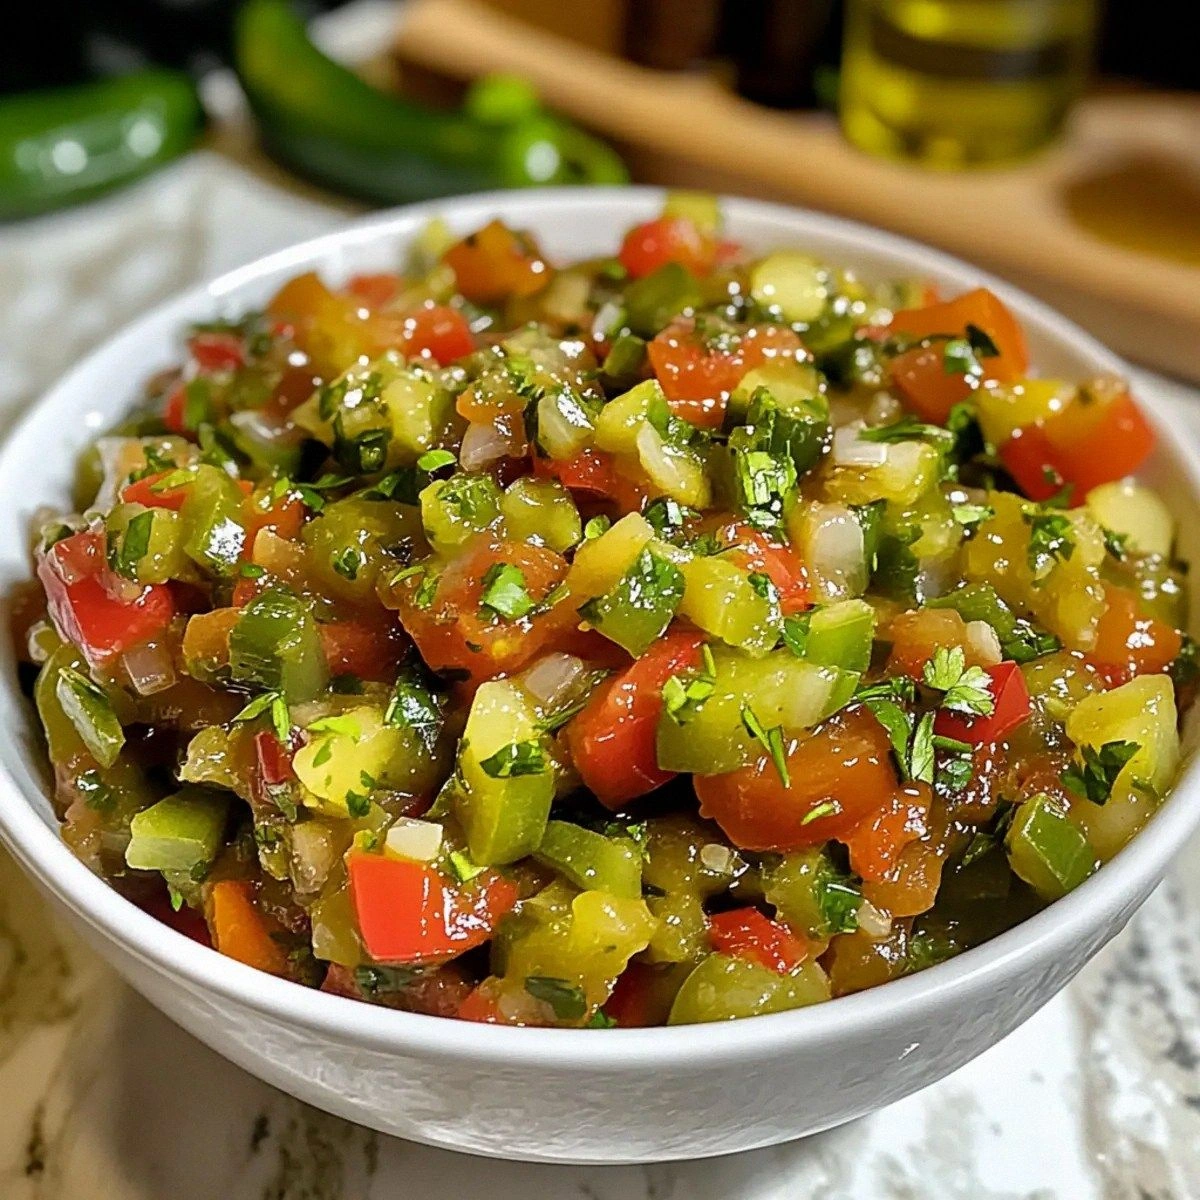
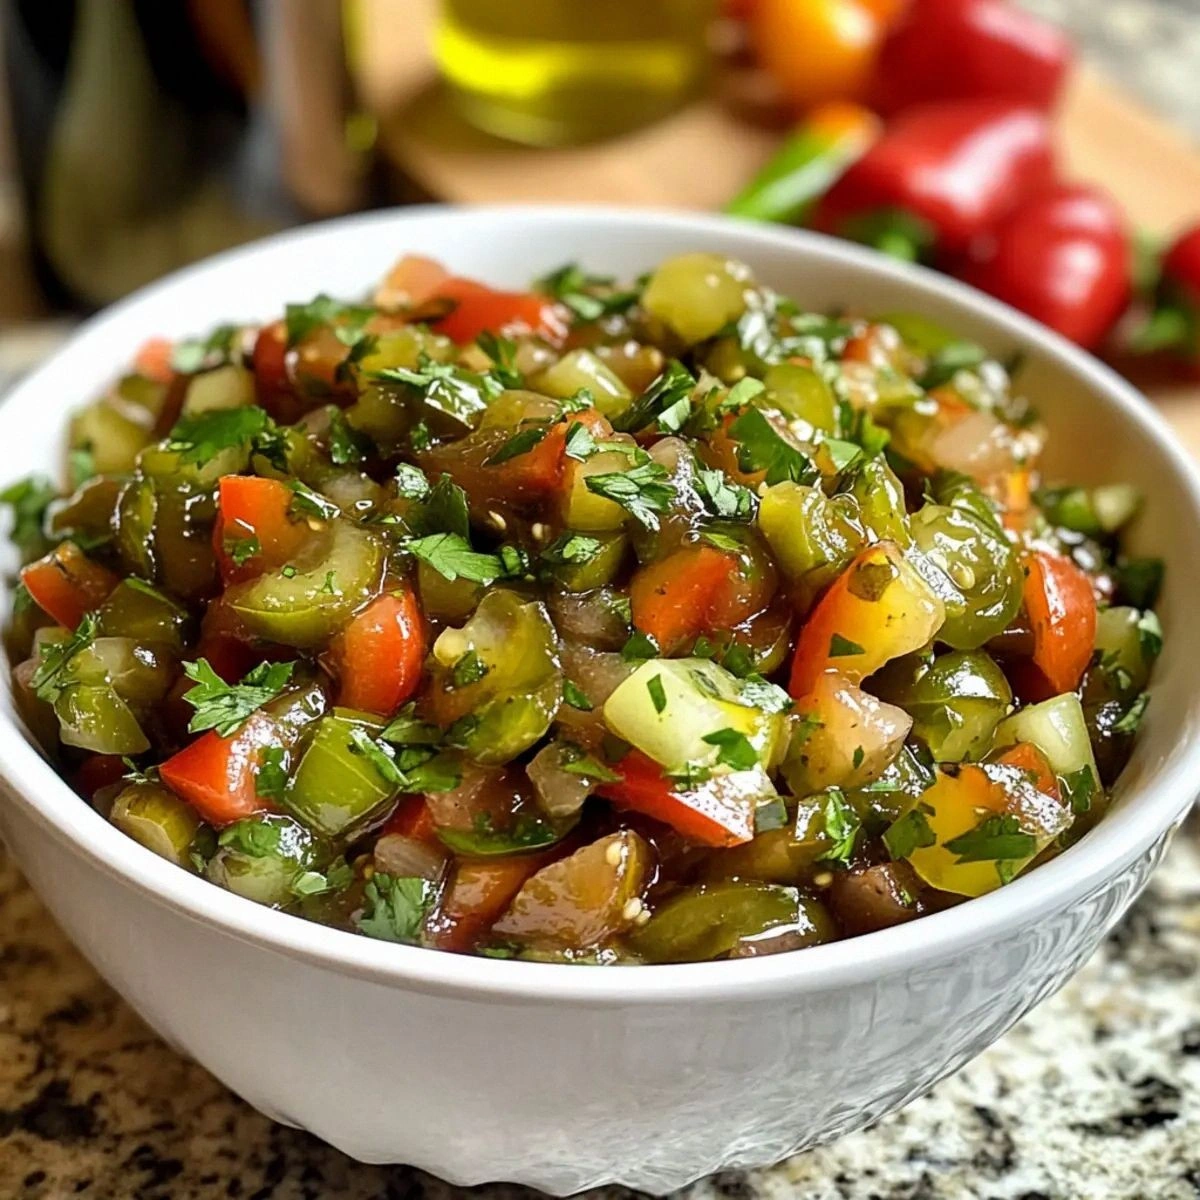
Remove the skillet from heat and fold in the ¼ cup of freshly chopped parsley. The parsley’s bright green flecks should contrast beautifully against the golden‑orange medley. Taste and adjust seasoning if needed—perhaps a pinch more salt or an extra splash of lemon if you like it zingier.
Transfer the hot relish to a clean glass jar, let it cool to room temperature, then seal and refrigerate for at least 30 minutes. This resting period is where the magic truly happens; the flavors continue to intertwine, creating a depth that’s impossible to achieve immediately. I’ll be honest — I ate half the batch before anyone else got to try it, and the leftovers only got better.
That's it — you did it. But hold on, I've got a few more tricks that'll take this to another level...
Insider Tricks for Flawless Results
The Temperature Rule Nobody Follows
Most home cooks think “high heat = faster cooking,” but with this relish, medium‑high is the sweet spot. Too hot and the peppers will release too much water, turning the mixture soggy; too low and the onions won’t develop that subtle caramelization. I always keep a hand on the skillet, feeling the heat through the handle—if it feels like a summer day, you’re good.
Why Your Nose Knows Best
Never rely solely on a timer when sautéing onions and garlic; trust the scent. When the onions turn fragrant and the garlic releases a nutty aroma, you know the base is ready. If you smell a sharp, raw garlic scent, keep stirring a bit longer—this is the moment of truth.
The 5‑Minute Rest That Changes Everything
After you finish cooking, let the relish sit uncovered for five minutes before sealing. This short rest lets excess steam escape, preventing a soggy jar and preserving the crunch. A friend tried skipping this step once — let's just say the texture was a disappointment.
Balancing Acid with Brine
Peperoncini juice already carries acidity, so the lemon should be added sparingly. I recommend tasting after adding half the lemon juice, then deciding if you need that extra zing. The goal is a harmonious balance where no single element dominates.
Pre‑Chop and Freeze for Future Use
If you love this relish, consider chopping all the veggies in bulk and freezing them in zip‑top bags. When you’re ready to make a batch, just dump the frozen mix into the skillet—no thawing needed. The texture remains crisp, and you’ll have a pantry‑ready flavor booster whenever cravings strike.
Creative Twists and Variations
This recipe is a playground. Here are some of my favorite ways to switch things up:
Smoky Chipotle Twist
Swap the jalapeños for chipotle peppers in adobo sauce and add a teaspoon of smoked paprika. The result is a deep, smoky relish perfect for grilled meats and tacos.
Herbaceous Basil Burst
Replace parsley with fresh basil and add a handful of sun‑dried tomatoes. This Mediterranean spin pairs beautifully with crusty bread and goat cheese.
Sweet‑Heat Asian Fusion
Introduce a tablespoon of honey, a splash of soy sauce, and a pinch of toasted sesame seeds. The sweet‑heat combo works wonders on stir‑fry noodles or as a topping for bánh mì.
Pickled Veggie Remix
Include finely diced pickles, carrots, and cauliflower for a crunchy, tangy twist reminiscent of a classic Italian antipasto.
Vegan Cheese Companion
Blend the finished relish with cashew cream and nutritional yeast for a spread that mimics a cheesy dip, perfect for vegans and dairy‑free diners.
Spicy Citrus Splash
Add a teaspoon of orange zest and a dash of hot sauce for a bright, citrusy heat that lifts seafood dishes like grilled shrimp or baked salmon.
Storing and Bringing It Back to Life
Fridge Storage
Keep the relish in an airtight glass jar for up to two weeks. The flavors will continue to meld, becoming richer each day. For optimal texture, store it in the vegetable crisper where temperature fluctuations are minimal.
Freezer Friendly
Portion the relish into freezer‑safe silicone bags, squeeze out excess air, and freeze for up to three months. Thaw in the refrigerator overnight; the texture remains surprisingly crisp.
Best Reheating Method
When you’re ready to serve, gently warm the relish in a skillet over low heat for 2‑3 minutes, adding a tiny splash of water if it looks dry. This steam‑back technique revives the crunch and restores the bright flavors without overcooking.