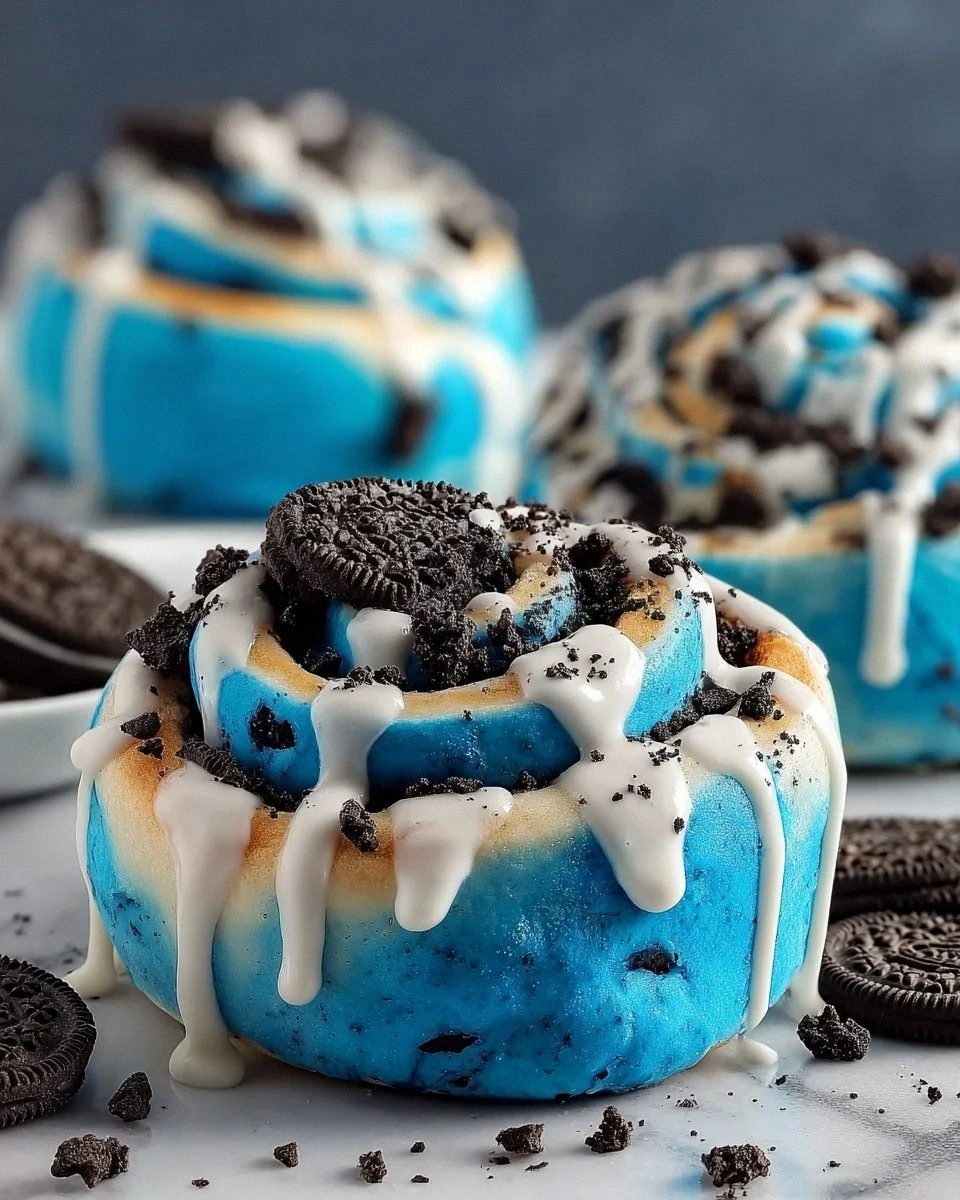
I was standing in my kitchen, staring down a half‑melted marshmallow disaster that had turned my countertop into a sticky battlefield. My roommate had dared me to create something that would make our late‑night snack cravings vanish forever, and I thought, why not combine the childhood staple of Rice Krispie treats with the cookie‑crunch royalty of Oreos? The moment the butter hit the pan, a buttery perfume rose like a warm hug, and the sound of the marshmallows bubbling was a promise of sweet surrender. I could already taste the crispy crunch of the cereal flirting with the creamy, chocolatey crunch of the Oreo crumbs, all wrapped in that unmistakable gooey marshmallow blanket.
The kitchen was a symphony of senses: the bright white of the marshmallows melting, the faint crackle of the cereal as it hit the butter‑infused pot, the dark specks of crushed Oreos scattering like tiny chocolate meteors, and the subtle vanilla aroma that whispered “comfort” from the back of the room. My hands were slick, the spoon was warm, and the whole scene felt like a science experiment that I was absolutely convinced would work. I’m not exaggerating when I say this version is hands down the best version you’ll ever make at home – it’s the kind of treat that makes you question every other dessert you’ve ever tried.
Most recipes get this completely wrong. They either drown the cereal in too much butter, or they forget the Oreo crunch entirely, leaving you with a bland, soggy slab that tastes like a sad after‑school snack. Here’s what actually works: a precise butter‑to‑marshmallow ratio, a quick melt that preserves the cereal’s airy structure, and a generous fold‑in of crushed Oreos at the perfect moment. I dare you to taste this and not go back for seconds – the balance is that addictive.
I’ll be honest — I ate half the batch before anyone else got to try it, and that was the best mistake I’ve ever made. The secret twist? I add a splash of vanilla extract right before the final stir, which lifts the whole flavor profile into a realm that feels both nostalgic and sophisticated. Picture yourself pulling this out of the pan, the whole kitchen smelling incredible, and the first bite delivering a snap, a melt, and a crunch all at once. Okay, ready for the game‑changer? Let me walk you through every single step — by the end, you’ll wonder how you ever made it any other way.
What Makes This Version Stand Out
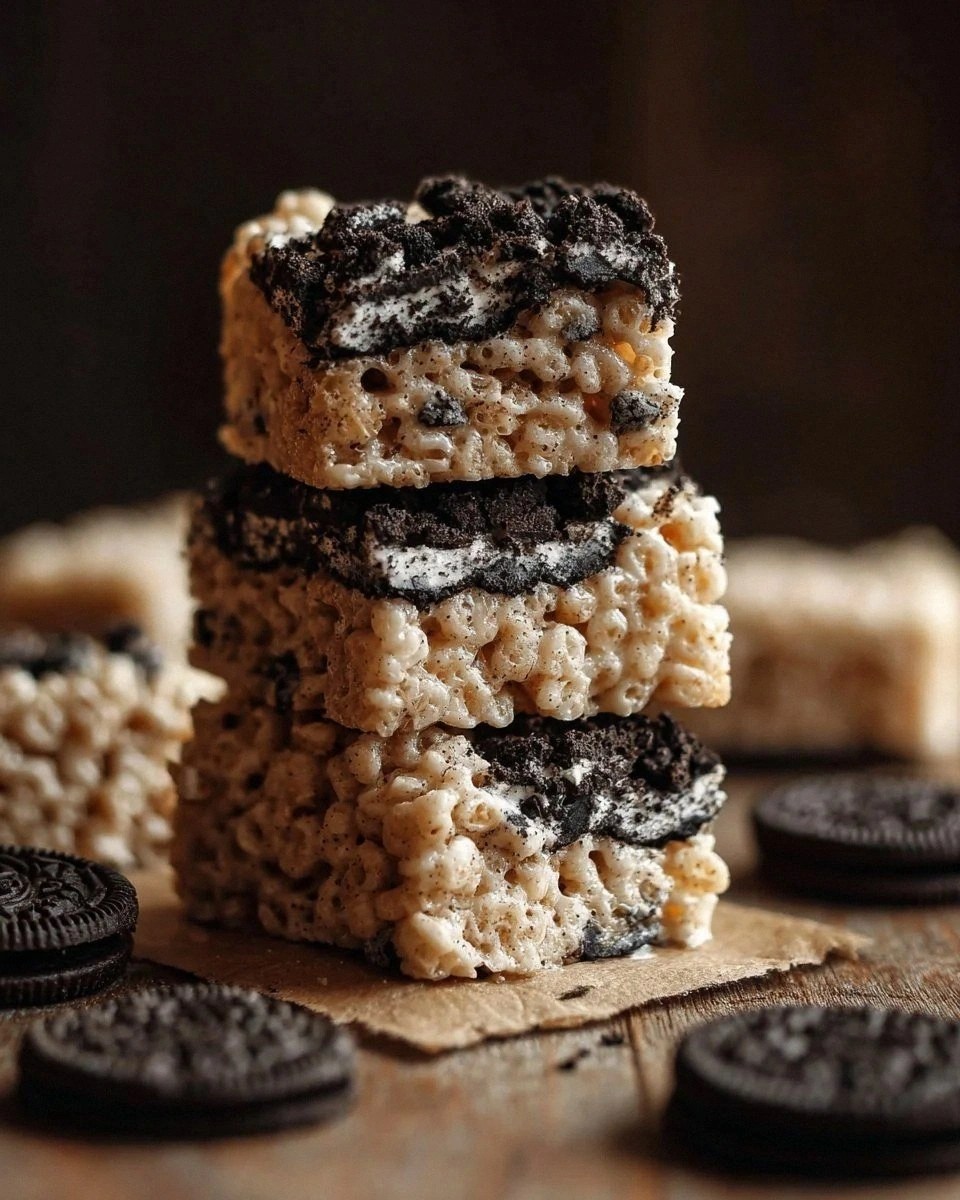
- Texture: The cereal stays light and airy while the Oreo crumbs add a satisfying crunch that doesn’t get soggy.
- Flavor: A buttery marshmallow base amplified by vanilla creates a sweet canvas for the chocolate‑cream Oreo bursts.
- Simplicity: Only five core ingredients, a single pot, and a 30‑minute timeline – perfect for lazy weekends.
- Uniqueness: The crushed Oreo layer is folded in at the last minute, preserving its texture and preventing it from melting into a uniform brown mush.
- Crowd Reaction: Guests invariably ask for the recipe, and you’ll see the same wide‑eyed awe you get when you pull a fresh batch of brownies out of the oven.
- Ingredient Quality: Using real butter (not margarine) and fresh mini marshmallows makes the whole thing taste like it was made in a gourmet bakery.
- Method: The gentle melt‑stir technique avoids over‑cooking, keeping the marshmallows glossy and the cereal crisp.
- Make‑Ahead Potential: This treat keeps its texture for days when stored properly, and you can even freeze individual squares for later indulgence.
Inside the Ingredient List
The Flavor Base
The butter is the unsung hero of this recipe. It creates a glossy, buttery sheen that carries the marshmallow’s sweetness and prevents the cereal from clumping together. If you skimp on butter, the mixture will feel dry and the flavor will be flat – you’ll miss that buttery kiss that makes every bite feel like a hug. You can swap the unsalted butter for a salted version, but be sure to reduce any added salt elsewhere, because the Oreo cookies already bring a subtle salty note.
The Texture Crew
Rice Krispies cereal is the backbone of the treat. Its light, airy structure expands when coated in the marshmallow mixture, giving you that iconic “crunch that shatters like thin ice” sensation. If you use a different puffed rice cereal, you might end up with a denser texture that doesn’t hold up as well. I recommend buying the original Kellogg’s brand for consistency, but any plain puffed rice will do in a pinch.
The Unexpected Star
Mini marshmallows are the glue that binds everything together. Their tiny size ensures they melt quickly and evenly, creating a smooth, glossy coating that doesn’t turn grainy. If you only have regular marshmallows, chop them into small pieces before adding them to the pot – the goal is the same rapid melt. The vanilla extract is the secret weapon that lifts the entire flavor profile, turning a simple sweet treat into something with depth and sophistication.
The Final Flourish
Crushed Oreo cookies are the show‑stopper. Their chocolate‑cream filling adds a creamy, slightly bitter counterpoint to the sweet marshmallow, while the cookie pieces provide a satisfying crunch. If you skip the Oreo, you’ll still have a decent treat, but you’ll miss the signature flavor that makes this recipe unforgettable. For a twist, try using double‑stuf Oreos for an even richer cream center, or substitute chocolate wafer cookies for a lighter bite.
Everything’s prepped? Good. Let’s get into the real action…
The Method — Step by Step
Gather all your ingredients and equipment before you start. You’ll need a large 4‑quart saucepan, a sturdy wooden spoon, a 9×13‑inch baking pan lined with parchment, and a measuring cup for the cereal. This is the moment of truth: once the butter hits the pan, the whole process moves forward at a rapid pace, so have everything within arm’s reach. I always set a timer for 2 minutes as a reminder not to get distracted.
Kitchen Hack: Use a silicone spatula to scrape the bottom of the pot – it prevents the marshmallows from scorching while still allowing a smooth melt.Place the butter in the saucepan over medium‑low heat. As it begins to melt, you’ll hear a gentle sizzle that’s absolute perfection – that sizzle when it hits the pan? It tells you the butter is hot enough to coat the marshmallows without burning. Let it melt completely, swirling the pot so the butter coats the entire surface. If you notice any browning, lower the heat immediately; you want a clear, golden pool of butter.
Add the mini marshmallows to the melted butter. Stir constantly with a wooden spoon, and watch the marshmallows puff up like tiny clouds. Within 2‑3 minutes the mixture should become a smooth, glossy river of sweetness. This is the part where you must stay vigilant – over‑cooking can cause the marshmallows to turn grainy, ruining the texture. The scent will become richer, and you’ll know you’re on the right track when the mixture looks like molten caramel.
Watch Out: If the mixture starts to bubble aggressively, reduce the heat. A rapid boil can cause the sugars to caramelize too quickly, leading to a bitter aftertaste.Stir in the vanilla extract. This tiny splash is pure magic, lifting the entire flavor profile and adding a subtle floral note that balances the chocolate of the Oreos. The vanilla should blend in seamlessly, creating a faint aroma that makes your kitchen feel like a bakery. Keep stirring for another 30 seconds to ensure it’s fully incorporated.
Remove the pot from heat and immediately dump the Rice Krispies cereal into the marshmallow‑butter mixture. The moment the cereal hits the hot mixture, you’ll hear a soft crackle as it absorbs the gooey coating. Fold gently but quickly with a spatula, ensuring every piece is evenly coated. This is where the texture magic happens – the cereal stays light and airy, and the marshmallow coating clings without making it soggy.
Now, the Oreo moment. Sprinkle the crushed Oreo cookies over the top of the cereal‑marshmallow blend. Using a gentle folding motion, incorporate the crumbs so they are distributed throughout the mixture. The Oreo pieces should stay distinct, creating pockets of chocolate‑cream surprise in every bite. If you over‑mix, the cookies will break down into a uniform brown mush – avoid that at all costs.
Kitchen Hack: Crush the Oreos with a rolling pin while they’re still in the bag; the bag prevents crumbs from scattering and gives you perfect bite‑size pieces.Transfer the mixture into the prepared baking pan. Press down firmly with a piece of parchment or a flat spatula, but do not over‑compress – you want the treat to hold together while still retaining that airy bite. The surface should be level, with a few visible Oreo crumbs peeking out for visual appeal. Let it sit for 5 minutes to set; the steam will continue to soften the marshmallow just enough for a perfect slice.
Cool completely at room temperature, then cut into squares or bars. I recommend using a sharp, warmed knife – dip the blade in hot water, wipe dry, and slice. The warm blade glides through the treat without dragging crumbs, giving you clean edges. This final step is the climax: the first bite should deliver a crunchy snap, a melt‑in‑your‑mouth marshmallow, and a burst of Oreo cream that makes you close your eyes in bliss.
That’s it — you did it. But hold on, I’ve got a few more tricks that’ll take this to another level. Stay with me here — this is worth it.
Insider Tricks for Flawless Results
The Temperature Rule Nobody Follows
Keep the heat on medium‑low throughout the melt. High heat can scorch the butter, creating a burnt flavor that overpowers the delicate vanilla. I once tried a “fast‑track” method on high heat and ended up with a bitter, caramelized mess. The rule of thumb: the butter should melt, not sizzle, and the marshmallows should swirl slowly, forming a glossy river.
Why Your Nose Knows Best
Your sense of smell is the best indicator that the marshmallows are ready. When the aroma shifts from sugary to a warm, buttery caramel, you’re at the perfect point to add the cereal. If you rely solely on a timer, you might miss that subtle transition. Trust the nose; it’s the ultimate kitchen gauge.
The 5‑Minute Rest That Changes Everything
After you press the mixture into the pan, let it rest untouched for exactly five minutes. This short pause allows the marshmallow to set just enough so the bars hold together, yet remain soft enough to bite through effortlessly. Skipping this rest results in a crumbly mess that falls apart when you try to cut it. I’ve seen novices rush this step and end up with a sad, crumbly slab.
Oreo Crunch Preservation
If you love that Oreo crunch, fold the crumbs in at the very end, right before transferring to the pan. Adding them earlier causes the moisture from the marshmallow to dissolve the cookie’s texture, turning them into a uniform brown paste. The late‑stage fold keeps each Oreo piece distinct, delivering that signature snap in every bite.
The Double‑Layer Technique
For an extra‑impressive presentation, split the mixture in half. Press the first half into the pan, sprinkle a thin layer of extra crushed Oreos, then add the second half and press again. This creates a visible Oreo “vein” that runs through the middle, making each slice look like a work of art. It’s a small extra step that pays off in visual wow factor.
Creative Twists and Variations
This recipe is a playground. Here are some of my favorite ways to switch things up:
Peanut Butter Swirl
Add a tablespoon of creamy peanut butter to the butter‑marshmallow melt before stirring in the cereal. The nutty undertone pairs beautifully with the chocolatey Oreos, creating a flavor reminiscent of a peanut‑butter cup. Perfect for anyone who loves a salty‑sweet combo.
White Chocolate Dream
Replace the regular Oreos with white chocolate Oreo cookies, or drizzle melted white chocolate over the finished bars. The pale sweetness elevates the treat to a more elegant, dessert‑grade experience, ideal for a holiday gathering.
Fruit‑Infused Crunch
Fold in a handful of dried cranberries or chopped dried apricots along with the Oreo crumbs. The tart fruit pieces cut through the richness, offering a surprising burst of flavor that keeps the palate excited.
Spicy Kick
Add a pinch of cayenne pepper or a dash of chili powder to the butter‑marshmallow mixture. The subtle heat contrasts with the sweet base, creating a sophisticated flavor profile that’s perfect for adventurous eaters.
Gluten‑Free Version
Swap the Rice Krispies for a gluten‑free puffed rice cereal and use gluten‑free Oreo cookies. The texture remains just as light, and the treat stays safe for those with gluten sensitivities without sacrificing flavor.
Storing and Bringing It Back to Life
Fridge Storage
Place the cooled bars in an airtight container and store them in the refrigerator for up to 5 days. The cool environment keeps the marshmallow from drying out, while the Oreo crumbs stay crisp. If you notice the edges hardening, let the bars sit at room temperature for 10 minutes before serving.
Freezer Friendly
Wrap individual squares tightly in plastic wrap, then place them in a freezer‑safe bag. They’ll keep for up to 2 months. When you’re ready to enjoy, let them thaw at room temperature for 15 minutes, then give them a quick microwave zap (10‑15 seconds) to revive the gooey interior.
Best Reheating Method
To bring a refrigerated bar back to its peak, preheat your oven to 300°F (150°C), place the bar on a parchment‑lined tray, and warm for 5‑7 minutes. Add a tiny splash of water (about a teaspoon) to the tray before heating – the steam will re‑hydrate the marshmallow, restoring that melt‑in‑your‑mouth texture without making it soggy.