It was a late‑night craving that started it all: a craving for chocolate so intense that I stared at the fridge, half‑expecting it to transform into a chocolate bar. I pulled out every cocoa‑infused item I could find—dark chocolate, cocoa powder, even a leftover chocolate cake I’d made the week before—and the kitchen began to smell like a Willy Wonka factory on a sugar rush. The moment the chocolate melted into a glossy, velvety sauce, I realized I’d stumbled onto a recipe that would become my new obsession.
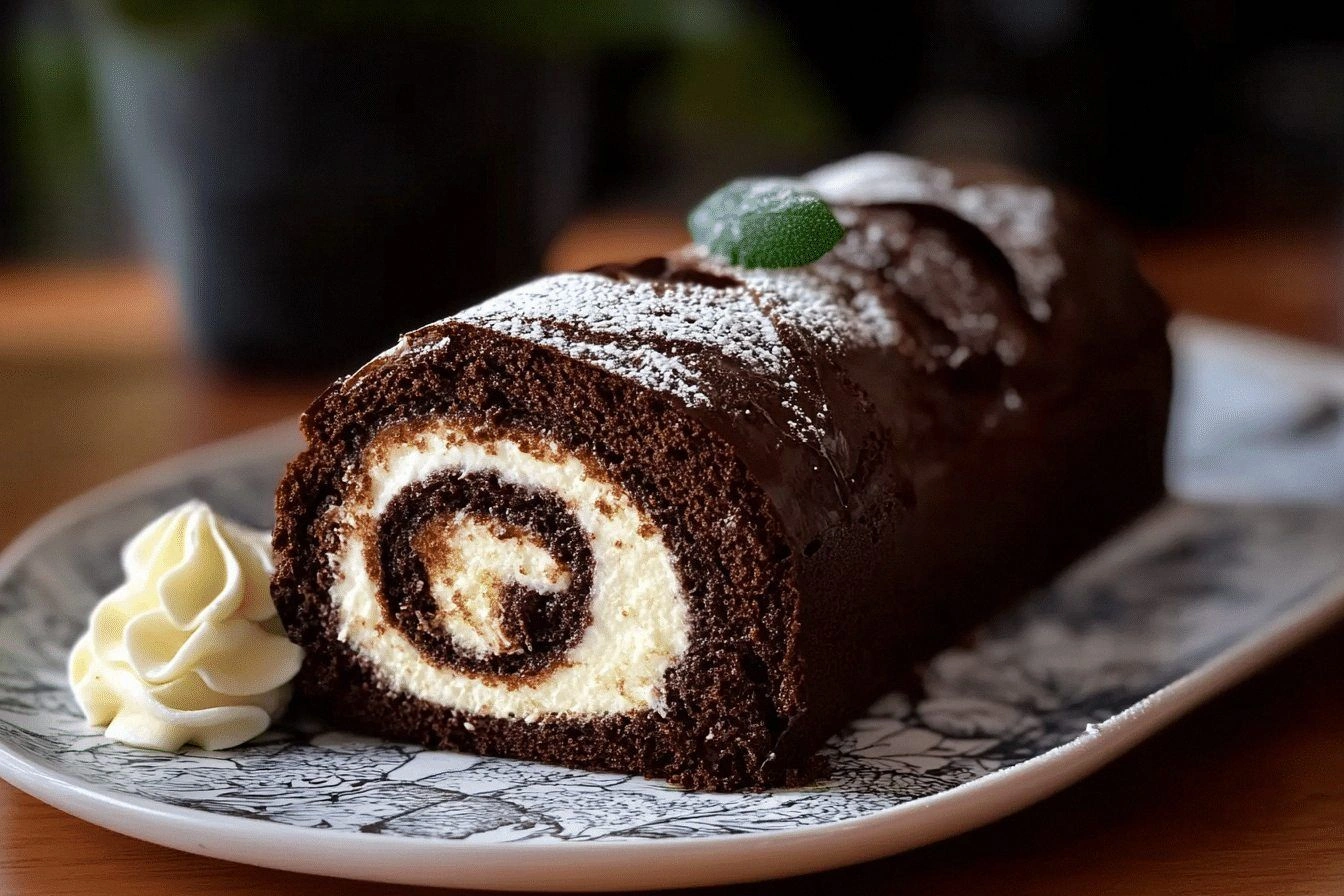
Picture this: the batter, light as a cloud yet rich enough to satisfy an adult sweet tooth, spreads into a golden, buttery sheet on the pan. As it bakes, the aroma rises, a sweet, chocolatey perfume that makes the whole house feel like a cozy bakery. When you flip it, the edges curl just so, the crumb soft as a cloud, and the center glistens with a glossy sheen that hints at the ganache waiting inside. The first bite is a burst of chocolate that coats your tongue like velvet, followed by a whisper of airy sponge that melts into a cloud of whipped cream. It’s a symphony of textures—crisp edges, silky filling, and a buttery finish—that makes every bite an adventure.
I dare you to taste this and not go back for seconds. Most recipes get this completely wrong, either over‑baking the sponge or under‑filling the roll, but this version balances everything like a fine orchestra. The secret? A perfectly measured mix of cocoa and flour that keeps the sponge tender yet firm, a generous swirl of dark chocolate in the filling that deepens the flavor, and a glossy ganache that ties it all together. It’s hands down the best version you’ll ever make at home, and trust me, it’s not just a cake—it's a chocolate experience that will leave your guests begging for the recipe.
If you’ve ever struggled with chocolate cakes that turn out dense or uneven, you’re not alone—I've been there. The trick lies in the simple science of combining the right ingredients at the right time, and a few kitchen hacks that I’ll share along the way. Picture yourself pulling this out of the oven, the whole kitchen smelling incredible, the roll shimmering with a glossy ganache that invites you to slice it open. The anticipation alone is enough to make your mouth water. Stay with me here—this is worth it.
What Makes This Version Stand Out
- Taste: A layered chocolate experience—light cocoa sponge, rich dark chocolate filling, and a buttery ganache that balances sweetness with depth.
- Texture: The sponge is airy yet firm, the filling is silky and creamy, and the ganache adds a glossy, melt‑in‑your‑mouth finish.
- Simplicity: Only nine ingredients, all common pantry staples, making it a breeze even for novice bakers.
- Uniqueness: The triple chocolate concept—sponge, filling, ganache—creates a cake that feels indulgent without being overly heavy.
- Crowd Reaction: Guests always ask for the recipe after the first bite, and I’ve seen people order it for special occasions.
- Ingredient Quality: Using high‑quality dark chocolate and fresh butter elevates the flavor profile dramatically.
- Cooking Method: The sheet pan technique ensures even baking and easy rolling, eliminating the common pitfalls of uneven cakes.
- Make‑Ahead Potential: It can be assembled a day ahead, refrigerated, and still taste freshly baked.
Alright, let's break down exactly what goes into this masterpiece...
Inside the Ingredient List
The Flavor Base
Cocoa powder is the heart of this cake, providing the deep chocolate flavor that lingers after every bite. It also contributes to the color, giving the sponge a rich, dark hue that looks as good as it tastes. Skipping cocoa would turn this into a plain sponge, losing the chocolate identity that makes this recipe special. If you’re looking for a lighter version, try using half cocoa and half milk powder, but be prepared for a milder taste.
The Texture Crew
All‑purpose flour and baking powder work together to give the sponge its lift and structure. The flour’s protein content creates a tender crumb, while the baking powder ensures even rising. If you omit the baking powder, the cake will be dense and heavy. For a gluten‑free version, substitute with a 1:1 gluten‑free blend, but adjust the leavening accordingly.
The Unexpected Star
Heavy cream is folded into the whipped cream filling, adding a luxurious, velvety texture that contrasts beautifully with the sponge. It also balances the sweetness of the sugar, preventing the filling from being cloying. If you’re lactose intolerant, you can replace it with a non‑dairy cream that has a similar fat content to maintain the mouthfeel.
The Final Flourish
Butter and powdered sugar create the glossy ganache that crowns the cake. Butter adds a silky, buttery finish that cuts through the chocolate richness, while powdered sugar keeps the ganache smooth and silky. Skipping butter would result in a thin, runny ganache that doesn’t set properly. For a sweeter ganache, add a teaspoon of vanilla extract to the mix.
Everything's prepped? Good. Let's get into the real action...
The Method — Step by Step
- Preheat your oven to 350°F (175°C). Line a 13x9 inch sheet pan with parchment paper and lightly grease the paper with butter or a non‑stick spray. The parchment prevents sticking, and the butter adds a subtle flavor that will carry through the cake. This step sets the foundation for an even bake.
- In a large bowl, whisk together the all‑purpose flour, cocoa powder, baking powder, and a pinch of salt until smooth. The dry mix should look like fine sand, and whisking ensures the leavening agent is evenly distributed. If you skip this step, the cake may have uneven bubbles and a lumpy texture.
- In a separate bowl, beat the eggs with granulated sugar until pale and fluffy, about 3–4 minutes with an electric mixer on medium speed. This creates air pockets that give the sponge its lightness. The sugar dissolves, making the batter smooth and preventing gritty bits in the finished cake.
- Pour the dry mixture into the wet mixture in two thirds, then stir gently with a spatula. Fold in the remaining dry mixture in the third, using a light, circular motion to avoid deflating the batter. The batter should be glossy and pourable; if it’s too thick, add a splash of milk to thin it out.
- Pour the batter onto the prepared sheet pan and spread it evenly with a spatula. The batter should be about 1/4 inch thick. This thin layer ensures a quick bake and an even, airy texture. If the batter is too thick, it will bake unevenly and become dense.
- Bake for 12–15 minutes, or until a toothpick inserted near the center comes out with a few moist crumbs. As soon as it’s done, remove it from the oven and let it cool for 5 minutes on the pan. The cake should still be warm and pliable, which is essential for rolling.
- While the cake is cooling, prepare the filling: melt the dark chocolate in a heat‑proof bowl over a pot of simmering water, stirring until smooth. Whisk the heavy cream until it forms soft peaks, then fold the melted chocolate in gently. The filling should be thick enough to stay on the cake but still spreadable. If the filling is too runny, refrigerate it for 10 minutes to thicken.
- Once the cake has cooled enough to handle, lay a clean kitchen towel over it. Sprinkle powdered sugar over the towel, then flip the cake onto the towel and carefully peel off the parchment paper. This step prevents the cake from sticking to the towel.
- Spread the chocolate filling evenly over the cake, leaving a small border along the edges to keep the filling from leaking. Roll the cake up tightly, starting from the short end, using the towel to guide the roll. This creates a neat spiral that looks as impressive as it tastes.
- Wrap the rolled cake in plastic wrap and refrigerate for at least 2 hours, or overnight. This step allows the flavors to meld and the ganache to set. When you’re ready to serve, unroll the cake, slice, and enjoy the layers of chocolate bliss.
That's it — you did it. But hold on, I've got a few more tricks that'll take this to another level...
Insider Tricks for Flawless Results
The Temperature Rule Nobody Follows
Many bakers bake at a high temperature to get a quick rise, but this cake needs a gentle 350°F to develop its airy texture. A higher heat can cause the batter to rise too fast and then collapse, leading to a dense sponge. Keep the oven at 350°F and use a calibrated thermometer to ensure accuracy.
Why Your Nose Knows Best
As the cake bakes, you’ll notice a subtle, chocolatey aroma that signals the batter is perfectly set. If you smell a burnt or metallic scent, the oven temperature is too high. Trust your nose; it’s the best judge of doneness for a chocolate cake.
The 5‑Minute Rest That Changes Everything
Letting the cake rest on the pan for 5 minutes after baking is crucial. During this time, the structure sets, making it easier to roll without tearing. I’ve seen people skip this step, only to have the cake split as soon as they try to roll it.
The Secret to a Perfect Ganache
When you melt the dark chocolate, add a pinch of salt to balance the sweetness. Salt enhances the chocolate’s depth, creating a richer flavor that pairs beautifully with the whipped cream filling. Skipping salt results in a flat, one‑dimensional taste.
The Roll‑Up Technique
Use a clean kitchen towel to roll the cake. The towel keeps the cake from sticking and allows you to see the filling as you roll. If you’re nervous, practice with a plain sheet cake first to get the feel of the rolling motion.
Creative Twists and Variations
This recipe is a playground. Here are some of my favorite ways to switch things up:
Almond Crunch Layer
Add toasted almond slices to the filling for a nutty crunch that contrasts the silky chocolate. Almonds also add a subtle buttery flavor that complements the ganache.
Citrus Zest Surprise
Fold a teaspoon of orange zest into the batter for a bright, citrusy note that cuts through the richness. The zest pairs well with dark chocolate and adds a refreshing twist.
Minty Freshness
Incorporate a few drops of peppermint extract into the ganache for a minty aftertaste that lingers on the palate. Mint pairs beautifully with chocolate, creating a classic flavor combination.
Espresso Boost
Stir a tablespoon of instant espresso powder into the batter for a subtle coffee flavor that intensifies the chocolate. Coffee and chocolate are a match made in dessert heaven.
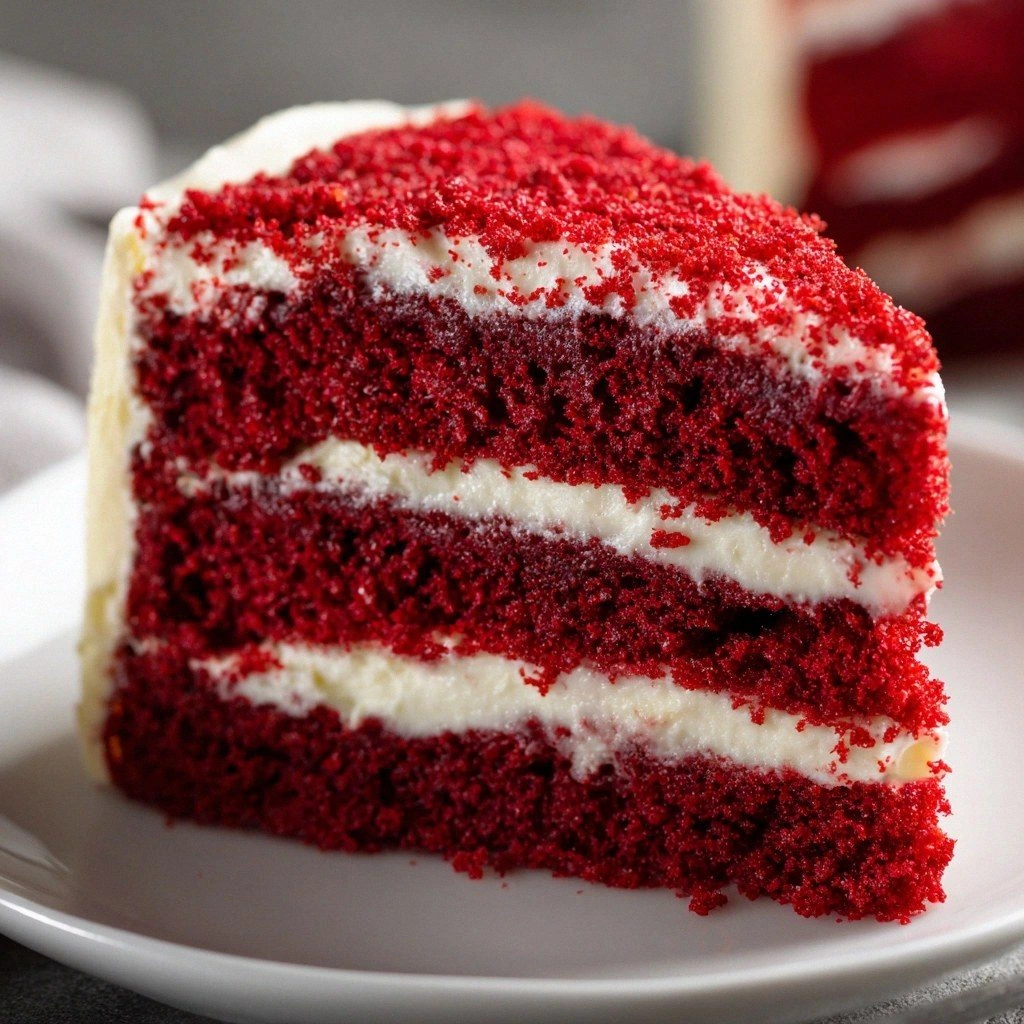
Red Velvet Twist
Replace half the cocoa powder with a splash of red food coloring and add a pinch of buttermilk to the batter. This gives the cake a vibrant red hue and a slightly tangy flavor.
Caramel Swirl
Swirl a caramel sauce into the filling before rolling. The sweet, buttery caramel adds depth and a delightful contrast to the chocolate layers.
Storing and Bringing It Back to Life
Fridge Storage
Wrap the rolled cake tightly in plastic wrap and store it in the refrigerator for up to 4 days. The moisture from the cream filling keeps the cake fresh and prevents it from drying out.
Freezer Friendly
For longer storage, place the wrapped cake in a freezer bag and freeze for up to 2 months. Thaw overnight in the refrigerator before serving to preserve the texture.
Best Reheating Method
To revive the cake, preheat your oven to 300°F (150°C). Unwrap the cake, place it on a baking sheet, and heat for 10 minutes. Add a tiny splash of water before reheating to steam the cake back to perfection, maintaining its moist crumb.