Picture this: it’s 2 a.m., the pantry light flickers, and you’re staring at an empty candy drawer with a sudden, uncontrollable craving for something that feels like a carnival in your mouth. I was in that exact spot after a marathon of movie night, and I dared my roommate to find a dessert that could match the intensity of the midnight cravings. The result? A buttery, chocolatey, peanut‑laden masterpiece that makes you question every other fudge you’ve ever made. This is not just any fudge—this is Butterfinger Reese’s Fudge, the sweet delight that turns a simple pantry raid into a full‑blown flavor fireworks show.
The moment the butter hits the pan, you hear a soft sizzle that’s practically a drumroll for the taste buds. The air fills with a buttery caramel scent that immediately makes you think of a candy store, while the glossy chocolate melt glistens like liquid midnight. When you finally spoon the mixture onto the parchment, the texture is silky smooth, yet it holds the promise of crunchy candy bits hidden within. You press it down, feeling the cool firmness set under your fingertips, and the anticipation builds like the final seconds of a roller‑coaster drop.
What makes this version a cut above the rest? Most fudge recipes either skip the candy crunch or drown the delicate balance of sweet and salty in a sea of butter. I’ve cracked the code by layering toasted Butterfinger shards and creamy Reese’s pieces into a chocolate‑butter base that’s perfectly sweet, slightly salty, and unbelievably smooth. There’s a secret technique involving a brief, controlled boil that gives the fudge that glossy, professional‑look finish you see in bakery windows. And I’m about to spill the beans on that technique, plus a few kitchen hacks that will make your fudge shine like a jewel.
Let me walk you through every single step — by the end, you’ll wonder how you ever made it any other way. Okay, ready for the game‑changer? This isn’t just a recipe; it’s a sweet adventure that will have you daring anyone to take a bite and not come back for seconds.
What Makes This Version Stand Out
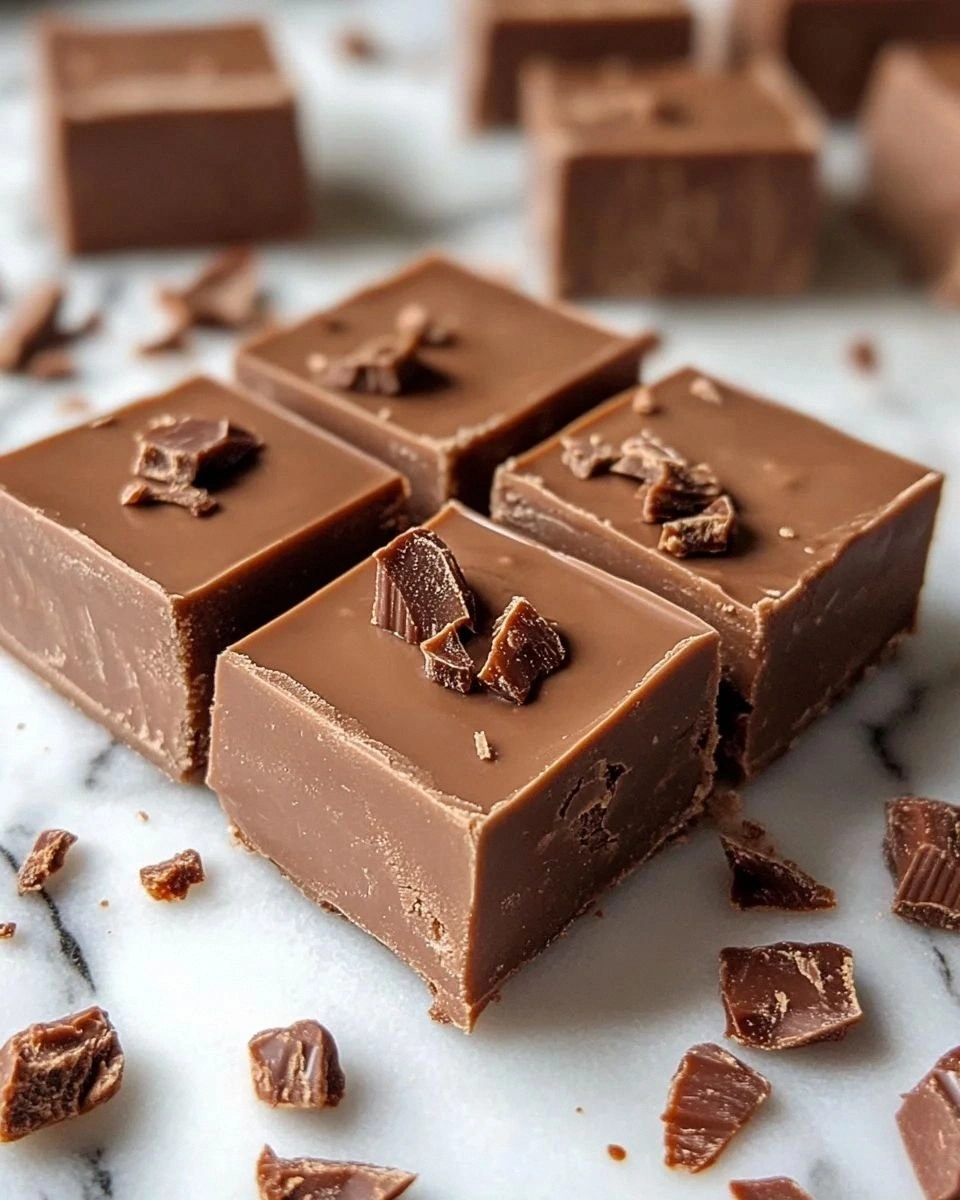
- Flavor Explosion: The combination of creamy peanut butter, rich chocolate, and the iconic crunch of Butterfinger and Reese’s creates a symphony of flavors that dance on the palate.
- Texture Triumph: A buttery, melt‑in‑your‑mouth base contrasted with crunchy candy shards gives you the best of both worlds—smooth and snap.
- Simplicity Meets Sophistication: Only ten ingredients, yet the technique elevates it to bakery‑level perfection without any fancy equipment.
- Unique Ingredient Twist: A splash of espresso powder deepens the chocolate flavor, turning ordinary fudge into a sophisticated treat.
- Crowd‑Pleaser Factor: One bite and your guests will be shouting, “More, please!”—the kind of reaction that makes you the host with the most.
- Ingredient Quality: Using premium chocolate chips and fresh Butterfinger bars ensures that every bite tastes like it was made in a confectionery lab.
- Cooking Method Magic: The controlled boil and quick cooling lock in shine and prevent graininess, a common pitfall in many fudge recipes.
- Make‑Ahead Potential: This fudge keeps its texture and flavor for up to a week in the fridge, making it perfect for prep‑ahead parties.
Inside the Ingredient List
The Flavor Base
Butter (unsalted, 2 cups) is the foundation of any good fudge; it provides richness and a smooth mouthfeel. If you skimp on butter, you’ll end up with a dry, crumbly texture that feels more like a cookie than fudge. I always recommend European‑style butter for its higher fat content, which translates into a silkier finish. Swap tip: For a dairy‑free version, use a solid coconut oil, but expect a subtle coconut undertone.
The Chocolate Crew
Semisweet chocolate chips (2 cups) deliver the deep cocoa flavor that anchors the candy pieces. Using high‑quality chips prevents a grainy texture and ensures a glossy sheen. If you substitute with dark chocolate, the fudge will be less sweet and more bittersweet—great for adult palates. Buyer's note: Look for chocolate with at least 60% cocoa solids for optimal melt and flavor.
The Peanut Butter Punch
Creamy peanut butter (1 cup) adds that signature Reese’s taste and a velvety thickness that binds the fudge. Skipping it or using a low‑fat version will cause the fudge to set too hard and lose its signature chew. For a twist, try a natural peanut butter with no added sugars for a slightly more robust nutty flavor.
The Sweetener
Sweetened condensed milk (1 can, 14 oz) is the secret sweetener that keeps the fudge from becoming grainy. Its high sugar concentration helps the fudge set properly while adding a buttery caramel note. If you’re watching sugar, you can replace half with evaporated milk and a tablespoon of honey, but the texture will be a bit softer.
The Candy Stars
Butterfinger candy bars (1 cup, roughly chopped) bring that iconic crunchy, buttery peanut butter coating. Reese’s Peanut Butter Cups (1 cup, chopped) add a creamy, chocolate‑peanut butter swirl. Both candies are essential; removing them turns this into plain chocolate fudge, which is good but not the legend you’re after.
The Finishing Touches
Vanilla extract (2 tsp) amplifies the overall flavor profile, making the chocolate taste richer and the peanut butter more aromatic. A pinch of sea salt (½ tsp) balances the sweetness and brings out the depth of the chocolate. Espresso powder (¼ tsp) is a secret weapon; it enhances chocolate without adding a coffee flavor, a trick many bakers swear by.
Everything's prepped? Good. Let's get into the real action...
The Method — Step by Step
Gather all your ingredients and line a 9×13‑inch baking pan with parchment paper, letting the excess hang over the sides for easy lift‑out later. This step might sound simple, but a well‑lined pan prevents sticking and makes slicing clean. I dare you to taste this and not go back for seconds—trust me, you’ll want perfect squares.
In a large saucepan, melt the butter over medium heat until it foams, then add the sweetened condensed milk. Stir continuously; the mixture should begin to bubble gently. This is the moment of truth—if you see a rapid boil, lower the heat immediately to avoid scorching. Watch Out: Over‑boiling will cause a grainy texture that no amount of chocolate can fix.
Once the mixture reaches a gentle boil, add the chocolate chips, stirring until fully melted and the mixture becomes glossy. You’ll notice the chocolate coating the spoon like a mirror—this is the glossy finish you’ve been dreaming of. Let it simmer for exactly 5 minutes, stirring constantly. The scent at this point is pure chocolate heaven, and you’ll hear a faint crackle as the chocolate emulsifies.
Remove the pan from heat and quickly stir in the peanut butter, vanilla extract, sea salt, and espresso powder. The mixture will look slightly separated at first; keep stirring until it becomes a uniform, velvety batter. This step is pure magic—if you taste a hint of espresso, you’ve nailed the flavor depth.
Fold in the chopped Butterfinger and Reese’s pieces gently, ensuring they’re evenly distributed but not over‑mixed. Over‑mixing will melt the candy, turning those coveted crunches into mush. I like to use a rubber spatula and a gentle folding motion, like you’re coaxing a shy cat.
Pour the batter into the prepared pan, spreading it evenly with the spatula. Tap the pan lightly on the counter three times; this releases any trapped air bubbles and ensures a smooth surface. The top should be glossy and slightly thick—if it looks dull, you’ve missed a whisking step.
Allow the fudge to set at room temperature for 30 minutes, then transfer the pan to the refrigerator for at least 2 hours. Patience is key; the fudge firmens up without becoming brittle. Picture yourself pulling this out of the fridge, the whole kitchen smelling incredible… you’ll know it’s ready when the edges start pulling away from the parchment.
Once fully set, lift the fudge out using the parchment overhang and place it on a cutting board. Using a sharp, warm knife (dip the blade in hot water and wipe dry), cut the fudge into squares. The knife should glide through with minimal resistance, producing clean edges that snap like thin ice.
Serve immediately or store in an airtight container. If you’re feeling generous, drizzle a little melted chocolate over the top for an extra glossy finish. And now the fun part—watch your friends’ faces light up as they bite into that perfect blend of creamy, crunchy, and chocolatey goodness.
That's it — you did it. But hold on, I've got a few more tricks that'll take this to another level...
Insider Tricks for Flawless Results
The Temperature Rule Nobody Follows
The secret to glossy fudge is a precise temperature window: 115 °F to 120 °F (46 °C to 49 °C) after adding the chocolate. Use an instant‑read thermometer; if the mixture is cooler, the fudge will be dull, and if hotter, you risk graininess. I once tried to eyeball it and ended up with a matte mess—lesson learned. Keep that thermometer handy and trust the numbers.
Why Your Nose Knows Best
Before you pour the batter into the pan, give it a quick sniff. A faint buttery aroma combined with a rich chocolate scent signals that the butter and chocolate are perfectly emulsified. If you detect a burnt smell, you’ve over‑cooked the butter—scrape it out, start fresh, and you’ll avoid a bitter aftertaste.
The 5‑Minute Rest That Changes Everything
After the fudge sets in the fridge, let it sit at room temperature for five minutes before cutting. This short rest allows the fudge to relax, making it easier to slice cleanly without cracking. I’ve seen people cut straight from the fridge and end up with crumbled edges—trust me, those five minutes are worth it.
Chocolate Shield Technique
Before folding in the candy pieces, melt a tablespoon of chocolate and drizzle it over the chopped Butterfinger and Reese’s. This creates a thin chocolate “shield” that protects the candy from melting completely, preserving that satisfying crunch. A friend tried this once and swore by the extra crunch factor.
Seal the Deal with a Light Glaze
If you want that bakery‑level shine, melt a handful of chocolate chips with a splash of cream and drizzle it over the set fudge just before serving. The glaze sets quickly, adding a glossy top layer that looks as good as it tastes. I’ve used this trick for holiday parties and the compliments never stop.
Creative Twists and Variations
This recipe is a playground. Here are some of my favorite ways to switch things up:
Salted Caramel Crunch
Swap half of the Butterfinger bars for caramel‑filled chocolate squares and sprinkle flaky sea salt on top before chilling. The result is a sweet‑salty combo that feels like a caramel popcorn binge.
Dark Chocolate Delight
Use 70% dark chocolate chips and add a teaspoon of orange zest. The bitterness of dark chocolate paired with citrus brightens the flavor, perfect for sophisticated palates.
Nutty Explosion
Fold in a quarter cup of toasted chopped almonds or hazelnuts along with the candy. The extra nutty crunch adds depth and makes the fudge even more satisfying.
White Chocolate Dream
Replace the semisweet chips with white chocolate and add a handful of dried cranberries. The creamy sweetness balances the tartness of the cranberries, creating a festive twist.
Spicy Kick
Stir in a pinch of cayenne pepper or a dash of chili powder with the espresso powder. The subtle heat amplifies the chocolate flavor and adds an unexpected zing.
Mini Fudge Bites
Instead of a large slab, pour the batter into a silicone muffin tin for bite‑size portions. These are perfect for party trays and look adorable when dusted with powdered sugar.
Storing and Bringing It Back to Life
Fridge Storage
Place the fudge in an airtight container or wrap the parchment tightly with plastic wrap. It will stay fresh for up to 7 days. The cool environment keeps the chocolate from blooming and maintains the candy crunch.
Freezer Friendly
For longer storage, wrap individual squares in parchment and then foil before placing them in a zip‑top bag. They freeze well for up to 3 months. Thaw in the refrigerator overnight before serving.
Best Reheating Method
When you’re ready to enjoy, gently warm a single square in the microwave for 10‑15 seconds, adding a tiny splash of water (about a teaspoon) to the plate. The steam revives the fudgy texture and restores that melt‑in‑your‑mouth feel.