Picture this: it is 9:47 p.m., you are wearing the hoodie you swore you would retire, the wind is rattling the kitchen window, and every single cell in your body is screaming for something warm, nutty, and so comforting it feels like a hug from the inside out. You open the pantry, praying for a miracle, and there they are—three lonely ingredients that look back at you like the culinary Avengers assembling for the first time: a half-used jar of peanut butter, a sugar canister with exactly one cup left, and one egg that has been rolling around since breakfast. Most people would sigh, shut the door, and settle for a sad granola bar. Not us. We are about to turn that rag-tag trio into peanut-butter-cookie gold, and we are going to do it faster than it takes the oven to preheat.
I first stumbled on this kitchen sorcery during finals week in college, when my roommate bet me twenty bucks I could not produce edible cookies without butter, flour, or vanilla. Challenge accepted. What came out of that dented dorm oven was so outrageously good—crispy lace edges, chewy centers, that deep caramelized peanut flavor—that the entire hallway followed their noses to our door like cartoon characters floating on scent waves. By midnight the cookie sheet looked like it had been licked clean by a very polite raccoon, and I never did collect that twenty. I have tweaked the ratios every year since, and this, right here, is the final form: the easiest, most irresistible peanut butter cookie you will ever meet. No mixers, no chill time, no leaveners, no funny business—just pure, shameless cookie bliss.
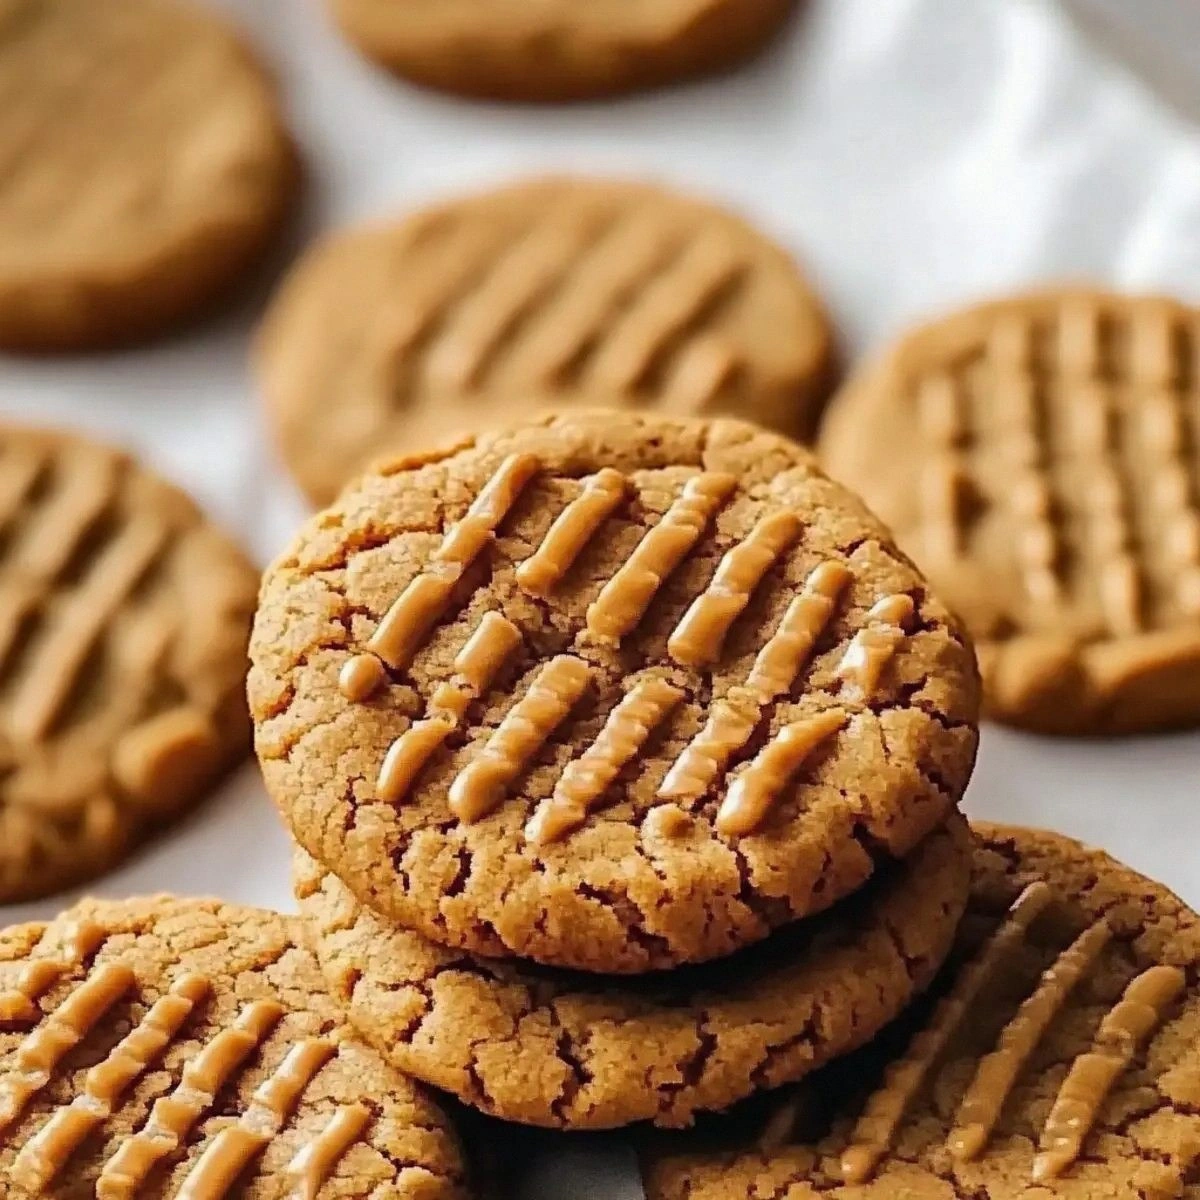
What makes this version the holy grail? The sugar caramelizes around the peanut proteins, creating that gorgeous crinkle-top that shatters like thin ice when you bite. The egg yolk acts like built-in glue, so the cookies stay lusciously dense instead of crumbly. And because there is no flour to muffle the flavor, the peanut butter sings baritone right up front. They bake in ten minutes, cool for five, and disappear in thirty seconds. I dare you to taste one and not go back for seconds. Picture yourself pulling these out of the oven, the whole kitchen smelling like a Reese's cup that just got a promotion. Stay with me here—this next part is pure magic.
Let me walk you through every single step—by the end, you will wonder how you ever made it any other way.
What Makes This Version Stand Out
Lightning Fast: From "I want cookies" to "I am holding cookies" in under fifteen minutes. Most recipes need chill time; this one needs you to preheat the oven and believe in yourself. One-Bowl Wonder: You literally stir everything with a fork in the same jar you measure the peanut butter in. Fewer dishes than a midnight bowl of cereal. Gluten-Free by Accident: No specialty flours, no xanthan gum mysteries—just naturally wheat-free goodness that happens to make every celiac friend weep with gratitude. Kid-Approved, Adult-Adored: My nephew calls them "peanut butter hamburgers" and my snobby foodie cousin asks for them by name at dinner parties. Universal crowd domination. Pantry Immortality: The ingredients live forever in your cupboard, so you are always fifteen minutes away from fresh cookies, even when the zombie apocalypse hits. Texture Nirvana: Crispy edges that crack like crème brûlée, chewy centers that bend like taffy, and that tiny sparkle of sugar on top that feels like stardust on your tongue. Make-Ahead Magic: Freeze the dough in little truffle-sized blobs; bake straight from frozen for instant midnight comfort without the 2 a.m. existential dish-washing crisis.Alright, let us break down exactly what goes into this masterpiece...
Inside the Ingredient List
The Flavor Base
Peanut butter is the Beyoncé of this trio—everything else is just backup dancers. You want the regular commercial kind, not the artisanal separated-oil stuff that looks like it meditates on mountaintops. The stabilizers in classic peanut butter (think Jif, Skippy, or their generic cousins) give these cookies their structure. Natural peanut butter works too, but you will need to stir the oil back in obsessively; otherwise the cookies spread into sad frisbees. If all you have is almond butter, I will not report you to the cookie police, but expect a more delicate, less "in-your-face-nut" personality. Bottom line: pick the peanut butter you would happily eat straight off the spoon at 2 a.m. because that intensity bakes right in.
The Sweet Spark
Granulated sugar is not just here for sweetness—it is the architect of the cookie's crunch. Those tiny crystals carve air pockets as they melt, giving you the crinkle-top that professional bakers try to fake with icing. Swap in brown sugar and you will get softer, more chewy cookies that taste like peanut-butter-butterscotch (not a bad thing, just different). Coconut sugar works if you are avoiding refined sugar, but the cookies darken faster and smell like toasted caramel popcorn. Powdered sugar is a no-go; it disappears into the dough and leaves you with peanut butter chalk. Whatever sugar you choose, save a tablespoon to roll the dough in—those sparkly edges are pure glamour shots.
The Binding Superhero
One solitary egg is all that stands between you and a pan of peanut butter gravel. The protein in the white sets the cookies, while the fat in the yolk keeps them tender. Forget the egg and you will excavate crumbles that taste great but require a spoon and a lot of denial. Egg substitutes? A flax "egg" (1 tablespoon flaxmeal + 3 tablespoons water) works in a pinch, though the cookies taste faintly like a health store smells. Aquafaba, apple sauce, or mashed banana add off-flavors that muddle the peanut purity. Trust me, I have tried them all during my vegan experimentation era; nothing beats the real thing for that perfect snap.
Optional Extras (But Do You Need Them?)
Technically this recipe needs nothing else, but if you are feeling fancy, a dash of cinnamon whispers warmth, a shower of chocolate chips turns them into Reese's impersonators, and a pinch of flaky salt on top makes grown adults close their eyes and sigh. Just promise me you will try the naked version first—there is something rebellious about proving that greatness needs zero accessories.
Everything prepped? Good. Let's get into the real action...
The Method — Step by Step
- Crank your oven to 350 °F (175 °C) right now—do not wait until the dough is ready and then stand around humming while the oven plays catch-up. Line a sheet pan with parchment; no parchment? Lightly butter the pan, but parchment is insurance against the dreaded stuck-bottom sob story. The sizzle when raw dough hits a hot pan? Absolute perfection. While the oven preheats, the flourless dough relaxes, the sugar starts dissolving, and you get to feel like a kitchen time-management genius.
- Dump the cup of peanut butter into a medium bowl, or if you are lazy like me, straight into the one-cup measuring cup you just used for sugar—fewer dishes, same joy. Microwave it for ten seconds so it spreads like gossip; warm peanut butter mixes faster than the cool kid gets invited to prom. Add the sugar and egg, then stir with a fork like you are whisking scrambled eggs on a lazy Sunday. The mixture will look crumbly at first, like damp sand, but keep going—about forty seconds in, it suddenly transforms into glossy play-dough that smells like the inside of a candy shop. That moment? Pure magic.
- Roll the dough into walnut-sized balls—about one heaping tablespoon each—and place them two inches apart on the prepared sheet. They spread just enough to whisper "I am a cookie" but not so much they merge into one mega-cookie continent (although would that be tragic?). For extra sparkle, roll each ball in a little extra sugar; the crystals will catch the heat and glitter like tiny disco balls. Now here is the iconic part: use the back of a fork to press a crisscross pattern on top. Press once, lift, rotate ninety degrees, press again—boom, instant nostalgia that screams "grandma, but make it 2024."
- Slide the pan into the middle rack and bake for exactly ten minutes. Do not walk away; these cookies go from bronzed beauty to bitter charcoal faster than you can say "just checking Instagram." At eight minutes your kitchen will start smelling like a peanut-butter factory had a baby with a caramel shop—this is your cue to hover. The edges should look set, the centers still a bit puffy and under-baked. They will finish cooking on the hot pan while they cool, a sneaky technique called carry-over baking that separates amateurs from cookie Jedi.
- Cool on the pan for five full minutes; during this spa treatment they firm up so you can lift them without tragic amputations. Transfer to a wire rack (or tilt them sideways against a mug if you do not own racks) and let the steam escape so the bottoms stay crisp. If you skip this step, condensation turns the under-sides soggy, and nobody likes a limp cookie. The waiting is the hardest part, but it is also when the flavors settle into married bliss. Sneak one while it is still warm—just know you will burn your tongue and consider it a worthwhile casualty.
- Repeat with remaining dough, or stash it in the fridge for up to three days. The raw dough also freezes like a champ: plop balls onto a plate, freeze solid, then toss into a zip-bag. Bake from frozen, adding two extra minutes. Future you, pulling hot cookies out at 1 a.m. while binge-watching mysteries, will thank present you for the foresight. And now the fun part...
That is it—you did it. But hold on, I have got a few more tricks that will take this to another level...
Insider Tricks for Flawless Results
The Temperature Rule Nobody Follows
Room-temperature egg blends more smoothly, but cold peanut butter keeps the cookies from spreading into pancakes. The sweet spot? Keep the jar in the cupboard, not the fridge, and let the egg sit on the counter while you preheat the oven. If you forget (hello, every Tuesday), float the egg in a bowl of warm tap water for three minutes. Your cookies will reward you with perfect domes and that satisfying crackly top that looks like sugar glaciers crevassing under midnight sun.
Why Your Nose Knows Best
Professional bakeries use thermometers; home bakers use nostrils. When the scent of toasted peanuts wafts into the living room, you have about sixty seconds before peak doneness. Set a timer for nine minutes, start sniffing, and pull the pan the moment the aroma turns from "raw" to "peanut-butter-caramel." If you wait until they smell "done," they are already overdone. Trust your nose; it evolved for survival, and cookie survival counts.
The 5-Minute Rest That Changes Everything
After mixing, let the dough nap for five minutes before shaping. The sugar dissolves slightly, the proteins relax, and the cookies spread more evenly. Skip this and you get cracked, planetary-looking mounds—still delicious, but not the Instagram heart-breakers you want. Cover the bowl with a plate so the top does not dry out, use the time to tidy your coffee mug graveyard, then proceed to cookie stardom.
Size Matters (Seriously)
Smaller cookies bake crisper, larger ones stay chewy. If you want snap, go heaping-teaspoon size; if you want that bend-like-taffy middle, shoot for golf-ball blobs. Stick to one size per sheet so everything bakes evenly—no cookie left behind. And remember, they spread to roughly double their raw width, so channel your inner spatial engineer when spacing.
Creative Twists and Variations
This recipe is a playground. Here are some of my favorite ways to switch things up:
Salted Caramel Swirl
Drizzle a spoonful of thick caramel over each dough ball, drag a toothpick through for marble magic, and finish with flaky salt. The sweet-salty tango will make you close your eyes and mutter inappropriate things.
Double Chocolate Eclipse
Replace two tablespoons of sugar with cocoa powder, fold in a handful of mini chips, and bake as usual. The result tastes like a peanut-butter cup that attended finishing school.
Thai-Inspired Firecracker
Add a pinch of cayenne and a whisper of lime zest to the dough. The heat sneaks up like a plot twist, and the citrus lifts the peanut flavor into tropical territory. Serve these at a party and watch people chase the spice with delighted horror.
Banana Bread Mash-Up
Swap half the sugar for mashed overripe banana. The cookies spread more, so chill the dough fifteen minutes. They taste like banana-peanut butter toast that decided to become dessert.
Breakfast of Champions
Stir in a tablespoon of espresso powder and a handful of chopped bacon bits. Maple glaze optional but highly recommended. Coffee, bacon, peanut butter—brunch in cookie form.
Storing and Bringing It Back to Life
Fridge Storage
Layer completely cooled cookies in an airtight tin with parchment between rows; they keep five days at peak deliciousness, though they have never lasted that long in any household I know. The fridge will stale them faster than you can say "science," so keep them at room temp unless your kitchen is a sauna.
Freezer Friendly
Freeze baked cookies in a single layer, then transfer to a zip-bag with as much air sucked out as possible. They thaw in four minutes on the counter or thirty seconds in the microwave. For grab-and-go glory, freeze dough balls and bake fresh; add two extra minutes from frozen and enjoy bakery-level warmth anytime.
Best Reheating Method
Microwave for eight seconds, or pop into a 300 °F oven for three minutes. Add a tiny splash of water on the pan before reheating; it steams the cookies back to softness without sogginess. Resist the urge to re-bake too long or you will resurrect the dreaded brick.