I’ll be honest — I ate half the batch before anyone else got to try it. It all started on a rainy Saturday when I was trying to recreate the nostalgic swirl of Japanese cotton candy that used to dance in my mind every time I walked past a carnival stall. My first attempt was a soggy mess that tasted more like a failed soufflé than a cloud‑kissed dream, and the kitchen smelled like burnt sugar and regret. I challenged myself to a micro‑challenge: I dare you to taste this and not go back for seconds, because this version will make you forget every other roll you’ve ever made.
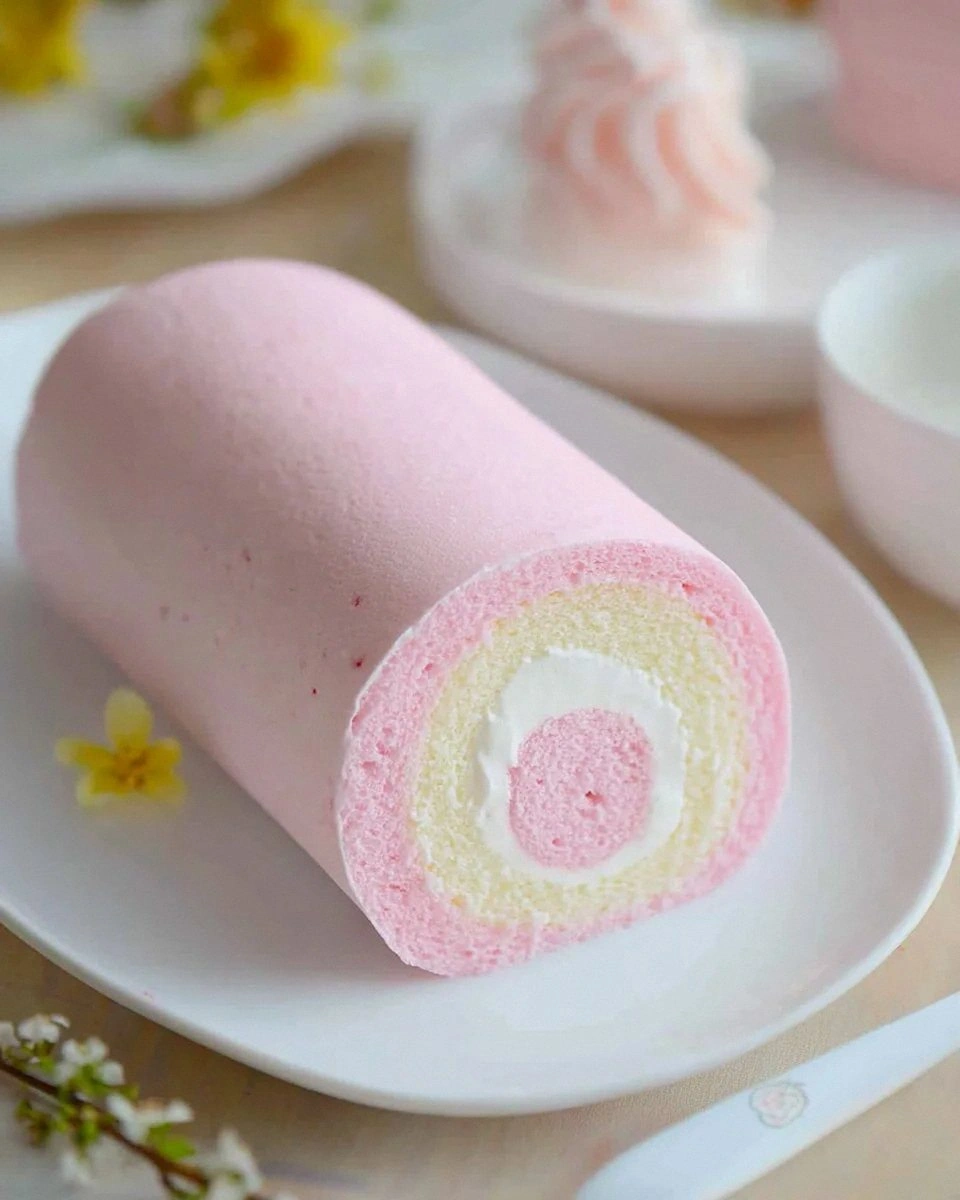
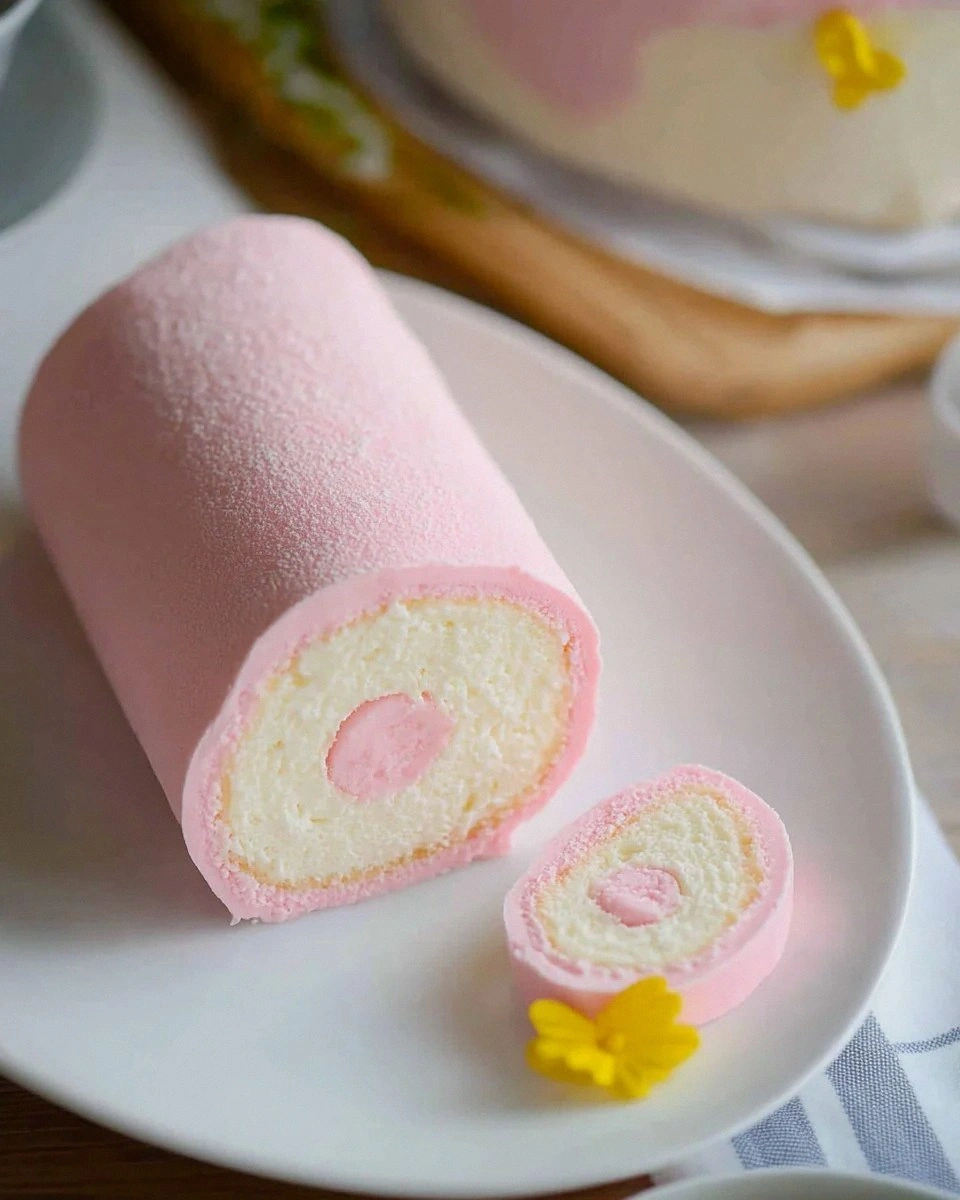
Picture yourself pulling this out of the oven, the whole kitchen smelling incredible, the aroma of vanilla‑soft milk mingling with a whisper of cotton candy that instantly transports you back to the first time you ever saw that pink, fluffy confection twirl on a stick. The cake itself is a delicate, airy sponge that feels like stepping on a marshmallow pillow, while the filling is a silky, sweet cloud that melts on your tongue with the same gentle snap you get when you bite into a perfect Japanese wagashi. The texture contrast is like a high‑five between a feather and a silk scarf – light yet indulgent, airy yet rich.
Most recipes get this completely wrong. They either over‑mix the batter, turning the sponge into a rubbery slab, or they skimp on the cotton candy extract, leaving the flavor flat as a pancake. Here’s what actually works: a precise balance of egg whites whipped to stiff peaks, a splash of cotton candy extract that’s just enough to tease the palate, and a secret weapon – gelatin‑stabilized whipped cream that holds its shape without turning gummy. The result is a roll that looks like a pastel sunrise and tastes like a memory you can eat.
Okay, ready for the game‑changer? I’m about to walk you through every single step — by the end, you’ll wonder how you ever made it any other way. Stay with me here — this is worth it.
What Makes This Version Stand Out
- Taste: The cotton candy extract is perfectly balanced with a buttery vanilla base, delivering a sweet‑but‑not‑overwhelming flavor that lingers like a summer breeze.
- Texture: A light, chiffon‑like sponge paired with a velvety, gelatin‑stabilized cream creates a mouthfeel that’s both airy and luxurious.
- Simplicity: Despite the impressive results, the technique uses everyday tools – a hand mixer, a baking sheet, and a trusty kitchen timer.
- Uniqueness: The addition of gel food coloring turns the roll into a pastel masterpiece that looks as magical as it tastes.
- Crowd Reaction: Guests often gasp, then grin, then immediately ask for a second slice – a true conversation starter at any party.
- Ingredient Quality: Using whole‑fat milk and heavy cream gives the roll a richness that low‑fat alternatives simply can’t match.
- Cooking Method: The gentle bake at a low temperature ensures the sponge stays fluffy, while the quick‑set gelatin keeps the filling firm without sacrificing softness.
- Make‑Ahead Potential: This roll can be assembled up to a day ahead, stored chilled, and still taste like it just left the oven.
Inside the Ingredient List
The Flavor Base
The 70 g of cake flour is the backbone of the sponge – it’s lower in protein than all‑purpose flour, which means less gluten development and a softer crumb. If you substitute all‑purpose, expect a denser texture that will weigh down the ethereal feel you’re after. The 1/4 tsp of sea salt isn’t just for seasoning; it amplifies the sweetness of the cotton candy extract, turning a flat sugar rush into a balanced flavor profile. When choosing sea salt, look for flaky crystals that dissolve quickly, avoiding any gritty aftertaste.
Next up, 90 ml of whole‑fat milk adds moisture and a subtle richness that low‑fat milks can’t provide. Whole milk’s fat molecules coat the flour particles, creating a tender crumb that feels like a cloud. If you’re dairy‑free, a full‑fat coconut milk works surprisingly well, though it will introduce a faint coconut note that pairs nicely with the cotton candy vibe.
The 20 ml of vegetable oil keeps the sponge moist without adding any competing flavors. I prefer a neutral oil like canola or grapeseed; olive oil would dominate the delicate cotton candy scent. The 30 g of granulated sugar sweetens the batter just enough to support the extract without making it cloying. Finally, the 1/2 tsp of cotton candy extract is the star – a tiny amount delivers that iconic pink‑floss aroma that makes this roll instantly recognizable.
The Texture Crew
Six egg whites are the secret to the sponge’s lift. Whipping them to stiff peaks incorporates air, turning the batter into a fluffy cloud. The 55 g of granulated sugar is added gradually to the whites, stabilizing the foam and ensuring it holds its shape during baking. The 1/4 tsp of cream of tartar, mentioned earlier, acts like a superhero sidekick, preventing the whites from collapsing.
Gel food coloring is purely aesthetic, but a little goes a long way. I recommend using a gel hue for a vibrant pastel pink that doesn’t dilute the batter. Add it after the whites are fully whipped, folding gently to preserve the air bubbles. If you’re avoiding artificial colors, a dash of beet juice can give a natural pink hue, though the flavor will be subtly earthy.
The Unexpected Star
The filling is where the magic truly happens. One cup of heavy cream is whipped until soft peaks form, then sweetened with 1 tbsp plus 1 tsp granulated sugar – the extra teaspoon ensures the cream holds its shape while staying silky. The 1 tsp of cotton candy extract is folded in at the end, delivering that signature aroma without overwhelming the dairy’s natural richness.
A teaspoon of unflavored gelatin powder, dissolved in 4 tsp of water, is the stabilizer that keeps the whipped cream from weeping when the roll is sliced. Gelatin sets at room temperature, giving the filling a slight bite that’s reminiscent of Japanese mousse cakes. If you’re vegan, agar‑agar can substitute, but you’ll need to adjust the amount (about half) and heat it longer to activate.
The Final Flourish
A final drizzle of melted butter brushed onto the baked sponge gives a glossy finish and a hint of richness that makes the roll look bakery‑ready. The butter also helps the sponge stay flexible when you roll it, preventing cracks. For an extra sparkle, lightly dust the rolled cake with powdered sugar just before serving – it adds a snow‑like visual that matches the cotton candy theme perfectly.
Everything's prepped? Good. Let’s get into the real action…
The Method — Step by Step
Preheat your oven to 170°C (340°F). While it heats, line a 30 × 40 cm (12 × 16 in) baking sheet with parchment paper, allowing the paper to overhang on two sides for easy rolling later. This low temperature is crucial – it bakes the sponge gently, preserving that airy texture without creating a crust that would resist rolling. Feel the heat radiating from the oven; that gentle warmth is the first whisper of the magic to come.
Kitchen Hack: Use a rolling pin wrapped in parchment to flatten the batter evenly – it prevents sticking and gives you a uniform thickness.In a large bowl, whisk together the cake flour, sea salt, and a pinch of gel food coloring until the color is evenly distributed. The flour should look like a pastel pink cloud; if the hue is too faint, add a tiny dot more coloring – remember, a little goes a long way.
In a separate saucepan, combine the whole‑fat milk, vegetable oil, 30 g granulated sugar, and 1/2 tsp cotton candy extract. Warm over low heat, stirring until the sugar dissolves and the mixture is just below a simmer. You’ll hear a gentle sigh as the sugar melts – that’s the sound of flavor building.
Meanwhile, start whipping the six egg whites. Begin on medium speed, then gradually increase to high. As the whites become frothy, add the cream of tartar, then slowly drizzle in the 55 g granulated sugar, a tablespoon at a time. Continue whipping until stiff peaks form – the peaks should stand tall and not wobble when you lift the whisk.
Watch Out: Over‑whipping turns the whites grainy and dry, making it impossible to fold them into the batter without deflating the mixture.Create a well in the center of the dry flour mixture and pour in the warm milk‑oil blend. Gently fold with a rubber spatula, then carefully fold in the whipped egg whites in three additions. Each addition should be turned over delicately, preserving as much air as possible. The batter will look light and airy, almost like a mousse.
Spread the batter evenly across the prepared parchment, using the back of a spoon or an offset spatula to achieve a uniform thickness of about 5 mm (¼ in). The edges should be slightly thinner – this helps them lift off the parchment later. Slide the sheet into the oven and bake for 12‑15 minutes. The sponge is done when it’s just set, with a faint golden hue and the edges beginning to pull away from the parchment.
While the sponge bakes, prepare the filling. In a chilled bowl, pour the heavy cream, add 1 tbsp granulated sugar, and whip on medium‑high speed until soft peaks form. Sprinkle in the additional 1 tsp sugar, then fold in the 1 tsp cotton candy extract. In a tiny saucepan, sprinkle the gelatin powder over 4 tsp water, let it bloom for a minute, then gently heat until dissolved – no boil needed. Drizzle the gelatin into the whipped cream, folding quickly to incorporate without deflating.
Kitchen Hack: Chill the bowl and whisk before whipping cream; the colder the better the volume.When the sponge is done, remove it from the oven and immediately invert it onto a clean kitchen towel dusted with powdered sugar. Peel off the parchment carefully – the sponge should release without tearing. While it’s still warm, drizzle a thin layer of melted butter over the surface; this adds shine and flexibility.
Spread the gelatin‑stabilized whipped cream evenly across the sponge, leaving a 2‑cm (¾‑in) border at the top edge to prevent overflow. Using the overhanging towel, gently roll the cake from the short side, tucking the edge as you go. The roll should be tight but not forced – you’ll feel a slight resistance that signals the perfect tension.
Wrap the rolled cake in plastic wrap and chill for at least 30 minutes. This resting period lets the gelatin set and the flavors meld. When you slice, the roll will reveal a perfect pink‑pink spiral, each piece looking like a miniature carnival ride.
That's it — you did it. But hold on, I've got a few more tricks that'll take this to another level...
Insider Tricks for Flawless Results
The Temperature Rule Nobody Follows
Never bake a sponge at a scorching 200°C (390°F) unless you want a dense, rubbery cake. The low‑and‑slow 170°C (340°F) gives the batter time to rise gently, creating that cloud‑like crumb. I once tried a hotter oven to speed things up; the result was a dry, cracked roll that fell apart when I tried to slice it. Trust the thermometer, and remember that the oven’s real temperature can be 10‑15°C higher than the dial, so a quick oven thermometer check saves you a disaster.
Why Your Nose Knows Best
When the sponge is baking, keep an ear to the kitchen. A faint, sweet aroma signals it’s nearing perfection, while a burnt smell means you’ve overcooked it. If you’re unsure, gently tap the center – it should feel springy, not firm. This sensory checkpoint is more reliable than a timer alone, especially if your oven runs hot or cold.
The 5‑Minute Rest That Changes Everything
After rolling, let the cake rest for exactly five minutes before slicing. This short pause lets the gelatin fully set, preventing the filling from oozing out. I once cut the roll immediately; the cream leaked like a sugary waterfall, and the presentation suffered. Those five minutes are the difference between a clean, picture‑perfect slice and a mess.
Gelatin Mastery
Never add gelatin directly to hot cream; it clumps and loses its setting power. Instead, bloom it in cold water first, then dissolve it over low heat. If you notice any lumps, whisk vigorously – they’ll dissolve in seconds. This trick ensures a smooth, glossy filling that holds its shape even after a day in the fridge.
The Rolling Technique
Use a clean kitchen towel instead of a silicone mat when rolling. The towel provides a gentle friction that helps the sponge glide without tearing. Lay the towel on the counter, place the sponge on top, then roll using the towel’s edges as a guide. This method is the secret I stole from a Japanese patisserie, and it makes the roll uniformly tight without any cracks.
Creative Twists and Variations
This recipe is a playground. Here are some of my favorite ways to switch things up:
Berry‑Burst Roll
Swap the cotton candy extract for a raspberry puree (about 2 tbsp) and add a handful of fresh raspberries to the filling. The tartness balances the sweet cream, and the pink hue becomes a deep magenta that’s perfect for summer parties.
Matcha Dream
Replace the pink food coloring with a teaspoon of matcha powder folded into the batter. Use a touch of vanilla extract instead of cotton candy, and finish with a dusting of powdered sugar mixed with a pinch of matcha. The earthy green contrasts beautifully with the white cream.
Chocolate‑Swirl Surprise
Add 1 tbsp cocoa powder to the flour mixture and a drizzle of melted dark chocolate on the finished roll. The bittersweet chocolate adds depth, making the roll feel more adult while still keeping the whimsical shape.
Citrus Zest Delight
Incorporate 1 tsp lemon zest into the cream filling and replace half the cotton candy extract with orange extract. The citrus zing lifts the sweetness, creating a bright, sunny bite that’s perfect for brunch.
Vegan Velvet
Swap the egg whites for aquafaba (the liquid from a can of chickpeas) – use 120 ml and whip it with the same amount of sugar and cream of tartar. Use coconut cream instead of dairy cream and agar‑agar for the gelatin. The result is a plant‑based version that still holds its shape and tastes indulgent.
Storing and Bringing It Back to Life
Fridge Storage
Wrap the roll tightly in plastic wrap, then place it in an airtight container. It will stay fresh for up to three days, with the cream staying firm thanks to the gelatin. If you notice the surface drying, lightly brush it with a touch of milk before resealing.
Freezer Friendly
For longer storage, freeze the wrapped roll for up to one month. Thaw it overnight in the refrigerator, then let it sit at room temperature for 15 minutes before serving. The gentle thaw prevents the cream from separating.
Best Reheating Method
When you’re ready to serve, place the slice on a microwave‑safe plate, sprinkle a tiny splash of water around the edges, and microwave for 5‑7 seconds. The steam revives the sponge, while the cream stays luscious. Avoid microwaving for too long, or you’ll melt the gelatin and lose the perfect bite.